If your Camry won’t start intermittently, check the battery voltage and clean/tighten terminals and grounds first, then test the starter/solenoid for clicks and 12V at the terminal. Inspect the ignition switch, key cylinder, and neutral safety switch for loose or worn operation. Verify fuel pressure and pump operation, and test the crankshaft position sensor for intermittent signals. Scan for ECU/immobilizer faults and parasitic draws. Follow this systematic checklist to isolate the fault, and keep going for detailed diagnostics and fixes.
Problem–Solution Guide: Camry Intermittent No-Starts
When your Camry won’t start intermittently, begin by isolating the most common causes so you don’t waste time chasing symptoms: first check the battery for charge and clean, tight terminals—batteries can show life (headlights on) yet fail under load and cause starting issues. If you hear a click, suspect the starter motor; test its engagement and plan replacement if it doesn’t spin consistently. Use electrical diagnostics with a multimeter to verify ignition switch output and look for worn contacts that interrupt power to the starter. Confirm fuel delivery next: a clogged filter or weak pump can mimic no-starts, so test fuel pressure. Don’t ignore sensors—inspect the crankshaft position sensor and key electrical connections for corrosion or looseness. Follow a stepwise test plan, document results, and act decisively. You’ll reclaim control by diagnosing, isolating, and repairing the precise failure rather than chasing random fixes.
Quick Checklist: 5 Things to Try Now
Start by checking the battery connections for tight, clean terminals and obvious corrosion. If the Camry won’t crank, try starting in neutral to rule out a faulty neutral safety switch. If you hear a single click or no crank, gently tap the starter while someone turns the key to see if the motor engages.
Check Battery Connections
Grab a wrench and a multimeter and work through these five quick checks to rule out simple battery-connection issues that commonly cause no-starts. Use these battery maintenance tips to empower yourself and avoid common battery issues that steal your freedom on the road. First, visually clean terminals: remove corrosion with a wire brush and baking soda solution. Second, tighten both positive and negative clamps so they don’t wiggle. Third, inspect the ground strap and chassis connections for frays or looseness; repair or replace if damaged. Fourth, measure battery voltage with a multimeter—below 12.4 V is weak and needs charging or replacement. Fifth, if symptoms persist, disconnect and reconnect the battery to reset the electrical system and try starting again.
Try Starting In Neutral
If the Camry won’t crank in Park, try shifting to Neutral and attempt to start it — this simple check can reveal a faulty park/neutral safety switch or a misaligned gear selector. Shift to Neutral, hold the brake, and turn the key or push START; if the engine fires, you’ve isolated the problem to Neutral Starting behavior rather than battery or starter failure. That outcome points to Transmission Issues like a worn gear selector or defective interlock switch; plan further inspection or replacement. This diagnostic is quick, tool-free, and liberating—you can confirm cause without waiting for a tow. If it still won’t start in Neutral, move on to checking the starter motor and electrical connections for intermittent faults.
Tap Starter Gently
When the Camry hesitates to crank, tap the starter gently with a wrench or hammer handle while the car’s in Park or Neutral and the brake held — that can free a sticking solenoid or temporary contact fault and let the engine turn over. Position the tool against the starter housing and deliver light, controlled taps while a helper turns the key or you cycle the ignition. Listen for clicks, grinding, or improved engagement; those sounds guide your diagnosis. Use starter tapping techniques as a temporary liberation tactic, not a cure. If tapping restores starts, record occurrences and pursue solenoid troubleshooting tips and contact inspection. Replace the starter or repair wiring if problems recur — don’t rely on tapping as a long-term fix.
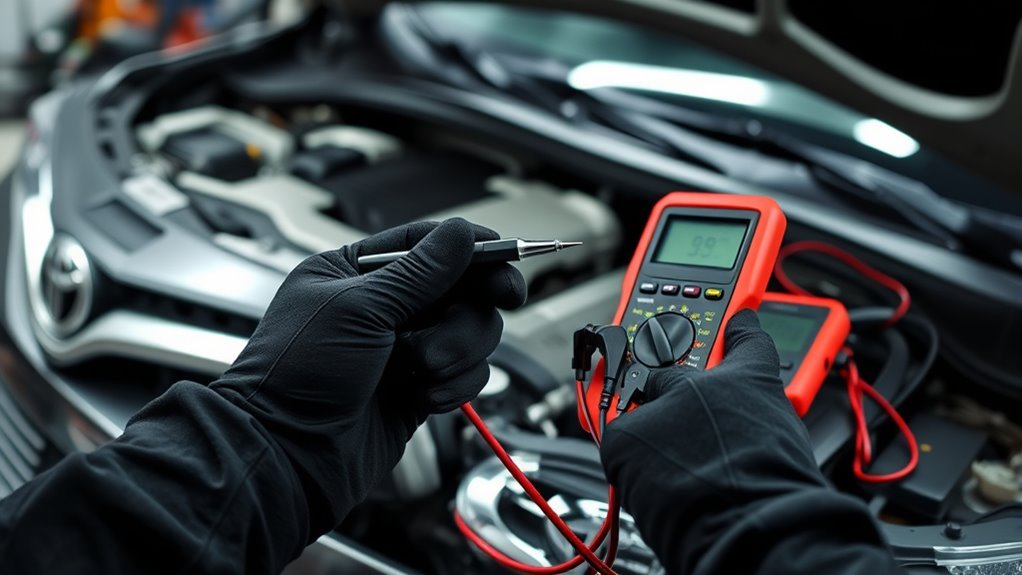
Diagnose Battery, Terminals, and Ground on a Camry
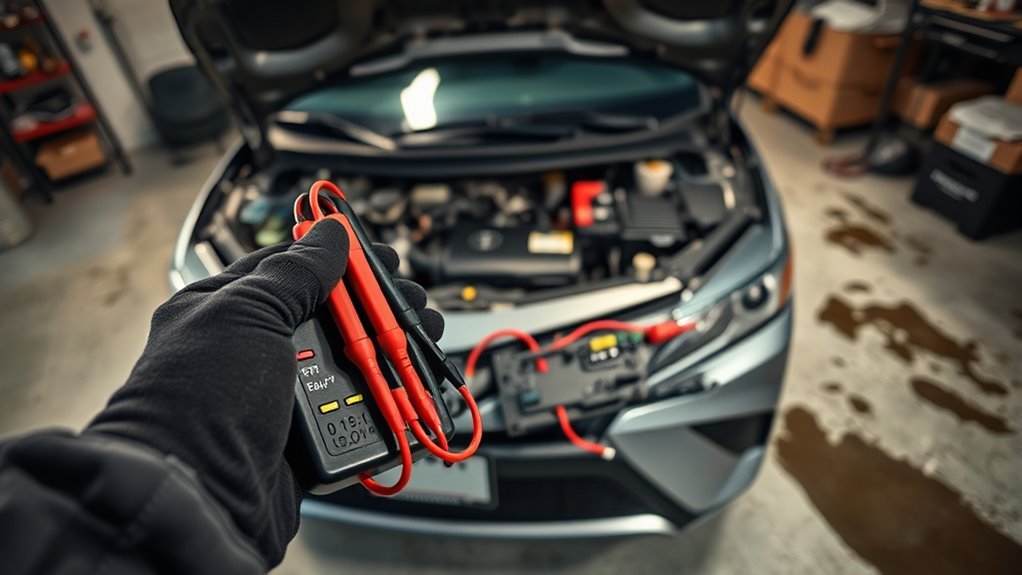
Start by measuring the battery with a multimeter—you’re looking for about 12.6 volts at rest and anything below 12.4 volts may need attention. Clean and tighten the terminals, removing corrosion so you get solid, low-resistance connections. Finally, inspect the engine ground strap for cracks, corrosion, or looseness that could cause voltage fluctuations and intermittent starts.
Battery Voltage Check
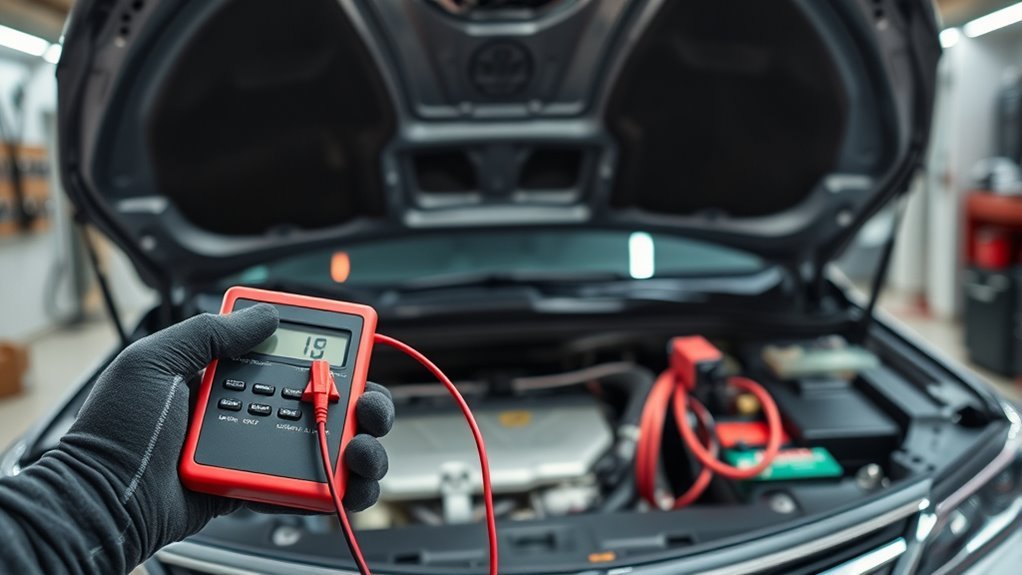
Begin by measuring the battery voltage with a multimeter: you should see about 12.4–12.7 V with the engine off and roughly 13.4–14.2 V while it’s running. You’ll use voltage monitoring to confirm health; record readings and compare to expected ranges. If readings fall short, charge and retest. Test for voltage drop across cables while cranking; significant drop means replacement. Secure grounds and inspect for corrosion without cleaning terminals here (that’s next). If battery won’t hold charge after charging, plan replacement—especially if over 3–5 years old. Maintain a routine battery maintenance schedule to avoid unexpected locks on freedom.
| Check | Action |
|---|---|
| Resting V | Measure with multimeter |
| Running V | Measure alternator output |
| Cable drop | Test under load |
| Age | Replace if 3–5+ yrs |
Clean And Tighten Terminals
After you’ve checked resting and running voltages, inspect and clean the battery terminals and grounds to eliminate connection-related starts. Remove negative then positive cable, wear gloves and eye protection, and scrub terminals and clamps with a brush and baking soda solution to remove terminal corrosion. Rinse, dry, and apply a thin coat of dielectric grease to prevent recurrence. Reconnect positive then negative, and tighten clamps firmly—don’t overtighten and strip threads. Use a multimeter at the terminals; if voltage is below 12.4 volts after cleaning, suspect a weak battery or hidden resistance. Perform regular battery maintenance on a schedule you control to avoid surprise failures. Clean, tighten, and verify so you reclaim reliability and freedom from intermittent no-starts.
Inspect Engine Ground Strap
Because the engine ground strap completes the electrical circuit between the engine and chassis, a loose or corroded strap can cause voltage drops that stop the starter from getting enough power, so inspect it visually and by touch for fraying, corrosion, broken braid, or loose fasteners where it bolts to the block and chassis. You’ll perform ground strap maintenance and electrical connection checks to restore reliable starting. Remove surface corrosion, tighten bolts to factory torque, and replace any strap with visible damage. Use a multimeter to measure voltage at the starter while cranking; under 9.6V indicates a poor ground. Free yourself from recurring failures by making this a routine check.
- Visually inspect strap and terminals
- Clean and tighten fasteners
- Multimeter voltage cranking test
- Replace damaged straps
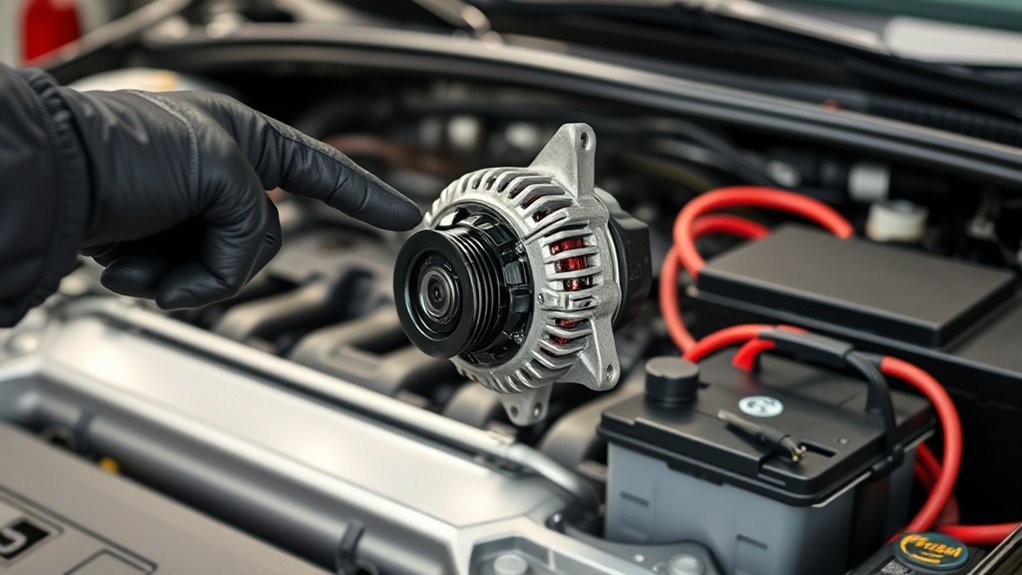
Test Camry Starter Motor & Solenoid Quickly
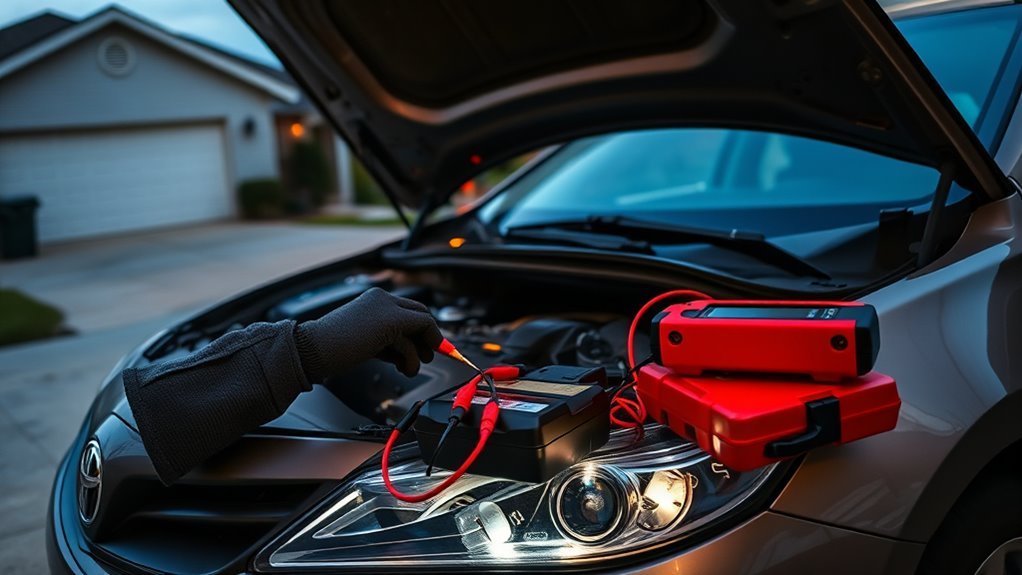
When your Camry won’t crank, start by listening for a rapid click when you turn the key — that sound usually points to a starter or solenoid issue. Begin with basic starter motor and solenoid testing: check battery terminals for clean, tight connections so power can flow. Use a multimeter at the starter terminal; you should see close to 12 volts when attempting to crank. If voltage is low, free yourself from guesswork — clean clamps, tighten cables, or charge the battery. If voltage reads correctly but the starter doesn’t engage, tap the starter lightly with a hammer; a stuck solenoid can free up and prove the cause. To confirm, use a jump starter to bypass the battery; if the starter engages, the battery or connections were the weak link. These steps put control back in your hands and let you diagnose whether the starter assembly needs replacement or you just need a better power source.
Check Ignition Switch, Key Cylinder, & Neutral Safety Switch
Start by checking the ignition switch, key cylinder, and neutral safety switch since each can interrupt starter power even with a healthy battery. You want freedom from being stranded, so diagnose cleanly: ignition switch wear often causes dim dash lights or no crank; a key cylinder malfunction can prevent the key from fully engaging the switch. The neutral safety switch may misread gear position and block starting.
- Visually inspect key cylinder for looseness or binding; wiggle the key while watching dashboard indicators.
- Use a multimeter at the ignition switch connector to verify battery voltage reaches the starter signal when you turn the key.
- Test neutral safety switch by confirming continuity in Park/Neutral; shift through gears with engine off to check consistent readings.
- If any component fails electrical or mechanical checks, replace the faulty part; prioritize the ignition switch when wear is evident.
Follow these steps to reclaim control and prevent unpredictable no-starts.
Test Fuel Delivery on a No-Start Camry
Wondering whether fuel delivery is the cause of your Camry’s no-start? Start by confirming there’s fuel in the tank; an empty tank stops freedom at the curb. Turn the ignition to ON (don’t start) and listen—your fuel pump should emit a faint buzz for a few seconds. If you don’t hear it, suspect pump power or pump failure.
Attach a pressure gauge to the fuel rail and read pressure; Toyota Camrys commonly register about 30–40 psi depending on year. If pressure is within range, your pump and regulator likely allow flow; move on to injector and wiring checks. If pressure is low, inspect the fuel filter for clogs and verify the fuel pump’s operation under load. Check electrical connections to the pump and fuel injectors for loose or corroded wires that cut power. Diagnose and replace failing components so you reclaim control and get your Camry starting reliably.
Test the Crankshaft Position Sensor (CKP)
Check the crankshaft position sensor (CKP) next—it’s the ECU’s primary timing input and a common cause of intermittent no-starts when it fails. You’ll verify that the ECU sees crank movement before condemning other systems. Use CKP testing techniques methodically: multimeter resistance checks and oscilloscope waveform inspection while cranking.
- Isolate the connector, inspect pins for corrosion or play.
- Measure resistance per spec; infinite or short indicates failure.
- Read waveform with an oscilloscope while someone cranks the engine; look for clean, consistent pulses.
- If readings are marginal or waveform drops out intermittently, plan sensor replacement.
Follow safety and liberation-minded practice: reclaim control by confirming symptoms match CKP failure (stalling, no-start, CEL). Sensor replacement tips: buy OEM-equivalent part, torque to spec, and clear codes after install. Re-test cranking waveform to confirm restored signal and regained starting freedom.
Find Intermittent Electrical Faults and Parasitic Draw
When intermittent starting or unexplained battery drain shows up, trace wiring and test for parasitic draw methodically so you can pinpoint loose connections, corroded terminals, or a component that stays powered when it shouldn’t. Start by visually inspecting electrical connections at the battery, starter, and fuse box; clean and tighten terminals as part of routine battery maintenance. Disconnect the negative battery cable and connect a multimeter in series set to amps; a resting draw above ~50 mA indicates a parasitic drain.
Isolate circuits by removing fuses one at a time until the draw drops, noting which circuit restores normal current. Check suspect components—accessories, modules, ignition switch—for stuck relays or internal faults. Verify starter and crank sensor grounds are solid. If a loose or corroded connector shows intermittent continuity under movement, repair or replace it and retest. Document findings, fix the fault, and confirm the draw stays below threshold before declaring the vehicle liberated from this failure mode.
When the ECU or Immobilizer Could Block Starting
Check the immobilizer and ECU when the Camry won’t crank or start, because an interrupted immobilizer signal, ECU software lockout, or a failed key transponder can all block ignition. Use a diagnostic scanner to read codes and observe the immobilizer light—blinking or solid often means the system is preventing start. If codes or symptoms point to the ECU or transponder, try reprogramming or replacing the key and update or reset the ECU per service procedures.
Immobilizer Signal Interruption
Although the immobilizer is meant to stop theft, it can also block your Camry from starting if the ECU and key fob lose communication, so you should treat intermittent no-starts as potential signal interruptions rather than random faults. You’ll want focused immobilizer troubleshooting to restore freedom from unpredictable failures. Check fob battery life first, then inspect wiring and grounds for breaks or corrosion. Use a scan tool to read immobilizer codes and confirm ECU reception without diving into software lockout yet.
- Replace weak key fob battery and retest start sequence.
- Visually and electrically inspect antenna ring, connectors, and grounding points.
- Scan for immobilizer-related fault codes; document and clear to observe recurrence.
- Shield fob from possible signal interference sources while testing.
ECU Software Lockout
If intermittent fob communication can stop a Camry from starting, the problem can also be rooted in an ECU software lockout that refuses ignition commands even when hardware looks fine. You’ll diagnose by scanning OBD-II for immobilizer-related error codes; those codes tell you whether the ECU failed to recognize the key or flagged a system anomaly. Follow a clear procedure: read and record codes, attempt basic Immobilizer troubleshooting (check fob battery, antenna, and wiring), then try ECU reset methods—battery disconnect for 10–15 minutes or manufacturer-recommended soft reset. If codes persist, update ECU software or consult a dealer to reprogram security parameters. These steps free you from guesswork and restore control without replacing parts prematurely.
Key Transponder Failure
How do you know the key transponder is at fault? You’ll see the immobilizer warning light, the starter may crank without the engine firing, or nothing happens when you turn the key. Diagnose methodically to reclaim control.
- Test the key fob: replace its battery and retry to rule out weak power breaking signal.
- Use a spare key: if the spare starts the car, you’ve isolated transponder issues to the original key.
- Scan for immobilizer/ECU codes: read fault codes to confirm the ECU rejected the transponder signal.
- Inspect wiring and antenna: verify the immobilizer reader at the ignition is intact and powered.
If faulty, reprogram or replace the key transponder to restore freedom to start your Camry.
Cost-Effective Fixes and Step‑by‑Step Troubleshooting Flow
When you’re tracing a stubborn no‑start, follow a logical, low‑cost sequence: check and tighten all battery, starter, and ignition connections, then test for parasitic drain with a multimeter, scan for stored OBD‑II codes, and if the electricals look good, verify the crankshaft position sensor and inspect starter contacts for wear before considering a full starter replacement.
Start with visual and torque checks: clean corrosion, tighten terminals, and secure ground straps. Next, perform a parasitic draw test at the battery with a multimeter to rule out overnight drain. Plug in an OBD‑II scanner; capture pending and historical faults that hint at fuel system or ignition timing faults. If codes are clean, bench‑test or live‑scope the crankshaft position sensor for signal consistency. Remove and inspect starter contacts; replace worn brushes or contact plates—often cheaper than a new starter. Recheck starting after each step. This method keeps costs low, isolates failures quickly, and frees you from needless parts swaps.
Frequently Asked Questions
Why Is My Toyota Camry Not Starting Sometimes?
Your Camry’s intermittent starts likely stem from poor battery health or failing ignition system components; check battery terminals, test battery voltage, inspect the ignition switch and starter, and replace faulty parts to regain reliable, liberated road control.
What Can Cause Intermittent Starting Issues?
You’re facing intermittent starting issues from poor battery health, loose connections, starter issues, faulty crank sensor, worn ignition switch, or fuel delivery faults; test battery health, inspect connections, bench-test starter, and replace failing components to reclaim control.
Conclusion
You’re not stuck—most Camry no-starts stem from a few predictable issues. Start with the battery and terminals; 80% of intermittent starts trace to weak batteries or poor connections, so that one check pays off. Then move methodically: test starter/solenoid, ignition switch and safety interlocks, CKP sensor, and hunt electrical faults or parasitic draw. Follow the step-by-step checks here, replace the failed component, and retest until starts are consistent.