Choose the back seat, preferably the center if the 2018 Camry’s width and head restraint let you; otherwise use a side seat. Use LATCH for child-plus-seat under 65 lb, otherwise lock the seat belt. Find lower anchors under bight covers and attach the top tether to rear anchors, removing slack. For rear-facing set recline 30–45°; for forward-facing use tether and tight harness. Finish with a 1‑inch wiggle test — keep going to learn specific trim fixes and tips.
Choose the Safest Seat: Center vs. Side in a Camry
1 clear rule: pick the back seat for a car seat, and favor the center position when it fits. You start by evaluating center safety: the center sits farthest from side impact zones, so it’s the default safest choice. Next, measure the 2018 Camry’s center width—it’s narrower than older models—so test-fit your car seat before committing. If your seat is too wide or the fixed head restraint (SE/LE trims) blocks proper rearward angle, move to a side position.
Step three: check anchors and belt routing. Confirm LATCH or seat belt anchors are present and accessible in your chosen spot; lacking anchors means you must use the seat belt. Step four: when installing two seats, borrow lower anchors from side seats as allowed to secure both safely. Finish by doing a firm 1-inch wiggle test at the base. Choose the spot that gives you secure attachment and preserves center safety against side impact, then install with confidence.
[Products Worth Considering]
The KUST Black Dashboard Cover Mat offers a custom, eco‑friendly fit for Toyota RAV4 models from 2019 to 2025, protecting the dash from UV damage, scratches, and glare. Made from post‑consumer recycled polyester with a silicone anti‑slip underside, it stays soft, breathable, and odorless while securely adhering to the surface. Installation is quick and reversible, and the foldable design allows easy storage when not in use.

Upgrade your RAV4 roof rack with these heavy‑duty aluminum crossbars featuring an anti‑theft lock and tie‑down loops for secure cargo transport. The matte‑powder‑coated bars resist corrosion and reduce wind noise, while easy installation fits existing rails without drilling. Ideal for bike mounts, roof boxes, kayaks and more.

Protect your smart key with this handcrafted crazy horse leather fob cover, designed to fit Toyota Tundra, Sienna, and Sequoia models from 2021 to 2026. The slim case offers all‑round protection against scratches, dust, and damage while preserving signal transmission. Its premium leather look adds a touch of luxury to your vehicle interior, making it an ideal gift for any occasion.
LATCH vs. Seat Belt: Which to Use in a Camry?
Wondering whether to use LATCH or the seat belt in your Camry? Decide by following these steps. First, check your child’s weight and the car seat label: if combined weight is under 65 pounds, LATCH advantages include quicker, easier attachment and consistent lower-anchor points. Second, confirm vehicle guidance in the owner’s manual for compatibility and any model-year specifics. Third, if the combined weight approaches or exceeds 65 pounds, choose the seat belt: Seat belt benefits include handling higher weights and often delivering a firmer, more secure install for heavier seats or older children. Fourth, when using LATCH, connect and tighten per the car seat guide, then verify minimal movement. Fifth, when using the seat belt, lock the belt and remove slack until the seat is tight. Finally, choose the method that meets limits and provides the least movement—if in doubt, use the seat belt for heavier setups and consult a certified technician for a hands-on check.
[Products Worth Considering]

These durable PVC cup holder inserts provide a non‑slip, waterproof surface that keeps drinks stable and prevents spills while protecting the cup holder from scratches and noise. The honeycomb mesh design offers a comfortable grip and easy cleaning, fitting most vehicle cup holders with a 2.75‑inch diameter. Ideal for cars, trucks, and SUVs, they enhance interior comfort and maintain a tidy cabin.

Upgrade your Toyota's interior with CKE's premium aluminum paddle shifter extensions, offering a sporty look and enhanced grip. The double‑sided tape ensures a secure, residue‑free installation, while the durable metal texture adds a sleek, movement‑inspired finish. Compatible with multiple Camry, Corolla, RAV4, Crown, and Avalon models, this set provides a seamless, non‑slip feel for precise gear changes.
Locate Camry Lower Anchors and Plastic Covers
Now that you’ve weighed LATCH versus the seat belt, find the Camry’s lower anchors before you attach anything. Step 1: locate the two sets of lower anchors in the 2018 Camry; they sit beneath small plastic covers at the seat bight. Step 2: lift or slide the covers to expose metal bars; each anchor accepts a variety of car seat connectors so you can secure different seats. Step 3: confirm you’re using the correct pair—anchors can be borrowed across seating positions when you need flexibility to install two seats. Step 4: check for obstructions—fixed head restraints on some trims may complicate access; move the seat or adjust what you can to gain clear access. Step 5: use the exposed lower anchors with the LATCH systems per your car seat manual, and follow these installation tips: attach both lower connectors, remove slack, and tug firmly to verify a secure, immovable fit before proceeding to tethering.
Find & Connect Top Tethers (Trim Differences)
Before you attach a forward-facing seat, locate the three clearly marked top tether anchors on the Camry’s rear shelf and choose the one that aligns with the seating position you’re using; in XSE and XLE trims this is straightforward, but on SE and LE trims with fixed head restraints you may need to work around the head restraint or use a V-shaped tether to route the strap to the innermost anchor for better clearance. Step 1: confirm tether anchor placement visually—three anchors are on the rear shelf and are clearly marked for quick identification. Step 2: assess top tether accessibility for your trim; XSE/XLE provide direct access, SE/LE may require a V-shaped tether or routing around the fixed head restraint. Step 3: attach the tether hook to the chosen anchor, remove slack, and pull tight while you stabilize the car seat with lower anchors or the seat belt. Step 4: verify no twist in the tether and that the anchor feels secure before finishing installation.
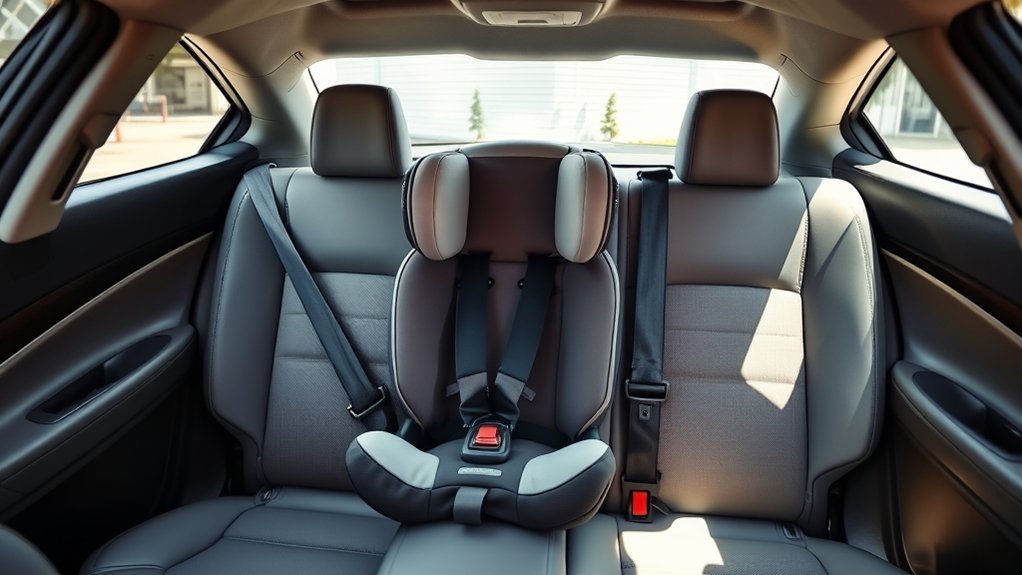
Install a Rear‑Facing Infant Seat in a Camry
- Position the rear-facing infant seat firmly on the Camry’s rear seat for rear seat safety. Choose either the LATCH system or the vehicle seatbelt method per infant seat guidelines and the seat’s manual. Use the two lower anchor points in the 2018 Camry when using LATCH; they’re designed to be borrowed for dual installations.
- Route and connect the lower attachments or thread the seatbelt, lock it per the car seat instructions, and push the carrier tightly against the vehicle seat while tightening.
- Set the recline so the carrier sits at about a 30–45° angle, matching the infant’s age and size recommendations.
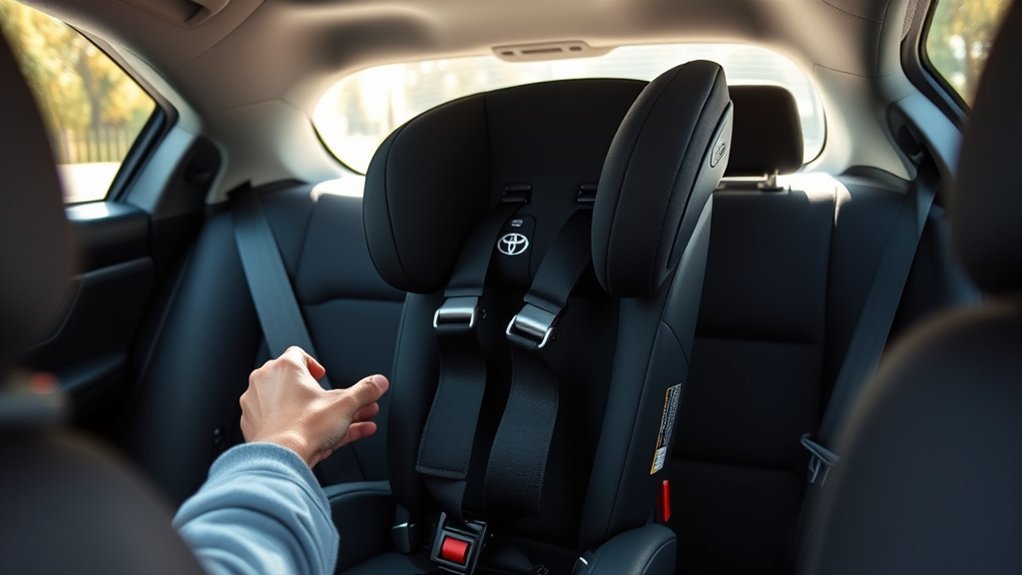
- Place the harness over the child, center the chest clip at armpit level, and snug the straps until they lie flat and resist pinch.
- Test stability: the installed seat should move no more than one inch side‑to‑side or front‑to‑back at the belt path.
- Recheck all connections before every trip to maintain safety and freedom on the road.
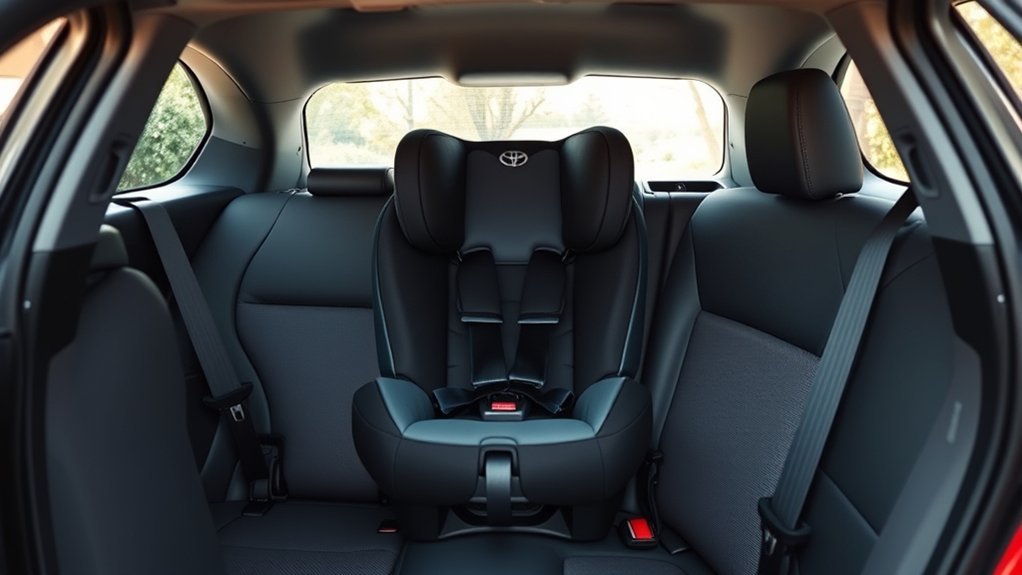
Install a Forward‑Facing Convertible Seat and Tether
First choose the correct anchor method: LATCH if your child and seat combine under 65 pounds, otherwise use the vehicle seat belt. Next secure the lower anchors or belt so the car seat doesn’t move more than one inch side-to-side or front-to-back. Finally attach the V-shaped top tether (for SE & LE fixed head restraints), tighten it, and position the harness snug with the chest clip at armpit level.
Choosing The Right Anchor
When you install a forward-facing convertible seat in a 2018 Toyota Camry, choose the appropriate anchor option—use the vehicle’s lower LATCH anchors with a top tether, and for SE and LE models with fixed head restraints, fit a V-shaped tether to reduce forward motion in a crash. First, identify anchor types: lower LATCH bars under plastic covers and a clearly marked top tether on the rear shelf. Next, follow installation tips: access lower anchors, route the belt or LATCH connector per the car seat guide, and attach the tether to the correct anchor point. Confirm tightness by ensuring the seat moves less than one inch side-to-side or front-to-back. Always consult both the child seat manual and Toyota owner’s manual for final verification.
Securing And Tethering
Before you secure the forward‑facing convertible seat, choose either the vehicle’s LATCH system or the seatbelt and plan a straight, uninterrupted path for the lower connectors and top tether. Step 1: attach the lower anchors or thread the seatbelt, pull tight, and verify the seat moves less than one inch side‑to‑side and front‑to‑back. Step 2: locate the top tether anchor on the rear shelf; fixed head restraints on SE and LE trims may block access, so use a V‑shaped tether if needed for better tether safety. Step 3: fasten the tether hook to the clearly marked anchor and tighten until snug. Use innermost lower anchors if sharing anchors for two seats. Always follow the car seat manual and Toyota owner’s manual for installation tips.
Install Booster Seats With Fixed Head Restraints
Although the Camry’s fixed head restraints can push a booster seat away from the seatback, you can still get a safe, stable fit by positioning the booster so it sits flush against the vehicle seat, checking that the child’s shoulder belt routing isn’t obstructed, and using the V-shaped tether recommended for SE and LE models to prevent strap slippage. First, verify booster seat compatibility with your Camry model and the booster’s manual. Second, slide the booster toward the seatback and make any head restraint adjustments allowed by the vehicle—if restraints are fixed, angle the booster until it contacts the cushion evenly. Third, route the lap and shoulder belt exactly as the booster instructs; confirm the shoulder belt crosses the mid-shoulder, not the neck. Fourth, attach the V-shaped tether on SE and LE models to stop strap migration during impact. Finally, validate stability by pushing and pulling the booster at the belt path; it should move less than one inch. Embrace these steps to reclaim safety and independence.
Fix Fit Issues: Narrow Center, Short Buckles, Anchor Borrowing
The Camry’s narrow center seat means you may need to choose a narrower car seat or shift seating to fit two seats safely. If the buckles’ short stalks make it hard for your child to buckle, route the belt or use a buckle extender approved by the car seat manufacturer and verify the lap-shoulder fit. For LATCH issues, plan installations that borrow the innermost lower anchors when needed, follow the car seat and owner’s manual for 2C vs 2D/2P configurations, and recheck anchorage and tethering after each change.
Narrow Center Seat
One key challenge you’ll face with the 2018 Camry is the narrower center seat, which means you’ll need to plan installations step-by-step to avoid squeeze and guarantee proper buckle and anchor access. Treat the space like a constrained workshop: measure, position, test. Use these installation tips to preserve safety and freedom.
- Position flexible buckles outward first so you can access them without contorting the car seat; check fit before final tightening.
- If installing two seats, consider borrowing an innermost lower anchor to achieve proper LATCH angles and reduce lateral crowding.
- Verify fixed head restraints won’t interfere; on SE/LE models, plan for V-shaped tethers on forward-facing seats to maintain stability.
Work deliberately; reclaim your mobility through safe, precise setups.
Short Seat Belt Buckles
Because short buckle stalks and a narrow center seat can make routing and latching tricky, start by planning each buckle’s access before you set a car seat in place. First, inspect buckle positions and note short buckle challenges: reach, angle, and how the center’s narrowness pushes seats together. Second, test each buckle with one hand to simulate a child’s reach and evaluate child accessibility issues; adjust seat location or rotate the car seat slightly to improve access. Third, use flexible buckles to ease latching while maintaining legal anchorage. Fourth, if two car seats must fit, plan placements that avoid forcing straps into awkward angles. Finally, confirm each belt clicks securely and that the child can’t accidentally dislodge a short stalk.
Borrowing Lower Anchors
If short buckle stalks or the narrow center squeeze your installation, consider borrowing the innermost lower anchors to get two secure attachment points for adjacent seats. You’ll improve anchor compatibility and free up space while keeping safety primary. Follow these installation tips stepwise and confidently.
- Locate the innermost lower anchors, detach one seat’s connectors, and route the second seat’s lower attachments to those anchors for a secure pair.
- Check both seats’ manual limits for anchor use, confirm latch tension, and verify minimal movement at the belt path (<1 inch).
- For SE/LE with fixed head restraints, add V-shaped tethers per guidelines; for XSE/XLE trims, use the improved forward-facing fit and recheck all connections.
You’ll gain safer, more liberated multi-seat setups.
Final Safety Checks and When to Get Inspection
After you finish installing the car seat, perform a final stability check by grabbing the seat at the belt path and trying to move it side-to-side and front-to-back—it should not shift more than one inch; then recheck the seatbelt or LATCH tightness to confirm a secure attachment. Next, verify orientation: rear-facing for younger children, forward-facing as they grow. Make final adjustments to harness height and recline so the child sits snugly and the harness is at the correct level.
Before each trip, repeat the stability and tightness check. Keep a short checklist in the glove box and claim control over your child’s safety—consistent action liberates you from doubt.
For inspection scheduling, arrange periodic professional checks with certified technicians or local law enforcement, especially after crash involvement, seat transfers, or long trips. Stay updated on regulations and recall notices; adjust installation accordingly. If anything feels off, seek inspection immediately to maintain secure, compliant restraint.
Frequently Asked Questions
Can You Put a Car Seat in a Toyota Camry?
Yes—you can install a car seat in a Camry. Prioritize car seat safety: choose the back seat, check lower anchors and tethers, prefer removable head restraints when possible, and follow clear installation tips stepwise for secure freedom.
Conclusion
You’ve covered every step: choose the safest seat, decide between LATCH and belt, locate anchors and tethers, install rear‑ and forward‑facing seats, secure boosters, and fix fit issues. Remember, measure twice, install once: small checks prevent big harms. Recheck harness tightness, angle, and tether routing; verify belt locks or LATCH clicks; confirm no more than 1 inch movement at the belt path. If unsure, get a car‑seat inspection immediately.