Your Camry’s alternator converts engine rotation into a controlled ~14‑volt electrical output to keep the battery charged and run lights, ignition, and accessories. It uses a spinning magnetic field and diodes to rectify AC to DC while the regulator adjusts output as loads change. Flickering lights, dim headlights, or resting battery below ~12.4V indicate problems. You can back‑probe B+, IG/L and S wires and measure voltages to confirm faults — keep going to learn inspection and replacement steps.
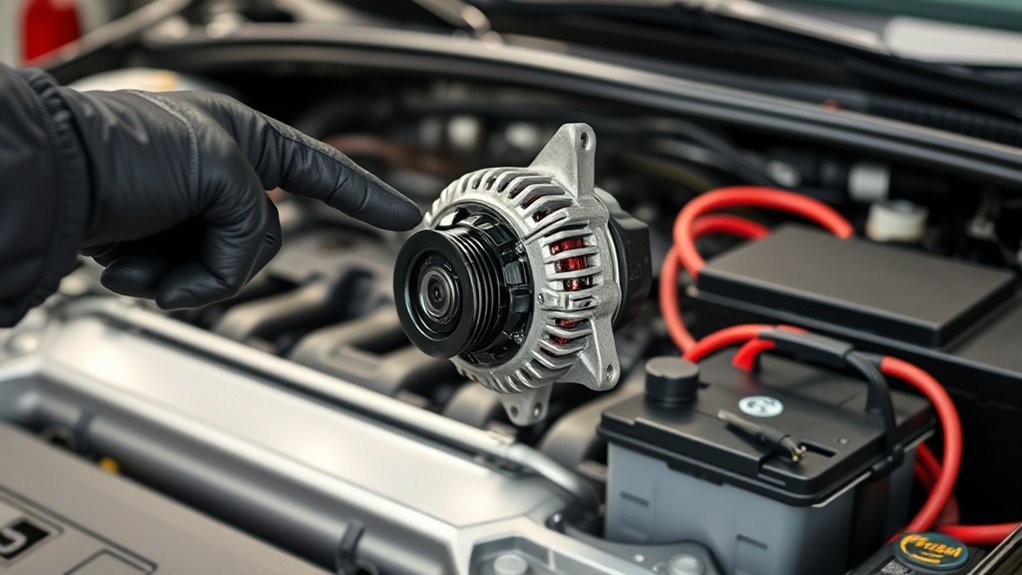
How a Camry Alternator Powers the Car
Although it’s driven by the engine, the Camry’s alternator converts that mechanical rotation into steady electrical power to run onboard systems and keep the battery charged. You rely on its regulated output—about 14 volts during operation—to sustain the electrical system and prevent voltage collapse. The alternator converts torque into current through a rotating magnetic field and diode rectification; that process determines alternator efficiency and how much usable charge returns to the battery versus heat losses. When you switch on headlights, climate controls, or infotainment, the alternator increases output to maintain voltage stability so accessories perform without draining the battery. The battery itself rests near 12.6 volts at full charge and serves as a buffer and startup energy source; the alternator replenishes that reserve continuously. If the alternator falters, you’ll notice dimming lights, warning indicators, and eventual starting failure—signals that immediate inspection or replacement is required to reclaim mobility and autonomy.
Is Your Camry’s Alternator Going Bad? Quick Checks
Now that you know how the alternator supplies regulated electrical power and charges the battery, you can use a few quick checks to tell if it’s failing. Start by observing symptoms: flickering lights on the dash or dimming headlights when accessories engage often point to alternator stress. Check resting battery voltage (should be ~12.6V). With the engine running, monitor for 13.5–14.5V; sustained drops under load suggest the alternator can’t maintain charge.
| Quick Check | Diagnosis Tip |
|---|---|
| Dashboard lights | Intermittent warning lights → possible alternator/electrical issue |
| Headlight behavior | Dimming headlights under load → alternator struggling |
| Resting battery voltage | ≈12.6V healthy; lower implies undercharged battery |
| Voltage drop test | >300 mV on positive side → circuit/charging fault likely |
These tests empower you to act decisively. If readings fall outside specified ranges, seek repair to restore electrical autonomy and prevent being stranded.
Test the Charging System: Battery, Voltage, Control Wires
Check the battery state first by measuring open-circuit voltage; a fully charged battery should read about 12.6 V and anything below 12.0 V suggests it’s undercharged. With the engine running, verify charging voltage at the battery is between 13.5–14.5 V and watch for drops under load that indicate alternator or system problems. Diagnose control wires by back-probing the alternator connector while toggling accessories to confirm proper excitation and signal voltages.
Battery State Check
Before you begin full diagnostics, confirm the battery’s open-circuit voltage: a healthy, fully charged battery should read about 12.6 V at rest, and anything substantially lower suggests undercharging or a weak cell. Use battery maintenance tips: keep terminals clean, tight, and corrosion-free to avoid false readings. Record battery health indicators — open-circuit voltage, surface charge behavior, and known load history — before moving on. With the engine off, note voltage; then run accessory loads and observe stability without performing the charging voltage test here. Measure positive-side voltage drop under load; it should stay under 300 mV (90 mV is exemplary). If readings deviate, replace or charge the battery and re-evaluate control wiring and alternator connections to secure electrical freedom.
Charging Voltage Test
With the battery state established, proceed to a charging voltage test to verify the alternator, battery and control wiring under engine conditions. Start the engine and measure voltage at the battery: expect ~13.5–14.5 V; ~12.6 V indicates no charging. With accessories on, voltage should stay above 12 V; a drop to ~12.2 V signals charging system weakness. Perform a positive-side voltage drop test: under load it should be ≤300 mV, ideally ~90 mV. Stable ~14 V with accessories confirms a functioning alternator and resolves prior voltage fluctuations. If readings fall outside these ranges, you’ll isolate faults to the battery, harness, or alternator. You’ll avoid control wire teardown here; control wire diagnostics come next.
Control Wire Diagnostics
Anyone working on the Camry’s charging system should next verify the alternator’s three control wires—battery (B+), ignition/field (IG/L), and signal/feedback (S)—by back-probing them while the engine runs and accessories are cycled; use a multimeter for steady DC checks and a lab scope to capture transient behavior and waveform integrity. You’ll confirm battery baseline near 12.6 V at rest, then 13.5–14.5 V with engine and loads. Perform voltage analysis across B+ for positive-side drop; keep it under 300 mV, ideally ~90 mV. Check negative ground for zero voltage drop to ascertain low resistance. Use the scope on IG/L and S to observe duty cycles and feedback pulses; deviations indicate regulator, wiring, or control module faults that restrict your electrical autonomy.
Replace a Camry Alternator: Key Steps & Access Tips
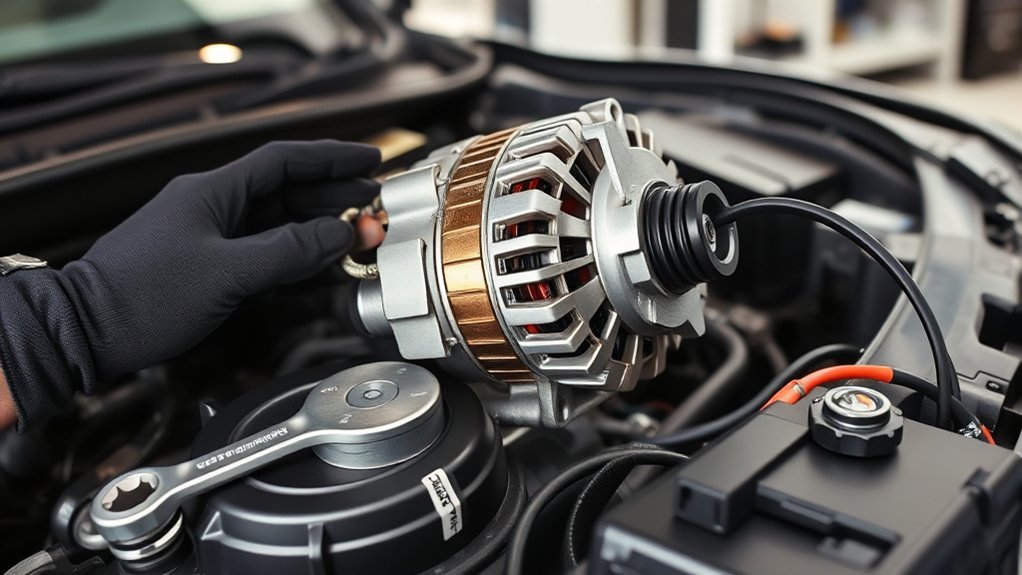
Begin by disconnecting the battery’s positive terminal, then remove the alternator’s upper bolt and access the long pivot bolt beneath; this sequence prevents shorting and lets you free the unit safely. You’ll use removal techniques that prioritize a clear work envelope: release serpentine belt tension by routing through the wheel well, and if access is limited, remove the cooling fan and radiator support to gain maneuverability. Unplug control connectors and label harnesses before extraction to avoid confusion.
When you position the new alternator, align pivot and upper bolt holes precisely, then torque fasteners to spec. Re-thread the serpentine belt with correct routing and restore tension. Use installation tips: reconnect control wires, secure the battery cable last, and back-probe control leads to confirm continuity and correct connector seating. This method frees you from repeated failure cycles, reduces rework, and puts you in control of a reliable alternator replacement.
Verify Camry Alternator Charging: Expected Voltages
Start by measuring the resting battery voltage—about 12.6 V indicates a full charge while below 12 V is undercharged. With the engine running you should see 13.5–14.5 V, confirming the alternator is charging. Finally, check voltage under load (headlights, radio); readings below ~12.2 V or a positive-side drop over 300 mV signal a charging-system problem.
Resting Battery Voltage
A properly charged Camry battery should read about 12.6 volts at rest, which confirms the battery’s state of charge before you check the alternator; measure this with the vehicle off and accessories disconnected. You’ll use that baseline to assess battery health and voltage stability: readings near 12.6 V indicate a fully charged battery and low self-discharge. If resting voltage is considerably lower, the battery or parasitic draw needs attention before alternator testing. Keep your multimeter contacts clean and wiring intact to avoid false lows. Document resting voltage, then proceed only if it’s acceptable. This disciplined step protects your testing accuracy and your autonomy over repairs, ensuring you’re diagnosing alternator behavior from a known, stable battery condition.
Running Charge Voltage
With the battery confirmed near 12.6 volts at rest, run the engine and measure the charging voltage at the battery terminals: a properly functioning Camry alternator will produce between 13.5 and 14.5 volts. You should verify that the measured value sits within this ideal charging range and stays stable with accessories engaged. Check for running voltage fluctuations; small transient changes are normal, but persistent dips below ~13.0 volts with lights or climate on indicate reduced alternator output. If voltage falls toward 12.2 volts under moderate accessory use, stop and inspect the charging system. You’ll want consistent readings around 14.0 volts to confirm the alternator restores the battery and frees you from recurring charge failures.
Voltage Under Load
When you run accessories like headlights and the radio, the Camry’s charging system should keep battery voltage above 12.6 volts and ideally near the 13.5–14.5 V range, confirming the alternator sustains load without significant voltage collapse. You’ll verify voltage stability by measuring at the battery with the engine idling and accessories engaged: readings between 13.5–14.5 V indicate proper charging; around 14.06 V after a new alternator confirms success. Monitor load effects: a drop to ~12.2 V suggests alternator or regulator issues. Check for wiring resistance if the positive-side drop exceeds 300 mV during tests. You’ll act decisively—repair connections or replace components—to restore reliable charging and maintain electrical independence.
OEM vs Aftermarket Alternators for Camry: Pros & Cons
Although you can choose between OEM and aftermarket alternators for your Camry, the decision hinges on trade-offs in fit, durability, performance, warranty, and cost. You’ll find OEM advantages in material quality, precise performance specifications, and warranty differences—Toyota’s 12-month unlimited mileage warranty reduces long-term risk. Aftermarket drawbacks include variable material quality, fitment variance, and potential reliability factors that can raise lifetime cost.
| Aspect | Summary |
|---|---|
| Cost analysis | OEM: higher upfront, lower lifecycle cost; Aftermarket: lower upfront, possible repeat purchases |
| Performance comparison | OEM: engineered to Toyota specs; Aftermarket: may deviate, affecting output |
| Installation challenges | OEM: straightforward fit; Aftermarket: may require adjustments or adapters |
You’ll weigh installation challenges against savings. If you want liberation from repeat repairs and electrical uncertainty, choose based on lifecycle cost, verified material quality, and clear warranty terms rather than only initial price.
Frequently Asked Questions
How Long Does a Camry Alternator Typically Last?
Typically 7–10 years or 80,000–150,000 miles; you’ll monitor alternator lifespan factors like heat, vibration, and electrical load, and signs failure such as dimming lights, battery drain, warning lights, or unusual noises to act decisively.
Can a Bad Alternator Drain the Battery Overnight?
Yes — like a dripping faucet, a failing alternator can drain your battery overnight. You’ll see battery symptoms like dim lights and slow cranking; perform alternator tests (voltage/load) to confirm and reclaim control.
Are Alternator Repairs Covered Under Warranty?
Yes — you might be covered if your warranty includes electrical components; check warranty coverage specifics. You’ll follow the repair process: diagnostic test, approval, authorized shop replacement or rebuild, and documentation to preserve your consumer rights.
How Much Does Professional Alternator Replacement Cost?
Astronomically, professional alternator replacement typically costs $300–$900 depending on parts and labor; you’ll recognize alternator symptoms early, follow a clear replacement process, and reclaim mobility through decisive, technically precise action.
Can a Failing Alternator Damage Other Electrical Components?
Yes — if you ignore alternator symptoms, fluctuating voltage can cause electrical issues and damage batteries, ECU modules, sensors, and wiring; you’ll want prompt diagnosis and replacement to prevent cascading failures and regain system autonomy.
Conclusion
You’ve seen how the alternator keeps your Camry’s electrical system alive, how to spot failures, test charging circuits, and swap units efficiently. Trust measured voltages and control-wire checks before condemning the alternator. When you replace it, follow access tips and torquing steps, and weigh OEM reliability against aftermarket value. Keep documentation and a voltmeter close — the alternator is the car’s electrical heartbeat, and you’re now able to diagnose and maintain it confidently.