If your Toyota Tacoma power window is not working, begin by isolating whether the failure affects all windows or a single window. If every window is unresponsive, the root cause is almost always the master window lockout switch, the 30A main power window fuse, the ignition relay feed, or the driver master switch assembly. If only one window has failed, test that window from both the master switch and the local door switch, listen closely inside the door panel for motor hum or clicking, and inspect the flexible door-jamb wiring harness for fractured conductors.
Written by automotive technical staff. [VERIFY: Add ASE-Certified Technician Byline]. Last reviewed: July 23, 2026. Updated with Gen 2, Gen 3, and Gen 4 (2024–2026+) Toyota technical service data.
Quick Diagnostic Answer
- All windows dead: Check the passenger window lockout switch on the driver door, the 30A
POWER/DOORfuse, and the ignition accessory relay circuit. - One window dead (no sound): Points to a failed local switch contact, broken door-jamb harness wire (inside the accordion boot), or burned-out motor brushes.
- Motor hums / clicks, but glass does not move: Points to a detached glass clamp, stripped regulator drive gear, or tangled regulator lift cable.
- Window reverses near the top: Jam protection is triggered by excessive friction in dry/dirty rubber run channels or misaligned glass sash tracks.
- Auto up/down inoperative after battery disconnect: The door ECU has lost calibration and requires a standard 5-second stroke initialization.
Key Takeaways
- Isolate the circuit first: Testing a window from both the driver master switch and the local passenger switch immediately narrows the fault to switch contacts versus the motor/regulator assembly.
- Sound reveals the fault domain: Motor noise with stationary glass confirms the electrical circuit is functional and isolates the failure to mechanical regulator or glass mounting hardware. Total silence points to electrical delivery (fuse, switch, wiring, ground).
- Check the door boot first for intermittent faults: Repeated opening of the driver and passenger doors causes fatigue breaks in the copper wires inside the rubber door-jamb boot while the outer insulation remains visually intact.
- Initialization is mandatory after power loss: Disconnecting the 12-volt battery or unplugging door harness connectors resets the pulse sensors, disabling one-touch auto operation until manually relearned.
- Generation differences matter: Gen 2 (2005–2015) and Gen 3 (2016–2023) use conventional analog direct feeds, while Gen 4 (2024–2026+) utilizes LIN-bus multiplex door control modules requiring non-intrusive digital testing.
At a Glance: Tacoma Window Troubleshooting
| Diagnostic Time | 15–45 minutes for electrical and switch verification; 1–2 hours for door panel removal and regulator service. |
| Skill Level | Beginner (fuses, switch checks, initialization); Intermediate (multimeter back-probing, regulator replacement). |
| Required Tools | Digital Multimeter (DMM) / 12V test light, non-marring nylon trim pry tools, 10mm socket and ratchet, Phillips screwdriver, dielectric grease, silicone spray lubricant. |
| Estimated Cost | $0 for reset/track cleaning; $5–$15 for fuses/relays; $40–$120 for replacement master/sub switches; $75–$250 for OEM/aftermarket motor and regulator assemblies (DIY). |
Safety Warning: Power window regulators operate under high spring tension and gear mechanical advantage capable of causing severe pinch injuries. Always securely support the glass with heavy-duty suction cups or masking tape before unbolting regulator arms. Disconnect the negative 12-volt battery terminal before probing door connectors on side-airbag equipped models.
How Does a Tacoma Power Window System Operate?
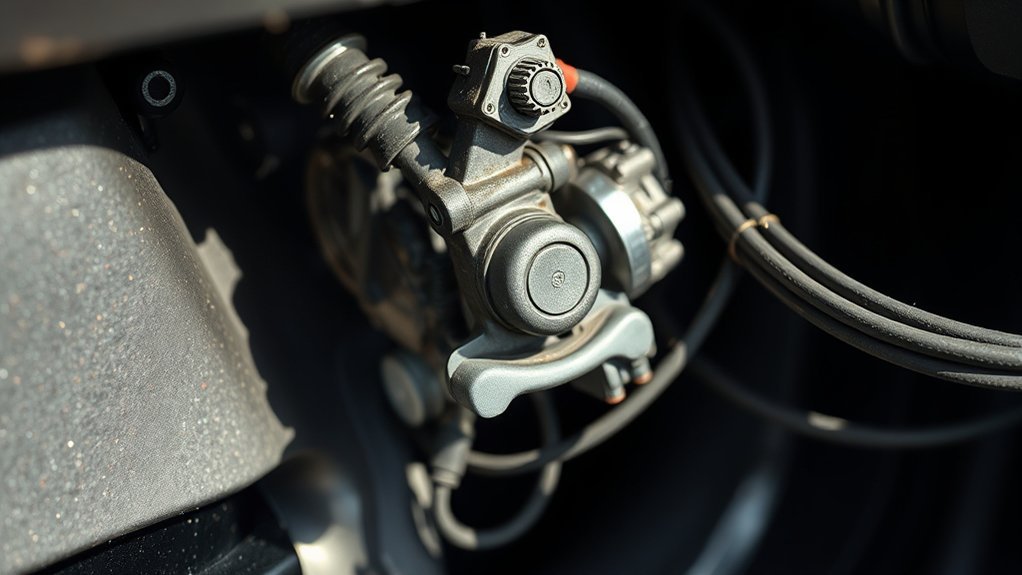
The power window system in a Toyota Tacoma relies on three interconnected subsystems: the operator controls (master switch panel and individual passenger door switches), the power distribution circuit (fuses, integration relays, and door-jamb wiring harnesses), and the mechanical lifting assembly (permanent-magnet DC motor, cable or scissor regulator, glass sash clamps, and rubber run channels).
When an operator presses a window switch, direct current is routed through the switch contacts to the window motor. Reversing the switch toggle reverses polarity, spinning the DC motor in the opposite direction. The motor drives a worm gear connected to a cable spool or mechanical scissor linkage, converting rotational torque into vertical travel along guide rails. On modern Tacomas, an optical or Hall-effect pulse sensor inside the motor assembly monitors rotational speed; if resistance spikes before reaching full closure, the Body ECU trips jam protection and reverses the glass ~2–4 inches to prevent injury.
Late-model Tacomas incorporate retained accessory power (allowing window operation for approximately 45 seconds after ignition shutdown until a front door is opened) and multiplex network communication between the driver master switch and individual door ECUs. Detailed system parameters can be referenced directly in the official 2026 Toyota Tacoma Owner’s Manual or technical service publications.
Generation Architecture Note: On Gen 1 (1995–2004) and Gen 2 (2005–2015) Tacomas, master switches directly switch 12V motor loads. On Gen 3 (2016–2023) and Gen 4 (2024–2026+), master switches send low-current digital signal commands to microcontrollers inside each door. Never use a test light to jump connector pins on Gen 4 models without verified factory pinout diagrams.
Tacoma Generation Reference & Fuse Locations
Fuse designations, junction box layouts, and switch configurations differ across Tacoma generations. Identify your truck’s generation before testing circuits:
| Generation / Model Years | Primary Power Window Fuse | Location | System Architecture |
|---|---|---|---|
| Gen 2 (2005–2015) | 30A POWER / 7.5A IGN |
Driver-side instrument kick panel (behind coin tray) | High-current master switch feeds; driver-side auto only (most trims). |
| Gen 3 (2016–2023) | 30A DOOR / 30A PWR-WNDW |
Under-dash junction block + under-hood main fuse box | Dual front auto or all-four auto (trim-dependent); pulse sensor feedback. |
| Gen 4 (2024–2026+) | 30A P-SEAT/P-WDW / 10A ECU-IG |
Engine compartment main fuse center & Body ECU block | Full LIN/CAN multiplex door network; all-window auto with advanced jam protection. |
Preliminary Non-Invasive Checks
Before disassembling door cards or buying replacement components, eliminate these common operational oversights:
- Window Lockout Switch Position: The rectangular window lock button on the driver master panel cuts the ground/feed to all passenger door switches. Press it firmly multiple times to ensure the internal physical detent switch has not oxidized or stuck in the locked position.
- Ignition Power Mode: Verify the ignition switch is fully in the
ON/RUNposition (or vehicle ignition is switched on without starting on push-button models). Retained accessory power will automatically cut off the moment a front door is opened. - 12-Volt Battery Voltage: Weak battery state-of-charge (<11.8V resting) can cause high current draw to trip electronic circuit protection modules. If the battery is discharging overnight, perform a structured Tacoma battery drain diagnostic test before replacing window components.
- Frozen / Obstructed Run Channels: Inspect the upper door frame and rubber seals for road grime, hardened tree sap, ice buildup, or lifting aftermarket window tint film that creates mechanical drag and trips safety sensors.
[Products Worth Considering]

This driver side front door lock actuator is designed to restore reliable locking performance across a wide range of Toyota, Lexus, and Scion vehicles. It serves as a direct replacement for multiple OE part numbers and helps solve issues with power door locks that are slow, unresponsive, or failing. Built for broad compatibility and backed by a one-year warranty, it is a practical solution for dependable door lock operation.

This automotive circuit tester checks low-voltage DC systems from 3-65V, making it useful for diagnosing headlights, taillights, fuses, sockets, and other vehicle wiring issues. The digital backlit display provides clear voltage readings with fine accuracy, while the bidirectional polarity indicator helps you test from either ground or positive. Built with a durable probe, insulated tip, and extra-long spring wire, it is designed for dependable everyday use in automotive and household electrical work.

This automotive test light combines a bright LED voltage display with quick polarity indication for fast, accurate circuit checks in a wide range of vehicle systems. It helps diagnose battery, charging, lighting, and fuse issues with a sharp stainless probe, long spring wire, and easy-to-use alligator clip for efficient troubleshooting.
Tacoma Power Window Diagnostic Symptom Matrix
| Observable Symptom | Primary Root Cause | Immediate Diagnostic Action |
|---|---|---|
| All power windows completely unresponsive | Blown 30A main power fuse, faulty master lockout switch, failed integration relay, or lost master ground. | Verify master switch 12V B+ supply wire and main cabin ground connection behind kick panel. |
| Single passenger window dead from all switches | Burned-out window motor, severed door-jamb harness wire, or disconnected regulator plug. | Back-probe the 2-pin motor connector for 12V and ground while toggling the switch. |
| Window operates from master switch but not door switch | Defective local door sub-switch, switch contact corrosion, or active window lock. | Remove local switch and test contact continuity across terminal pins in UP/DOWN positions. |
| Motor hums, whines, or clicks, but glass is stationary | Stripped regulator drive gear, snapped lift cable, or glass clamp unbolted from sash. | Remove door card; inspect cable spool for birdnesting and confirm 10mm glass sash bolts are intact. |
| Glass rolls up slowly, stalls, or tilts forward | Dried silicone lubricant in run channel, bent scissor arm, or excessive channel friction. | Clean rubber tracks with isopropyl alcohol and apply pure dry silicone spray along vertical channels. |
| Window operates only with door open / swinging | Fatigue fracture in copper wiring inside the flexible rubber door-jamb boot. | Gently flex the rubber door accordion boot while holding switch to identify intermittent open circuits. |
| Window rolls to top, then immediately reverses down | Jam protection sensor triggered by channel pinch or uncalibrated pulse limit position. | Inspect top channel seal for obstruction; execute standard 5-second window initialization sequence. |
| Auto UP/DOWN feature inoperative after repair | Lost pulse-count calibration data in door ECU following battery disconnect. | Perform manual window stroke reset procedure at the affected door switch. |
[Products Worth Considering]

This two-piece front door lock actuator motor set is designed to restore reliable power door lock operation for a wide range of Toyota, Lexus, and Scion vehicles. It includes left driver and right passenger side actuators and is made as a direct replacement for common factory part numbers. With broad vehicle compatibility and a one-year warranty, it offers a practical solution for fixing faulty door locking issues.

This 5-piece auto trim removal tool kit helps you remove dashboards, door panels, clips, and interior trim with less risk of damage. Built from durable nylon, the tools provide reliable leverage while helping protect delicate surfaces from scratches during automotive interior work. The assorted shapes make it easier to reach tight angles, extract fasteners, and handle common panel removal tasks on cars, SUVs, and other vehicles.

This 12V bus bar set provides a reliable and organized way to distribute power for marine, automotive, and solar wiring systems. Built with tinned copper conductors, insulated ABS bases, and multiple terminal connections, it helps simplify installation while improving safety and reducing the risk of short circuits. The included covers, lugs, and terminals make it a practical solution for clean, durable battery wiring.
Step-by-Step Diagnostic Protocol for Tacoma Windows
Follow this logical diagnostic workflow to pinpoint the exact failure point without spending money on unnecessary replacement parts.
| Step Number & Action | Specific Testing Method | Diagnostic Conclusion |
|---|---|---|
| 1. Dual-Switch Isolation | Command the non-functional window from the driver master switch, then immediately test from the passenger door switch. | If it functions from one switch but not the other, the motor/regulator is mechanically sound; focus on switch contacts or harness lines. |
| 2. Fuse & B+ Power Supply Check | Using a 12V test light or DMM connected to chassis ground, probe both test tabs on the 30A power window fuse with ignition ON. | Power on one tab only = blown fuse (indicates motor stall or short). Power on neither = open upstream relay or ignition feed. |
| 3. Acoustic & Vibration Inspection | Place your hand flat against the lower door sheet metal and toggle the switch while listening in a quiet environment. | Audible click/hum + mechanical thump = motor is receiving power; fault is stripped gears, tangled cable, or jammed track. Total silence = electrical open. |
| 4. Door-Jamb Harness Flex Test | Hold the window switch in the UP or DOWN position while slowly swinging the door from fully open to closed, gently kneading the rubber boot. | If the motor engages momentarily, a wire is broken inside the rubber boot accordion conduit. |
| 5. Voltage Drop & Load Testing | Remove door card. Back-probe the two motor connector leads with a DMM set to DC Volts. Depress switch UP, then DOWN. | DMM should read +12V in one direction and -12V in reverse. Full voltage present with zero motor spin confirms a dead motor. Voltage below 10.5V indicates high circuit resistance. |
| 6. System Initialization Relearn | Execute the Toyota manual stroke reset procedure at the local door switch to clear software position errors. | Restores one-touch automatic operation and recalibrates anti-pinch safety thresholds. |
Field Diagnostic Pro Tip: If your multimeter reads 12 volts at the motor connector when disconnected, but drops to 0 volts the moment you plug the motor in, you have high resistance upstream (often a corroded switch contact or single strand wire break). Always perform voltage checks under load.
[Products Worth Considering]

This 26-piece terminal removal tool kit is designed to help you depin and service automotive wire connectors with greater speed and accuracy. It supports a wide range of connector types used in cars, trucks, motorcycles, and other equipment, while the organized case keeps each tool easy to find and carry. Built for reliable, damage-free terminal removal, it is a practical choice for professional electrical work and DIY wiring repairs.

This all-in-one automotive trim removal kit is designed to help you safely remove door panels, clips, fasteners, stereos, molding, and interior trim without damaging paint or surfaces. It combines pry tools, pick and hook tools, clip pliers, stereo removal tools, terminal removal tools, and a scraper in one organized storage bag for convenient use. Built from durable materials with ergonomic, non-slip handles, it offers reliable performance for interior repair, disassembly, and detailing tasks.

This waterproof 6-circuit fuse block helps keep automotive and marine wiring neat, protected, and easy to troubleshoot. Built for 12V-32V DC systems, it includes a negative bus, LED blown-fuse indicators, and corrosion-resistant busbars for dependable performance in cars, boats, RVs, and trucks. The flame-retardant base and damp-proof cover add an extra layer of safety for demanding electrical installations.
Detailed Breakdown of Common Tacoma Window Failures
1. Blown Power Window Fuse or Relay Overload
A blown 30A power fuse is commonly caused by an overloaded motor fighting an iced or heavily gummed-up window channel. If a newly installed fuse blows instantly upon pressing the switch, disconnect the motor plug and retest. If the fuse still blows, the wiring harness has shorted to the door frame sheet metal. If it only blows with the motor connected, the motor armature has shorted internally.
2. Master Switch Contact Degradation & Lockout Failure
The driver-side master switch contains high-cycle contacts exposed to rain spray when the door is opened. Moisture causes micro-arcing and carbon buildup across the internal rocker contacts. Furthermore, the master lockout button can fail internally in a normally-open state, disabling passenger switches while the master panel continues to operate normally.
3. Door-Jamb Harness Fatigue Breaks
Due to the frequent hinge motion of the driver door, the copper wiring inside the rubber conduit between the A-pillar and door shell undergoes severe metal fatigue. A broken ground or B+ wire inside this boot is one of the most common causes of intermittent window, mirror, or speaker operation on high-mileage Gen 2 and Gen 3 Tacomas.
4. Burned-Out or Seized Window Motor
Tacoma window motors utilize carbon brushes and a permanent-magnet armature. Over time, brush wear, water ingress past worn outer belt moldings, or prolonged stall conditions (holding the switch after full glass travel) burn out the commutator or seize internal bushings.
5. Broken Cable Regulator or Detached Glass Sash Clamps
Modern Tacomas utilize cable-drive regulators where steel aircraft cables pull plastic carrier blocks along vertical tracks. When the plastic cable guides or spools crack from age and temperature cycling, the cable frays, birdnests, and jams the mechanism. Alternatively, the two 10mm bolts securing the glass sash to the regulator bracket can vibrate loose, causing the motor to run smoothly while the glass remains dropped inside the bottom of the door cavity.
6. Channel Binding & False Jam-Protection Activation
Road dust, mud, and degraded flocking inside the rubber window run channels create friction. When the motor attempts to push the glass through high-friction spots near the top of travel, the optical pulse sensor detects a drop in RPM and misinterprets the friction as a trapped limb, immediately triggering jam protection and reversing the glass downward.
Component Testing: Switch, Harness, and Motor Isolation
- Safely Remove the Door Trim Panel: Lower the window halfway if possible. Using a nylon trim tool, unclip the sail panel at the mirror base, remove the hidden screw behind the interior door handle latch cover, and unscrew the fastener inside the armrest pull cup. Disengage the perimeter push clips and lift the panel vertically off the weatherstrip ledge.
- Secure the Window Glass: Apply heavy-duty automotive masking tape or glass suction cups over the top door frame to ensure the glass cannot drop unexpectedly while unbolting components.
- Inspect Connectors and Vapor Barrier: Peel back the plastic moisture barrier carefully to preserve the butyl sealant. Examine the motor and switch multi-pin plugs for green copper corrosion, loose terminal pins, or thermal melting.
- Direct Motor Functionality Test: Unplug the 2-pin motor harness. Using a fused (15A) 12-volt jumper wire lead and a clean chassis ground wire, apply direct battery power across the two motor terminals. Swap polarity to verify bidirectional travel. If the motor operates strongly in both directions, the entire fault resides in the upstream switch, relay, or harness circuit.
- Mechanical Assembly Verification: If the motor spins but the glass binds or chatters, inspect the regulator cable lines for fraying and ensure the vertical guide rails are free of metal shavings.
Caution on Digital Multiplex Circuits: On 2024–2026+ (Gen 4) Tacomas, door switches communicate via digital serial data lines to the local door control modules. Never apply 12-volt battery power directly to random multi-pin switch connector terminals, as this can destroy sensitive microcontroller circuitry. Always verify wiring diagrams on the Toyota Technical Information System before bench testing.
How to Reset / Initialize a Tacoma Power Window (All Generations)
Initialization is required whenever the 12V battery is replaced, a door ECU is disconnected, or a new regulator/motor assembly is installed. If the auto-up feature is non-functional or the window reverses when hitting the top frame, perform the following procedure directly at the switch of the affected door:
- Turn the vehicle ignition to the
ONposition (engine does not need to run). - Press the window switch down and hold it continuously until the glass reaches the bottom of travel. Continue holding the switch down firmly for an additional 3 to 5 seconds after it stops.
- Pull the window switch up and hold it continuously until the glass reaches the top of travel. Continue holding the switch pulled up firmly for an additional 3 to 5 seconds after the glass seals into the upper frame.
- Release the switch, then verify one-touch auto-up and auto-down functionality by pressing the switch past the initial detent.
- If the window still fails to auto-cycle, repeat the procedure once more. On four-door models equipped with all-window auto switches (such as higher-trim Gen 3 and all Gen 4 Tacomas), this reset sequence must be executed individually at each specific door switch rather than from the driver master panel.
Diagnosing Integration Relays and Control Modules
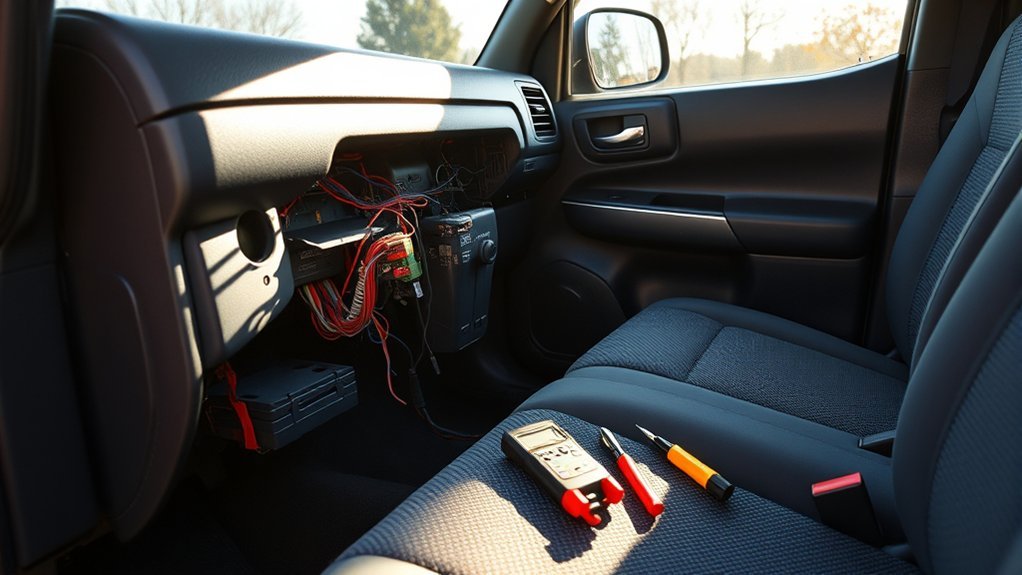
Unlike older utility trucks with individual, mechanical plug-in relays for every accessory, modern Toyota Tacomas integrate power window switching into the main Body Control Module (Body ECU) or driver-side junction block. If a relay fault occurs, it typically disables all window functions simultaneously along with retained accessory power.
Relay & Body ECU Failure Indicators
- Total loss of power to all four window switches despite the 30A main fuse testing good on both sides.
- Intermittent window function that cuts out completely as the cabin interior warms up.
- Complete loss of the 45-second retained accessory power window delay after turning the ignition off.
Relay & Module Verification Method
If your specific Tacoma model year incorporates a dedicated, serviceable four-pin ISO relay for the power window circuit, remove the relay and test continuity across the load pins (30 and 87) with a multimeter while applying 12V across the control coil pins (85 and 86). The relay should click audibly and drop resistance across the load terminals to below $0.5\,\Omega$. On integrated multiplex fuse panels, verify 12V ignition input into the junction connector before condemning the Body ECU.
Toyota Safety Recalls & Technical Service Bulletins (TSB)
Certain model years of Toyota trucks and SUVs have been subject to safety recalls and customer support programs relating to power window master switch assemblies (notably related to electrical shorting, melting, or switch binding resulting from incorrect non-conductive grease application during servicing). Before purchasing aftermarket switches, check your vehicle for open safety recalls and technical service campaigns by entering your 17-digit VIN into the Toyota Official Recall Database or the NHTSA Vehicle Safety Recall Portal. Open safety recall repairs are performed free of charge at authorized Toyota dealerships.
When to Seek Professional Automotive Repair
While testing fuses, cleaning tracks, and replacing modular master switches are straightforward DIY tasks, certain complex electrical and structural issues warrant professional diagnostic equipment:
- Multiplex / LIN-Bus Network Communication Errors: When a diagnostic scan tool reveals
U-codenetwork communication faults between the driver master ECU and door sub-modules on Gen 4 trucks. - Damaged Door-Jamb Harness Requiring Splicing: Repairing fatigue breaks inside the door accordion conduit requires heat-shrink soldering or aerospace-grade crimp connectors with high-flex silicone wire to prevent recurrent fires or breaks.
- Bent Sash Guides or Twisted Window Frames: If collision impact or forced entry has bent the internal structural door sheet metal, forcing new regulators will cause premature gear stripping and water leaks.
Emergency Action: How to Raise a Window Stuck Open
If your Tacoma window is stuck down during rain or in an unsecured parking area, use these field techniques to raise the glass temporarily:
- The Palm-Friction Assist Method (Two People): Turn the ignition
ON. Have an assistant hold the door switch in theUPposition. Simultaneously sandwich the glass between your flat palms on both sides of the window pane and pull firmly upward. This reduces the mechanical starting torque load on a weak motor or binding track, often allowing the glass to seal fully. - The Door Strike Assist: Hold the window switch firmly in the
UPposition while firmly closing (slamming) the truck door. The mechanical shock can briefly re-seat worn motor brushes on the commutator, providing enough electrical contact for one final upward cycle. - Manual Mechanical Lift: If the regulator cable has snapped and the glass moves freely by hand, pull the glass all the way to the top frame and wedge a rubber doorstop or fold of cardboard between the lower glass edge and the inner door weatherstrip to hold it up until repairs are performed.
Frequently Asked Questions
Why is the power window not working on my Toyota Tacoma?
A Tacoma power window stops working due to an activated window lockout button, a blown 30A power fuse, oxidized switch contacts, broken copper wiring inside the door-jamb rubber boot, a failed DC motor, a snapped regulator cable, dirty run channels triggering jam protection, or lost electronic calibration after battery disconnection. Begin diagnosis by determining whether the fault affects one window or the entire truck.
How do I know if the window motor is bad versus the regulator?
If you press the switch and hear zero noise from inside the door while your multimeter confirms 12V and ground reaching the motor plug, the motor has failed. If you hear the electric motor running, humming, or grinding inside the door panel but the glass stays stationary or tilts crookedly, the motor is functional and the regulator cables, plastic drive gears, or glass sash mounts are broken.
Why does my Tacoma window work from the master switch but not the door switch?
When a window operates normally from the driver master switch but is completely unresponsive from the passenger door switch, the passenger door switch contacts are oxidized, the passenger switch connector is loose, or the driver master lockout button is engaged or defective internally. The motor and regulator assemblies are completely functional.
How do I reset my Tacoma auto up/down power window?
Turn the ignition to ON. At the specific door switch with the issue, press and hold the switch down until the window is fully open, maintaining firm pressure for an extra 3 to 5 seconds. Next, pull and hold the switch up until the window closes completely, holding for an extra 3 to 5 seconds. Release the switch. The door module will now remember its end-stroke limits and restore one-touch automatic operation.
Where is the power window fuse located on a Toyota Tacoma?
On Gen 2 (2005–2015) Tacomas, the 30A POWER fuse is located in the under-dash fuse block behind the driver coin tray. On Gen 3 (2016–2023) Tacomas, the 30A DOOR and PWR-WNDW fuses are situated in the driver-side kick panel and the engine bay fuse box. On Gen 4 (2024–2026+) Tacomas, the multi-circuit power window fuses reside in the main engine compartment junction block and cabin Body ECU interface.
Why does my Tacoma window roll up and then immediately roll back down?
The window is triggering the safety anti-pinch jam protection system. This occurs when dirt, degraded weatherstripping, or misaligned tracks create high friction near the top frame, causing the motor pulse sensor to detect a mechanical obstacle. Clean the channels with isopropyl alcohol, lubricate with dry silicone spray, and perform a standard 5-second switch stroke initialization.
How do you get a stuck Tacoma power window to roll up temporarily?
Have a helper hold the window switch in the UP position while you grip the glass between your palms on both sides and pull firmly upward. If the motor is intermittently failing, holding the switch UP while firmly closing the door can jar the motor brushes into making electrical contact. If the cable is snapped, manually pull the glass up and secure it with a rubber wedge.
Authoritative Technical Sources
- Toyota Owners Official Resource: 2026 Tacoma Power Windows — Factory operational parameters, anti-pinch sensor descriptions, and digital window initialization sequences.
- Toyota Technical Information System (TIS) — Factory electrical wiring diagrams (EWD), connector terminal pinouts, and master switch continuity matrices for Tacoma Gen 1 through Gen 4.
- Toyota Official Safety Recall Database — VIN-specific safety campaign verification tool for master switch lubrication and thermal protection service campaigns.
- NHTSA Vehicle Safety Database — Federal defect database and Technical Service Bulletins covering automotive electrical power-window systems.
Diagnostic Summary & Next Steps
Troubleshooting an inoperative Toyota Tacoma power window begins by separating electrical power delivery from mechanical hardware failure. If all windows are inoperative, verify the master window lockout switch and test the 30A main power window fuse. If only one window has failed, compare operation across both switches, check for fractured wires inside the flexible rubber door-jamb boot, and perform an in-line voltage drop test at the 2-pin motor connector. If the motor hums but the glass does not move, replace the regulator and cable assembly. Always complete the 5-second stroke initialization sequence after performing battery or door electrical repairs to restore one-touch automatic convenience and anti-pinch safety protection.