You can open a 4Runner liftgate with a dead battery by using the interior manual release behind the hatch trim: park on level ground, set the brake, remove the small plastic cover near the latch, and pull the emergency lever to disengage the lock. If the lever’s stiff, spray penetrating oil and cycle it gently or use a 12V jump pack to power the actuator briefly. Follow safety steps to avoid backfeed or ECM damage; continue for detailed procedures and precautions.
Quick Answer: Opening a 4Runner Liftgate With a Dead Battery
If your 4Runner’s battery is dead, you can still open the liftgate by using the manual release inside the rear hatch: remove the small plastic cover near the latch (often a square piece) with a screwdriver, then pull the emergency lever to disengage the lock. You’ll locate an emergency access point behind that cover; models vary, so consult the owner’s manual for your year and exact location. Work deliberately: use flat tools to avoid breaking the cover, expose the lever, and pull firmly to release the latch. If the lever’s stiff, panel removal may be required, but that risks component damage—consider this a last resort. To avoid repeat lockouts, adopt battery maintenance tips: keep terminals clean, monitor voltage, and service the battery before failure. Carry emergency tools: a screwdriver, jumper cables or a portable power pack, and a trim tool. These steps free you quickly and reduce dependency on external help, preserving your mobility and autonomy.
Safety Checklist Before You Try the Manual Release
Before you pull the emergency lever, run a brief safety checklist to reduce risk and make the job straightforward. You want controlled, predictable action when using the manual release; follow these safety measures before touching the mechanism. Position the vehicle on level ground and set the parking brake so the liftgate operation can’t coincide with vehicle movement. Disconnect the negative battery terminal to prevent shorts or alarm triggers. Put on gloves to protect your hands when removing trim, and keep a flashlight ready to illuminate the release area.
- Confirm vehicle is level, parking brake set, and wheels blocked.
- Disconnect negative battery terminal; carry a flashlight and wear gloves.
- Gather a screwdriver and any needed tools; clear working space.
These steps reduce surprises and preserve your autonomy. They let you access the manual release confidently and efficiently, minimizing risk and keeping the procedure straightforward and under your control.
Find the Interior Access Panel and Manual Release
Locate the interior access panel on the rear hatch—it’s usually held with screws or clips near the latch assembly. Remove the trim and carefully peel back the vapor barrier to expose the manual release mechanism. Pull the manual release lever to disengage the latch and open the liftgate.
Locate Interior Access Panel
Start by inspecting the underside of the rear hatch for a removable plastic cover; pry it off with a flathead screwdriver to expose the square access panel that leads to the manual release. You’ll use simple access tools and reference the interior panel location to reach the release. Confirm the hatch is stable and unobstructed before proceeding. Locate the smaller manual release lever adjacent to the latch assembly; it should move freely and align with the latch. If it’s stiff, don’t force—reassess alignment and clear debris. Consult your owner’s manual for model-specific diagrams. Follow these steps to reclaim control of a locked liftgate when the battery fails.
- Remove plastic cover with flathead screwdriver
- Find square access panel
- Identify manual release lever
Remove Trim And Vapor Barrier
Remove the inner rear trim panel by prying upward from the bottom edge to release the clips, then lift the panel clear to expose the vapor barrier; work deliberately to avoid cracking plastic fasteners. You’ll locate the interior access area once the trim panel is out. Use a plastic trim tool or gloved fingers to prevent marring surfaces. Gently peel back the vapor barrier — don’t tear the adhesive more than necessary — to reveal the liftgate actuator and latch area. Scan for the square cover that conceals the manual release lever near the latch mechanism. Keep removed clips and the trim panel secure so you can reseat them after. You’re creating an unencumbered path to freedom; proceed methodically and consult the owner’s manual for model specifics.
Pull Manual Release Lever
Pop the interior access panel near the latch by prying the square plastic cover off with a flat screwdriver or trim tool to expose the manual release lever; work slowly to avoid cracking the cover. Once exposed, confirm the vehicle is secure and your hands are clear. Locate the small lever; it’s designed to disengage the latch when pulled. Pull firmly in the direction indicated, hold until the latch releases, then swing the liftgate open. If it resists, stop and recheck for obstructions or consult the owner’s manual—access points vary by year. Manual release use resolves many liftgate issues when power is absent, restoring immediate freedom to access cargo.
- Reveal: remove cover, expose mechanism.
- Actuate: pull lever, hold until release.
- Verify: open slowly, secure hatch.
Step-by-Step: Access the Manual Release Behind the Hatch Trim
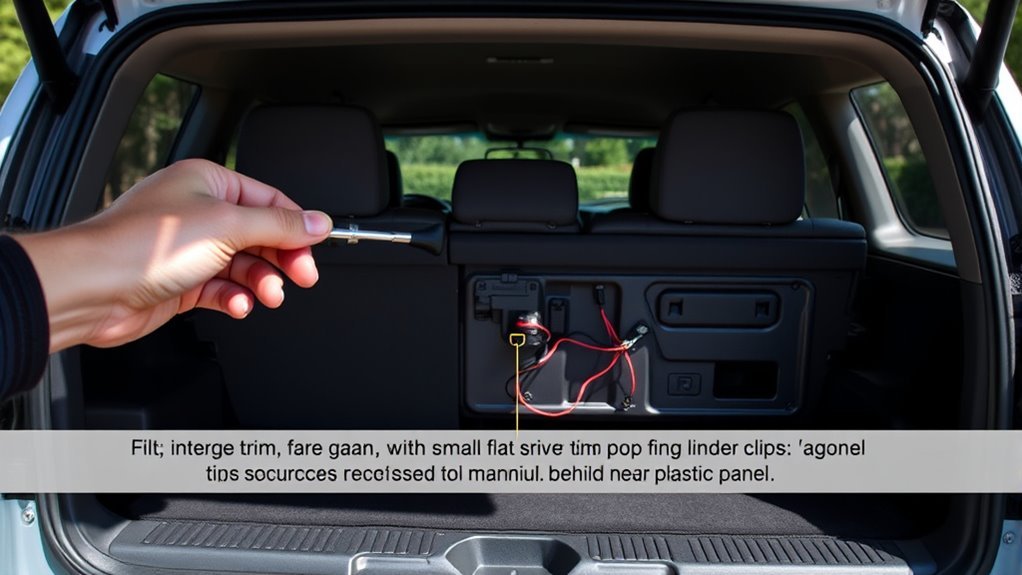
Work from the bottom edge of the inner rear trim, gently prying off the plastic cover to expose the pull strap area and mounting hardware. You’ll gain liftgate access through this opening; remove any visible fasteners and set the cover aside. Inspect the square cover hiding the pull-strap bolt; pry it free and unbolt the strap if necessary to clear the space around the manual release.
Peel back the vapor barrier carefully, avoiding tears that would compromise the seal. Tuck the barrier aside to reveal the actuator cover. Remove its fasteners and lift the cover to expose the internal linkage. Identify the smaller manual release lever behind the actuator cover—this is your mechanical latch override. Reach in, maintain firm control, and pull the lever to free the latch. After operation, reassemble in reverse order, restoring the actuator cover, vapor barrier, strap, and plastic trim. Consult your owner’s manual for model-specific diagrams and torque specs.
If the Manual Lever Is Stiff or Won’t Move
If the manual lever feels stiff or won’t move, first inspect the latch area for rust, debris, or misaligned parts that could be binding the mechanism. You’ll perform a targeted latch inspection and basic lever maintenance to regain freedom from a stuck hatch. Work methodically: clear visible debris, look for bent linkages, and test movement after each action.
- Visually clean the latch and lever pivot with a brush and rag; remove rust flakes and grit that obstruct travel.
- Apply a penetrating oil to pivot points and the latch catch; wait a few minutes, then cycle the lever gently to free seized parts.
- If the lever still won’t move, probe for dislodged internal components or consult the owner’s manual for model-specific release geometry.
Act with care to avoid breaking fragile parts. These steps prioritize liberation of the hatch while minimizing further damage; replace damaged components if freedom isn’t restored.
Alternate Access: Reach Connectors Through Cargo or Rear Seat
Fold the rear seats or remove the rear seat bottom to create a clear path to the liftgate area. Remove cargo trim panels and floor covers to expose the wiring and access panels. Inspect the connector plugs, reseat or reconnect them as needed, and consult the owner’s manual for model-specific diagrams.
Access Via Folded Seats
When the 4Runner’s liftgate is unresponsive due to a dead battery, lower the rear seats to create a clear passage from the cabin into the cargo area so you can reach the tailgate mechanism or wiring harness. Use seat folding to lay seats flat for direct cargo access; this lets you reach connectors, the manual release near the latch, or pass tools through without removing trim. Verify seat latches are secure in the folded position before reaching in. Consult the owner’s manual for the release location and any model-specific cautions.
- Fold seats flat, clear obstructions, and secure headrests.
- Reach through cargo access to locate manual release or connectors.
- If seats don’t fold fully, reposition items to improve reach.
Remove Cargo Trim Panels
Having folded the seats and cleared a path, you can remove the cargo trim panels to access the liftgate wiring harness. Locate fasteners and use appropriate cargo area tools—screwdriver, panel popper, socket—matching trim panel materials to avoid damage. Unscrew visible screws, then work perimeter clips free with steady, even force; hidden screws or fasteners may be tucked behind covers or near taillights, so verify before prying. If using the rear seat route, maintain the cleared passage and protect trim edges. Once panels are off, identify the harness routing without disconnecting plugs yet; note clip locations and cable ties so you can restore panels securely. Consult the vehicle service manual for model-specific diagrams and torque or clip specifications.
Inspect And Reconnect Plugs
Access the rear hatch panel and remove any screws or covers to expose access points, then crawl through the cargo area or fold down the rear seat to reach the liftgate connectors and actuator. Peel back the vapor barrier carefully; you’re doing plugs inspection and connection troubleshooting to free the hatch from a dead battery’s hold. Work deliberately, avoid cutting the barrier, and note connector orientations before disconnecting.
- Locate the actuator and wiring harness, confirm plug seating and visible damage.
- Re-seat any loose plugs, clean contacts with electrical cleaner, secure locking tabs.
- Manually test the latch by applying 12V or operating the actuator lever.
Test the liftgate before reassembly; restore panels only after reliable operation is confirmed.
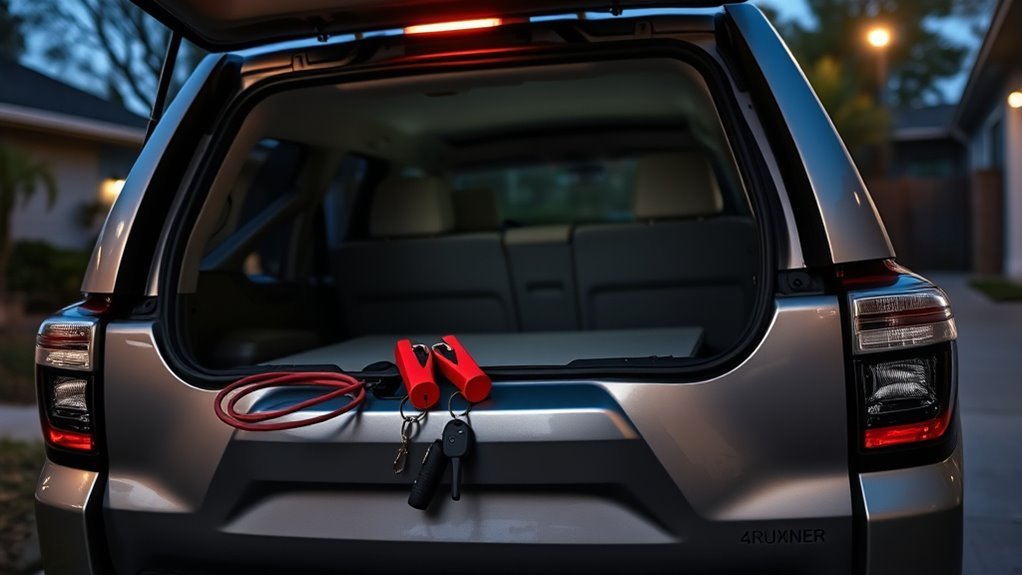
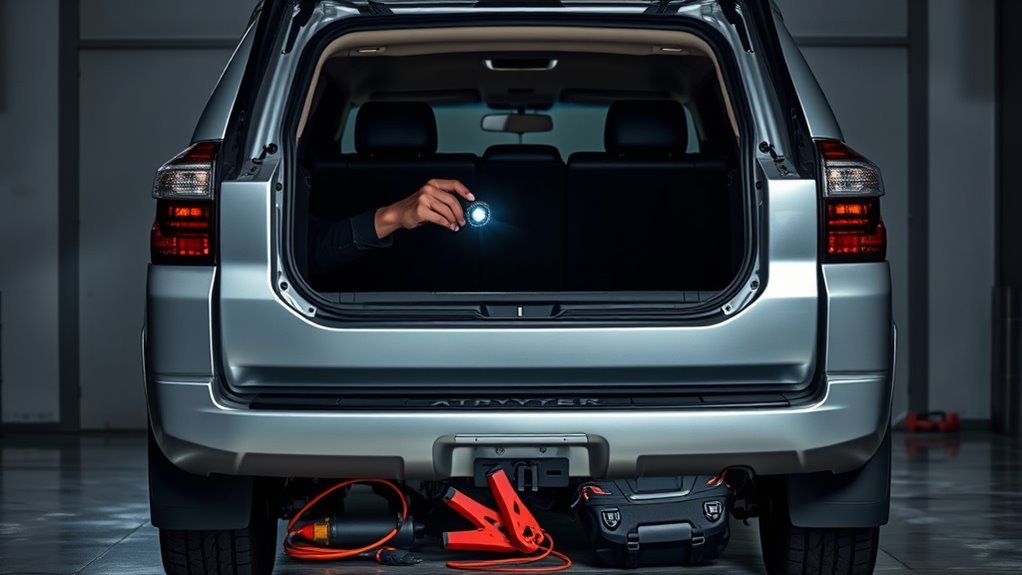
Use a 12V Booster or Jump Pack Safely to Open the Hatch
If your 4Runner’s battery is dead, use a 12V booster or jump pack to restore enough power to operate the liftgate: connect the booster’s positive lead to the vehicle’s positive terminal under the hood, attach the negative lead to a clean metal grounding point away from the battery to prevent sparks, confirm correct polarity, let the booster charge the battery for a few minutes, then attempt the electronic hatch release; if it still won’t open, remove the interior panel and use the manual release latch. Choose an appropriate booster type rated for 12V automotive use and compact storage. Inspect and maintain your jump pack as part of routine battery maintenance: check charge level, terminals, and casing integrity. With leads attached and polarity verified, allow a brief charge period before testing the hatch. If electronics respond, open the liftgate and keep the booster connected while you start the engine or access service. If the hatch remains locked, proceed to manual panel removal and latch actuation to regain access and freedom.
Avoid Electrical Mistakes: Backfeed, Wiring, and ECM Damage
When you apply external power to the 4Runner, isolate the source with a relay or dedicated isolation device to prevent backfeeding into the vehicle harness. Verify all wiring and connectors match the factory specifications and use fused leads to avoid shorts that could propagate to the ECM. Install a switched control for the external supply and consult the service manual before any connections to protect the ECM from surges or incorrect polarity.
Prevent Backfeeding Risks
Because improper connections can let an external pack feed voltage back into the Runner’s wiring, you should always isolate any auxiliary power with a relay or similar device to protect the ECM. Use relay isolation and backfeeding prevention as primary design rules: wire the relay coil to an ignition-switched source or a dedicated control so the auxiliary pack can never directly energize vehicle circuits. Mount fuses close to the external pack, use correct gauge wire, and label connections. Test with a multimeter before finalizing.
- Use a SPDT relay wired to interrupt the pack positive; control from a switched 12V source.
- Fuse the external battery at its positive terminal and route ground to chassis.
- Inspect and secure terminals; verify no voltage appears on vehicle circuits when pack is disconnected.
Protect The ECM
Although you can hook an external pack to the liftgate for convenience, you must isolate the vehicle’s ECM from that source to prevent backfeed and catastrophic module damage. You’ll perform ECM isolation via a dedicated relay circuit that separates external power from the vehicle harness. Install a normally open relay controlled by a fused ignition or accessory feed so external packs can’t backfeed when the vehicle is off. Verify voltage/amperage compatibility and use inline fuses sized to OEM specs. Inspect wiring for chafing and repair with heat-shrink and proper terminals. Follow manufacturer guidelines to preserve warranty. You’re freeing yourself from risky jury-rigs by using Relay installation and disciplined wiring practices.
| Task | Requirement |
|---|---|
| Relay installation | Fused, N/O relay |
| Wiring check | No frays, OEM spec |
Preventive Steps: What to Store and How to Test the Release
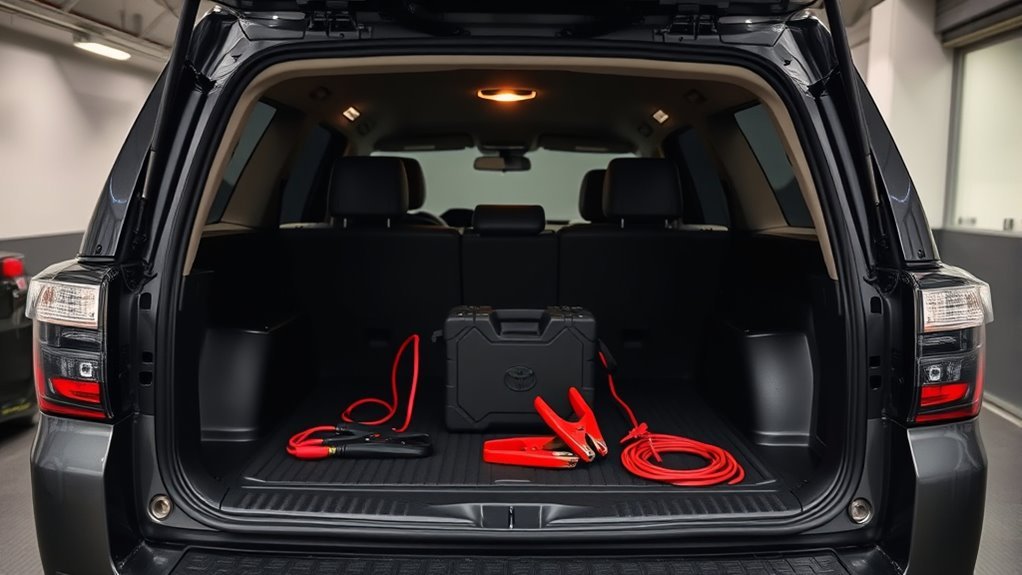
If your 4Runner’s battery fails, having the right gear and a practiced routine lets you open the liftgate quickly and safely. You’ll store a portable battery jump starter and basic tools so you’re not trapped, and you’ll incorporate routine checks into your battery maintenance schedule. Learn the location of the manual release, keep a screwdriver and flashlight in the cabin, and follow the owner’s manual when testing.
- Keep a charged portable jump starter, compact screwdriver, and small flashlight in a labeled pouch near the cargo area.
- Inspect the manual release cover and linkage every 3 months: remove the panel, verify free movement, and re-lubricate pivot points per manual specs.
- Perform a functional test quarterly: with power off, operate the manual release to confirm the liftgate unlatches; record results and address binding immediately.
You’ll act deliberately, avoid improvisation, and maintain readiness so a dead battery never confines you.
Permanent Fixes: Mechanical Handles and Relay-Isolated Backup Power
Alongside storage and routine checks, you can implement permanent fixes that remove reliance on the vehicle battery: fit a mechanical Rav4-style handle and install a relay-isolated backup power circuit. First, assess mechanical advantages of the Rav4 handle: measure mounting points, latch engagement, and lever throw. Fabricate brackets to match 4Runner sheetmetal, drill pilot holes, and torque fasteners to spec. Test manual operation repeatedly to confirm consistent release without electrical input.
Second, design a relay-isolated power solution using an 18650 battery pack with a charging circuit and a fuse. Mount the pack in a protected enclosure near the liftgate. Wire the pack to the liftgate actuator through a relay whose coil is driven only when you enable a dedicated switch; this prevents backfeeding into vehicle electronics. Include a diode and voltage monitoring for safety. Inspect connections and switch function during routine maintenance so your permanent fixes give you true liberation from a dead main battery.
Frequently Asked Questions
Can I Manually Open My Trunk?
Yes — you can manually open the trunk: locate the emergency access, remove the cover or rear panel, pry if needed, reach the manual trunk release, and pull to gain access despite a dead battery; consult your manual.
Conclusion
You’ve got the steps and precautions to get that 4Runner hatch open and avoid electrical damage. Remember the one time I used a jump pack and found the manual lever stiff from rust — like a frozen zipper that needed patience and a little WD-40 — and the pack brought power in seconds. Keep a compact jump pack, basic trim tools, and dielectric grease; test the manual release annually so you’re never caught out with a dead battery.