To change your Toyota Camry’s engine air filter, first disconnect two wiring connectors and gently lift the harness. Remove any clips with a flathead screwdriver. Take out the old filter, inspecting it for dirt or blockages. Clean the housing area to avoid contamination. Install the new filter, ensuring it aligns with the airflow direction. Press it snugly into place and reconnect all wiring securely. Need more tips on maintenance timing and disposal? There’s more you should know.
Understanding Why Air Filter Maintenance Matters
Maintaining your Toyota Camry’s air filter is essential because it directly impacts engine performance and fuel efficiency. A clean air filter can enhance fuel efficiency by up to 10%, ensuring your engine runs smoothly and effectively. When dirt and debris are kept out, you not only prolong engine life but also minimize wear and tear. Clogged air filters hinder airflow, leading to decreased acceleration and reduced horsepower, which can diminish your driving experience. By replacing the air filter at the recommended intervals—typically every 15,000 to 30,000 miles—you maintain ideal airflow, contributing to better engine performance. Regular inspections also allow you to catch potential issues early, preventing costly repairs down the line. Ultimately, prioritizing air filter maintenance not only enhances the air quality entering your engine but liberates your vehicle from unnecessary strain, ensuring an efficient and enjoyable ride.
Tools You’ll Need for the Job
To successfully change your Toyota Camry’s air filter, you’ll need a few essential tools. Gathering the right equipment not only streamlines the process but also guarantees you maintain your vehicle efficiently. Here’s a quick list to help you prepare:
| Tool | Purpose |
|---|---|
| Flathead screwdriver | Pry off clips or covers securing the air filter housing |
| Pliers | Disconnect wiring connectors |
| Clean cloth/rag | Wipe down the air filter housing |
| Safety gloves | Protect your hands from dirt and grease |
| Vacuum | Clean the area around the air filter housing |
Consider the different filter types available for your Camry. Regular maintenance tips include inspecting your air filter every 15,000 miles. This guarantees peak engine performance and longevity. With these tools in hand, you’re ready to tackle the job confidently.
Step-by-Step Guide to Removing the Old Filter
To remove the old filter, you’ll need a few basic tools and should take safety precautions to protect yourself and your vehicle. Start by inspecting the old filter for wear or clogging, as this will inform your next steps. With everything in place, you can proceed with the removal process efficiently.
Tools Required For Removal
When changing the air filter in your Toyota Camry, you’ll need a few essential tools to make the process smooth and efficient. Gather a socket wrench, a flathead screwdriver, and safety gloves. These tools will help guarantee you can comfortably access the air filter assembly and perform necessary maintenance.
| Tool | Purpose |
|---|---|
| Socket Wrench | To remove screws from housing |
| Flathead Screwdriver | To pry open clips or covers |
| Safety Gloves | To protect your hands |
Using the right tools not only simplifies the removal of different filter types but also promotes better maintenance tips for your vehicle. With these in hand, you’re ready to proceed with the removal process.
Safety Precautions To Take
Before you begin removing the old air filter, it’s essential to prioritize safety. First, always wear safety gloves and goggles; these will protect your hands and eyes from debris. Make certain the engine is turned off and completely cool to prevent burns or electrical issues. Next, disconnect the negative battery terminal to avoid accidental electrical shorts while handling wiring. For effective filter maintenance, use a clean cloth to wipe any dirt around the air filter housing before removal, preventing contaminants from entering the engine. Finally, refer to your vehicle’s service manual for specific safety instructions tailored to your Toyota Camry model, making sure you follow the correct procedures throughout the process. Safety gear is your first line of defense.
Inspecting The Old Filter
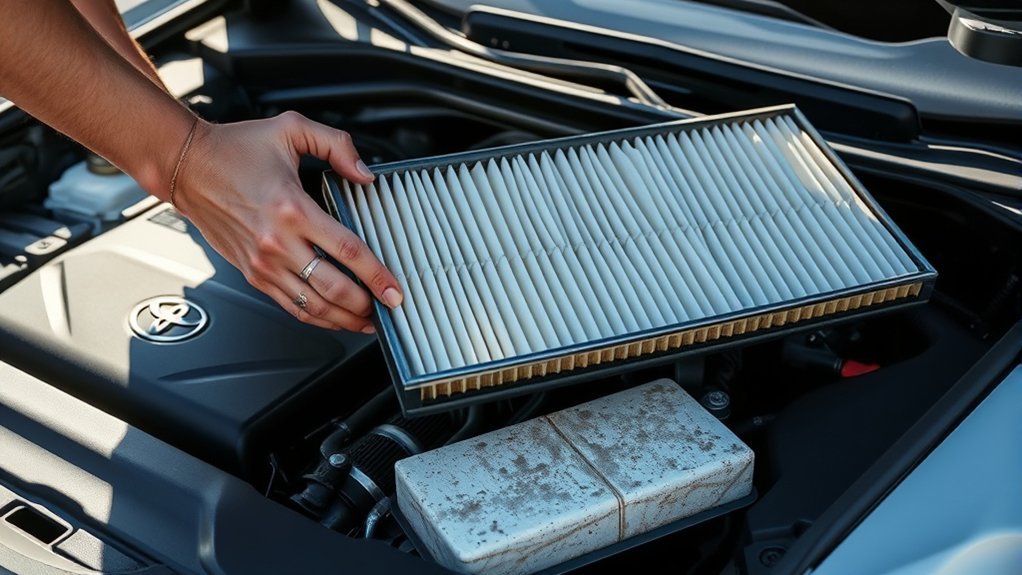
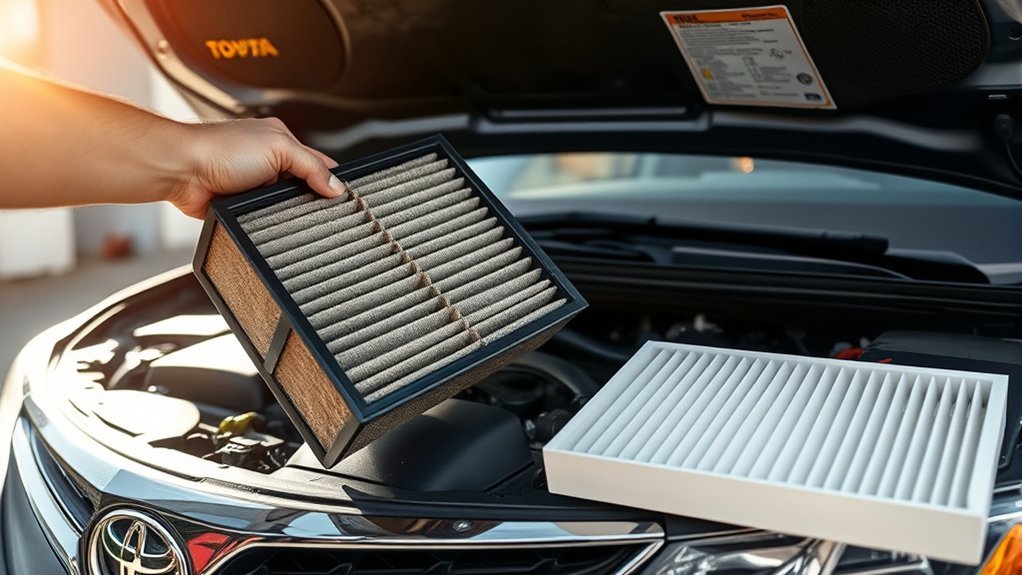
As you prepare to inspect the old air filter, start by carefully lifting the wiring harness to gain better access. Disconnect the two connectors for easier maneuverability. Next, gently lift and pull the air filter assembly to the left to remove it from its housing. With the old engine air filter in hand, examine it for signs of wear indicators such as dirt, blockages, or tears. These issues can greatly affect filter efficiency and overall engine performance. Pay close attention to the edges for any damage; even small tears can compromise filtration. Verify your workspace is clean to prevent debris from entering the engine during this inspection. A thorough check now sets the stage for peak performance later.
Installing Your New Air Filter: A Simple Guide

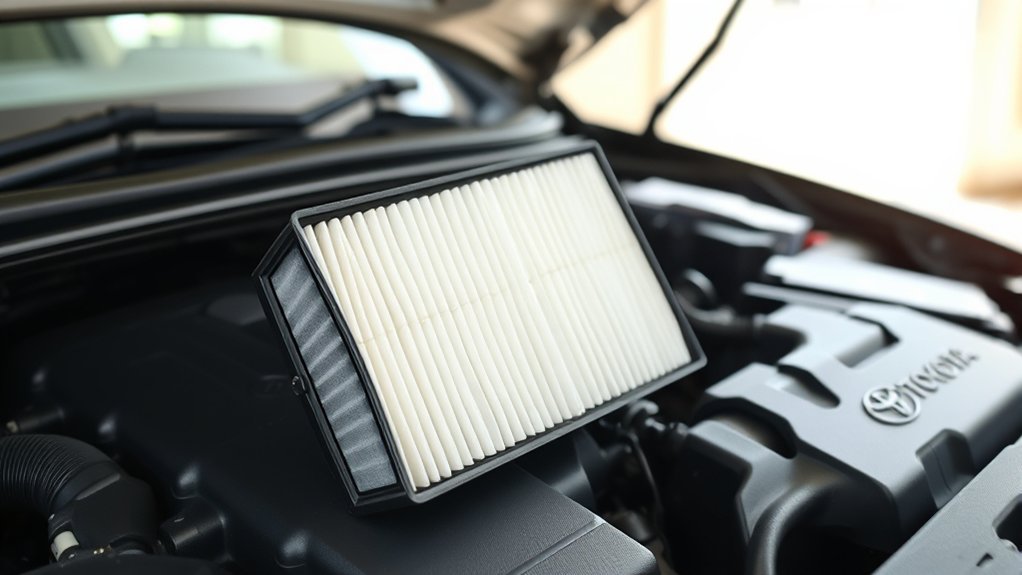
Now that you’ve removed the old filter, it’s time to install the new one. Carefully align the filter according to the manufacturer’s specifications for proper airflow, then secure it snugly in place. After ensuring a tight fit, double-check that everything is locked and sealed to prevent any air leaks.
Proper Filter Orientation
Making certain the correct orientation of your new engine air filter is essential for peak performance in your Toyota Camry. Proper filter alignment guarantees ideal filter airflow, preventing engine performance issues. Follow these steps:
- Check the airflow direction indicated on the filter.
- Align the filter with the housing’s airflow direction.
- Make sure it fits snugly into its designated slots.
- Verify any rubber seals or gaskets are seated properly.
- Double-check that the filter is fully seated before securing the assembly.
Securing the Filter
After positioning your new air filter, insert it into the housing, making certain it’s fully seated and aligned with the designated slots. Proper filter alignment is essential; any misalignment can restrict airflow and negatively impact engine performance. Once you’ve positioned the filter, double-check for a snug fit. Secure the assembly on both sides to guarantee it stays stable and prevents vibrations.
| Action | Importance | Result |
|---|---|---|
| Verify proper fit | Prevent air leaks | Maintains ideal airflow |
| Lock assembly | Stabilizes components | Reduces movement |
| Inspect for obstructions | Confirms installation | Assures efficiency |
With your air filter securely in place, you’re ready to reconnect the wiring.
Final Fit Check
A final fit check is essential to confirm your new air filter is properly installed and functioning at its peak. This step guarantees maximum filter efficiency and minimizes airflow impact. Follow these steps for a thorough check:
- Confirm the filter’s orientation, aligning it with any directional arrows.
- Press down gently to verify the filter is fully seated in its housing.
- Run your fingers around the edges to check for gaps or misalignments.
- Verify that the filter is securely locked in place on both sides.
- Inspect for any obstructions that could interfere with airflow.
Securing the Filter and Reattaching Components
Once you’ve installed the new engine air filter, make certain it’s fully seated in the housing and aligned with the designated slots to prevent air leaks. Next, reattach the two connectors securely; listen for the click to guarantee proper connection and maintain connector security. Lock the assembly on both sides to prevent it from vibrating loose during operation.
| Component | Action Required | Verification Method |
|---|---|---|
| Engine Air Filter | Confirm proper filter alignment | Check for snug fit in slots |
| Connectors | Reattach and confirm secure connections | Listen for clicking sound |
| Assembly | Lock on both sides | Visual inspection |
| Wiring | Inspect for pinching or damage | Check routing and tightness |
| Overall Setup | Double-check all components | Verify no obstructions exist |
Finally, inspect your work to confirm everything’s tightly in place for peak performance.
Best Practices for Handling Wiring During Filter Replacement
When handling wiring during the air filter replacement, it’s essential to lift the wiring harness gently to prevent any damage to connectors or wires. Follow these wiring precautions for a smooth process:
- Disconnect two connectors for better access to the air filter area.
- Lift wires carefully, avoiding any tugging or pulling.
- Route wiring back to its original position to prevent pinching.
- Inspect wiring post-reinstallation for any damage or exposed sections.
- Secure connectors firmly to guarantee reliable electrical connections.
When to Replace Your Air Filter?
Handling wiring carefully during air filter replacement sets the stage for understanding when to replace your air filter. Generally, you should replace your engine air filter every 15,000 to 30,000 miles, but this varies with driving conditions. If you often drive in dusty or polluted areas, check your air filter more frequently to maintain peak engine performance. A clogged air filter can reduce fuel efficiency by up to 10%, making timely replacements essential for preserving economy.
During routine maintenance checks, inspect the air filter; if it looks dirty or worn, it’s a clear sign it needs replacing. Some Toyota Camry models even have a warning light for filter maintenance, so be sure to consult your owner’s manual for specific recommendations. By staying proactive about your air filter lifespan, you guarantee your vehicle runs smoothly and efficiently, liberating you from unexpected repairs.
What Happens If You Don’t Change Your Air Filter?
Neglecting to change your air filter can greatly impact your vehicle’s performance and longevity. When you skip this essential maintenance, several issues can arise:
Neglecting air filter changes can severely affect your vehicle’s performance and longevity, leading to costly repairs and decreased efficiency.
- Reduced airflow forces the engine to work harder, decreasing fuel efficiency by up to 10%.
- Dirt and debris enter the engine, increasing wear on internal components and potentially leading to costly repairs.
- Your engine may misfire or stall, undermining overall performance and reliability.
- Clogged filters can elevate emissions, risking failure in emissions tests and violating regulations.
- Regular air filter changes enhance throttle response and prolong engine life.
To maintain peak engine performance, adhere to your maintenance schedule and prioritize air filter changes. Ignoring this simple task can lead to significant long-term consequences for your vehicle.
How to Dispose of Your Old Air Filter Responsibly
After changing your air filter, disposing of the old one responsibly is essential for both your vehicle and the environment. Start by checking local regulations regarding automotive component disposal. Many auto parts stores and service centers offer recycling programs for used air filters, making eco-friendly options accessible. Before disposal, seal the used filter in a plastic bag to prevent leakage of contaminants like dirt and oil.
If local disposal options are limited, consider repurposing the old air filter for non-toxic uses, such as a dust collector for home projects. Prioritizing sustainable practices in automotive maintenance minimizes environmental impact.
| Disposal Method | Description | Location |
|---|---|---|
| Recycling Programs | Many auto parts stores accept filters | Local auto parts stores |
| Local Regulations | Check guidelines for safe disposal | City or county websites |
| Sealing in Plastic Bags | Prevents leakage of contaminants | Your home |
| Repurposing Uses | Use for dust collection or crafts | Your garage or workshop |
| Eco-Friendly Options | Choose sustainable disposal methods | Community programs |
Frequently Asked Questions
How Often Should I Check My Engine Air Filter?
You should check your engine air filter every 12,000 to 15,000 miles. Regular inspections maintain engine performance and extend the air filter lifespan, ensuring ideal airflow and efficiency for your vehicle’s overall operation.
Can I Clean My Air Filter Instead of Replacing It?
Yes, you can clean your air filter using specific cleaning methods. However, regular cleaning may reduce filter longevity; replacing it is often more effective for maintaining peak engine performance and air quality in your Toyota Camry.
What Type of Air Filter Is Best for My Camry?
Isn’t better performance what you seek? For your Camry, consider performance filters or high-quality aftermarket options. They enhance airflow and filtration, boosting your engine’s efficiency and longevity. Choose wisely for best results!
Does a New Air Filter Improve Fuel Efficiency?
Yes, a new air filter can improve fuel efficiency by ensuring ideal air quality. This allows your engine to breathe better, leading to potential fuel savings and enhanced performance. Regular replacements help maintain these benefits over time.
Will Changing the Air Filter Affect My Warranty?
Changing your air filter won’t send your warranty into a tailspin. Regular filter maintenance is essential, but as long as you follow guidelines, your warranty coverage remains intact. Keep your engine happy and efficient!
Conclusion
So, if you want your Toyota Camry to run like a well-oiled machine instead of a wheezing old man, don’t skip that air filter change. Regular maintenance keeps your engine happy and fuel-efficient—who wouldn’t want that? Just remember, ignoring the filter can lead to a dramatic performance drop, like trying to run a marathon with a pillow over your face. So, roll up your sleeves, grab that new filter, and give your Camry the revitalizing boost it deserves!