Toyota Camry Pre-Collision Malfunction: What to Do First
Last updated: July 31, 2026
A Toyota Camry pre-collision system malfunction requires a different response from a temporary “unavailable” message. First, read and photograph the exact dashboard wording. If the display says the system is unavailable because the radar or camera view is blocked, clean the exterior sensor-cover area and the outside of the windshield in front of the camera, then let fog, ice, extreme heat, or extreme cold clear. If the message says “Pre-Collision System Malfunction Visit Your Dealer,” remains after conditions normalize, or appeared after windshield, grille, bumper, or collision repair, arrange Toyota-capable diagnostics and the model-year-specific calibration procedure. Do not remove, aim, or adjust the radar sensor or windshield camera yourself.
What’s in This Article
- What Does the Exact Warning Message Mean?
- Understanding Your Toyota’s Pre-Collision System
- Common Reasons Your Camry Shows a Pre-Collision Malfunction
- How Windshield Replacement Can Affect the System
- Before You Begin: Safety and Tools
- How to Diagnose Your Pre-Collision System Issues
- Should You Check Wiring Behind the Mirror?
- What to Do If the Warning Started After Windshield Work
- How to Clean the Radar and Camera Viewing Areas
- How to Check the System After Basic Cleaning
- What If the Pre-Collision Warning Stays On?
- How to Keep Toyota Safety Sense Sensors in Good Shape
- Frequently Asked Questions
- Conclusion
Quick Answer
Clean only the accessible exterior radar-cover and windshield areas, remove obvious obstructions, and wait for temporary weather or temperature conditions to pass. A persistent malfunction message, a warning with a buzzer, collision damage, or an alert that began after windshield, grille, or bumper work needs professional scanning and possible camera or radar calibration.
Key Takeaways
- The exact message matters: “unavailable” may be temporary, while “malfunction” usually needs diagnosis.
- Clean the radar cover and the outside of the windshield, but do not touch the camera lens or move sensor mounts.
- Windshield replacement can require front-camera recalibration; grille or bumper replacement can require radar recalibration.
- Record all companion warnings because PCS, radar cruise, lane support, and other systems may share sensors.
- Do not rely on automatic collision warning or braking while the warning remains active.
Editorial method: This guide summarizes Toyota owner-manual and service guidance plus NHTSA driver-assistance safety information. It does not claim hands-on testing of a specific Camry.
What Does the Exact Warning Message Mean?
Toyota uses different messages for temporary sensor limitations, disabled settings, and system faults. The wording varies by Camry model year and market, so compare the display with your owner’s manual. Use this table as a triage guide, not as a substitute for fault-code diagnosis.
| Example Camry Message | What It Usually Indicates | First Safe Action |
|---|---|---|
| “Pre-Collision System Unavailable See Owner’s Manual” | The radar or camera cannot operate under the current conditions, often because of obstruction, weather, visibility, or sensor temperature. | Follow the display, clear visible obstructions, and allow normal conditions to return. |
| “Front Camera Vision Blocked Clean and Demist Windshield” or similar | Fog, condensation, ice, dirt, a sticker, an open hood, or another obstruction is limiting the camera view. | Close the hood, defog the glass, and clean the outside camera-viewing area. |
| “Pre-Collision System Malfunction Visit Your Dealer” | The system detected a fault or an adjustment/calibration condition that did not clear. | Arrange Toyota-capable diagnostics; do not aim or replace sensors by guesswork. |
| “VSC Turned Off Pre-Collision Brake System Unavailable” or similar | Vehicle Stability Control is disabled, which can limit pre-collision braking functions. | Restore the normal VSC setting when safe and check the owner’s manual if the message remains. |
Stop-driving warning: A PCS warning by itself does not always make the Camry undrivable. However, stop in a safe place and arrange assistance if braking or steering feels abnormal, collision damage is visible, or a red brake, steering, charging, or other serious warning appears at the same time.
Understanding Your Toyota’s Pre-Collision System
The Toyota Pre-Collision System (PCS) is a driver-assistance feature within Toyota Safety Sense. Depending on the Camry model year and equipment, it uses a front radar sensor, a windshield-mounted front camera, or both to help detect certain collision risks ahead. Toyota describes current Camry systems as capable of providing visual and audible warnings and, under specific conditions, braking support.
PCS is not autonomous driving and cannot detect every road user or hazard. NHTSA describes automatic emergency braking and forward-collision technologies as momentary driver assistance; the driver remains responsible for watching the road and controlling the vehicle.
A camera or radar problem can affect more than PCS. Dynamic Radar Cruise Control, Lane Tracing Assist, Lane Departure Alert, Automatic High Beams, or Road Sign Assist may also become unavailable, depending on the Camry’s equipment. Record every message rather than focusing on only one warning.
For a model-by-model overview of related features, see the Toyota Safety Sense guide.
Common Reasons Your Camry Shows a Pre-Collision Malfunction
The cause often falls into one of four groups: a temporary operating condition, an obstruction, a repair-related alignment issue, or an electrical/system fault. The exact warning text helps separate them.
- Radar-cover obstruction: Dirt, snow, ice, water, bugs, road film, stickers, accessories, or damage around the radar cover can prevent normal operation.
- Camera-view obstruction: Fog, condensation, ice, an oily windshield film, tint, stickers, an open hood, darkness, snow, fog, or bright light can limit the front camera.
- Temperature outside the operating range: Toyota manuals note that extreme heat or cold around the camera or radar can temporarily suspend a system until conditions normalize.
- Windshield replacement or camera disturbance: Replacement glass, camera removal, bracket position, or work around the mirror area can create a calibration requirement.
- Grille, bumper, or radar work: Impact, replacement, removal, installation, or a damaged mount can change the radar axis and require inspection or calibration.
- Wiring, communication, or module fault: A connector, harness, sensor, control module, power-supply, or network problem may store diagnostic information that requires a Toyota-capable scan tool.
- VSC or another related system is disabled or malfunctioning: Some PCS braking functions may be limited when Vehicle Stability Control or a related system is not available.
Do not assume that cleaning will fix a message that specifically says “malfunction” or “visit your dealer.” Cleaning is appropriate for an obstruction or temporary-unavailable message; a persistent fault needs diagnosis.
How Windshield Replacement Can Affect the System
On Camrys equipped with a windshield-mounted front camera, glass replacement can change the camera’s relationship to the road. Toyota’s 2025 Camry driving-support manual states that front-camera recalibration is necessary after windshield replacement. Requirements for earlier years must be checked against the exact model-year repair information.
- Camera alignment: A small change in the camera or mounting bracket can alter its field of view.
- Glass compatibility: The replacement glass and camera mounting area must match the vehicle’s specifications.
- Obstructed viewing area: Tint, stickers, residue, fog, or damage in front of the camera can block detection.
- Installation or connector problem: Work around the mirror and camera can disturb components that should be checked by the installer or an ADAS-qualified technician.
- Calibration not completed: A shop may need Toyota-specified static, dynamic, or other model-specific procedures and scan-tool functions.
If the warning began immediately after glass work, contact the installer and ask for the calibration report, pre-scan and post-scan results, and confirmation that the procedure matched your Camry’s model year. See the site’s detailed Camry windshield camera calibration guide.
Warning: Do not rely on PCS, lane support, or radar cruise while a related malfunction message remains active.
[Products Worth Considering]

This versatile sanding and polishing kit provides a complete progression of grits for smoothing, refinishing, and restoring a wide range of surfaces. Designed for wet or dry use, it includes sanding discs, backing pads, and buffing accessories that make it easy to move from aggressive sanding to fine polishing. The quick hook-and-loop attachment and reusable components help deliver efficient results on cars, wood, metal, glass, resin, and more.

Bosch High Efficiency Cabin Air Filter is designed to help deliver cleaner, fresher air inside your vehicle for a more comfortable ride. Its HEPA-style media uses a melt-blown electrostatic layer and additional static cotton layer to improve trapping of airborne particles without added chemical odor neutralizers. Built with structural ribs for added stability, it is a smart replacement choice for maintaining cabin air quality over time.

This multi-layer cabin air filter helps deliver cleaner, fresher air inside your vehicle while supporting efficient HVAC performance. Its close-meshed filtration helps reduce odors and airborne particles, and the easy-fit design makes replacement quick and simple. Designed for broad compatibility across many Toyota, Lexus, Subaru, and other select models, it is a practical maintenance upgrade for a healthier in-car environment.
Before You Begin: Safety and Tools
Park on level ground away from traffic, select Park, and set the parking brake. These steps cover only exterior cleaning and visual inspection. They do not replace Toyota’s diagnostic or calibration procedures.
- Clean microfiber cloth
- Water or an automotive-safe cleaner for the accessible exterior surface
- Windshield defogger, if condensation or ice is present
- Flashlight for a no-disassembly visual check
- Phone to photograph the exact message and companion warning lights
- Owner’s manual for the exact Camry model year
Do not use a screwdriver or trim tool around the camera. Do not spray cleaner onto the camera lens, remove the mirror cover merely to search for a fault, disconnect the battery to erase the message, or adjust a sensor mount.
[Products Worth Considering]

This A-Premium windshield washer pump is designed to restore reliable windshield cleaning performance across a wide range of compatible vehicles. It supports numerous Toyota, Honda, Lexus, Mazda, Ford, Lincoln, and other models, making it a versatile replacement choice for maintaining clear visibility in all driving conditions. Built for straightforward fitment, it helps ensure consistent washer fluid delivery when you need it most.

Rain-X WeatherBeater wiper blades deliver dependable, conventional performance designed to meet or exceed OEM standards for quality and durability. The natural rubber squeegee, galvanized steel frame, and multiple pressure points work together to provide a clean, consistent wipe while resisting cracking, rust, and corrosion. A pre-installed multi-adapter helps simplify installation on many vehicles.
How to Diagnose Your Pre-Collision System Issues
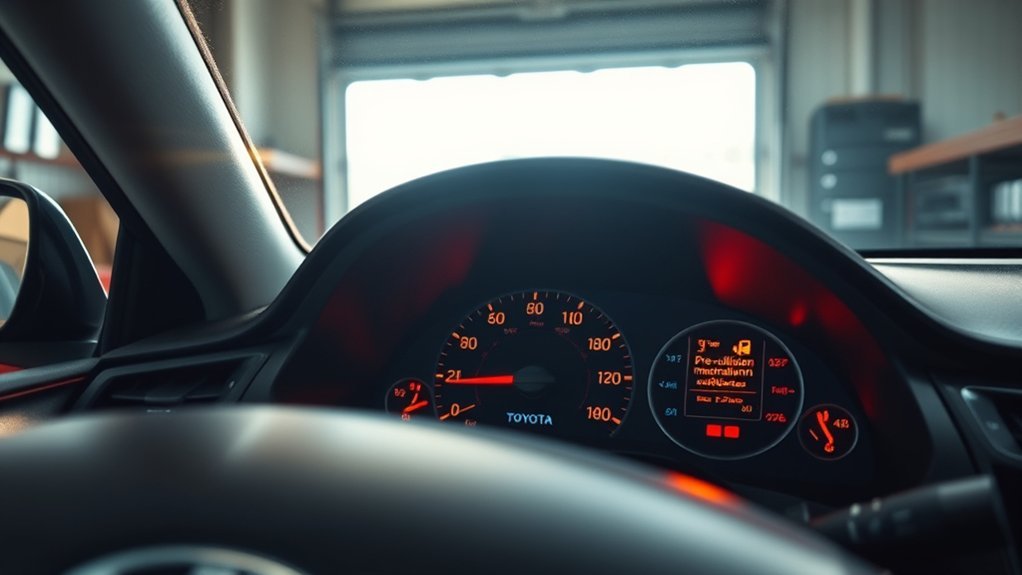
Use the following sequence to avoid replacing parts or disturbing calibration before you know what the message means.
- Record the exact display wording. Photograph the message, note whether a buzzer sounded, and record all PCS, cruise, lane, ABS, VSC, brake, steering, engine, or charging warnings.
- Check for a temporary condition. Look for heavy rain, snow, fog, glare, extreme heat or cold, condensation, ice, or a recently opened hood.
- Inspect accessible exterior surfaces. Look for dirt, snow, ice, stickers, accessories, cracks, impact damage, or a crooked grille/emblem area.
- Clean without disturbing components. Wipe the radar-cover area gently and clean or defog the outside of the windshield in front of the camera.
- Let normal conditions return. A temporary-unavailable message may clear after visibility and sensor temperature return to normal.
- Review recent work. Note any windshield, mirror-area, bumper, grille, collision, suspension, alignment, battery, or electrical work performed before the warning began.
- Restart only after the basic condition is corrected. Check whether the message returns. Do not repeatedly cycle power to hide a persistent fault.
- Request a full-system scan if it remains. A basic emissions-only OBD-II reader may not access the PCS, front camera, radar, chassis, or vehicle-control-history data. Use a Toyota-capable tool or qualified shop.
- Complete any required calibration and verification. The technician should follow the repair procedure for the exact model year and confirm that related warnings and diagnostic records do not return.
Here is a decision table for the most common situations:
| Situation | Safe DIY Check | When to Get Help |
|---|---|---|
| Temporary-unavailable or blocked-sensor message | Clean accessible exterior areas; remove obstructions; defog the windshield | If the message remains after normal conditions return |
| “Malfunction” or “Visit Your Dealer” message | Record the message and check for obvious damage only | Arrange Toyota-capable diagnostics promptly |
| Warning began after windshield replacement | Check the outside viewing area and obtain the installer’s records | If calibration was not documented or the warning remains |
| Warning began after bumper, grille, or impact repair | Look for visible damage or a crooked cover; do not adjust it | Have the radar mount, axis, codes, and calibration checked |
| Multiple chassis or electrical warnings | Photograph all warnings; avoid clearing them | Request a full vehicle health check, not only a generic engine-code scan |
[Products Worth Considering]
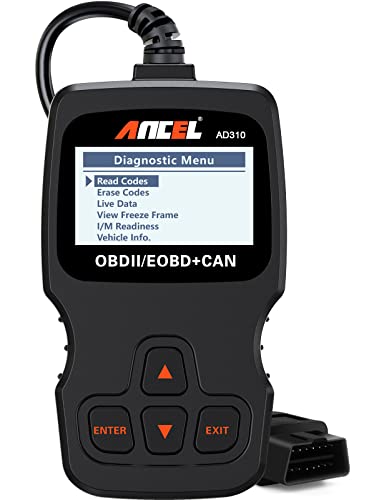
CEL Doctor: The ANCEL AD310 is one of the best-selling OBD II scanners on the market and is recommended by Scotty Kilmer, a YouTuber and auto mechanic. It can easily determine the cause of the check engine light coming on. After repairing the vehicle's problems, it can quickly read and clear diagnostic trouble codes of emission system, read live data & hard memory data, view freeze frame, I/M monitor readiness and collect vehicle information

[Easy to Use—Work Out of the Box] + [FOXWELL 2026 New Version] FOXWELL NT604 Elite scan tool is the 2026 new version from FOXWELL, designed for car owners who want to figure out the cause of issues before fixing car problems by scanning common systems like ABS, SRS, engine, and transmission. The NT604 Elite obd2 scanner diagnostic tool comes with the latest software—no need to waste time downloading software first. Plug the scanner into the OBDII port with OBDII cable to start the diagnosis.

Multi-Functions - Practical Multi-Functions OBD2 code reader features built-in OBD2 DTC lookup library, which help you to determine the cause of the engine light, read code, erase code, view freeze frame, I/M ready, vehicle information, data flow, real-time curve, get vehicle speed information, calculate load value, engine coolant temperature, get engine speed.
Should You Check Wiring Behind the Mirror?
Do not remove trim or handle camera wiring as a first diagnostic step. Toyota cautions against changing the position or orientation of the front camera, removing it, disassembling it, or modifying nearby parts such as the inside mirror or ceiling area. A forced cover, pinched harness, bent terminal, or moved camera mount can turn a simple inspection into a calibration or repair problem.
If the warning began after windshield or mirror-area work, document the timing and return to the installer or an ADAS-qualified shop rather than probing connectors yourself.
A no-disassembly visual check is reasonable only for obvious exterior issues: a loose cover, visible damage, residue on the glass, or a component that appears displaced. Do not pull wires, reseat unfamiliar plugs, apply electrical cleaner, or test terminals without the model-year wiring diagram and service procedure.
What to Do If the Warning Started After Windshield Work
Use a repair-verification checklist instead of reconnecting wires by guesswork:
- Photograph the dashboard warning. Include every related PCS, camera, lane, and cruise message.
- Check the invoice. Look for camera removal/reinstallation, ADAS calibration, pre-scan, post-scan, and calibration-result documentation.
- Ask which procedure was used. The shop should identify the Toyota procedure for your exact Camry model year, not merely say the light was reset.
- Ask whether the glass and camera bracket matched the vehicle specification. Do not accept a visual inspection alone as proof of calibration.
- Return promptly if the warning remains. The installer or an ADAS-qualified technician should inspect the camera installation, harness, diagnostic records, and calibration status.
Do not drive toward an object to “test” automatic braking. A successful dashboard reset also does not prove that camera alignment is correct.
How to Clean the Radar and Camera Viewing Areas
Cleaning helps only when dirt, snow, ice, water, fog, or another obstruction is causing temporary unavailability. Sensor location varies, but many Camrys place the forward radar behind a front emblem or radar cover and the camera high on the windshield near the rearview mirror.
- Turn the vehicle off and let hot surfaces cool.
- Remove loose snow or ice gently. Do not strike, scrape, or heat the radar cover or camera area aggressively.
- Wipe the radar-cover area with a soft cloth. Remove bugs, mud, salt, wax residue, and water film without polishing or modifying the cover.
- Clean the outside of the windshield in front of the camera. Use the defogger or wipers as appropriate for condensation, water, or ice.
- Leave the camera itself alone. Do not touch its lens or spray cleaner inside the camera housing. Toyota directs owners to contact a dealer if the inside glass at the camera or the lens needs attention.
- Remove non-factory obstructions. Stickers, tint, accessories, grille covers, badges, or mounting hardware must not block the camera or radar path.
Pro tip: After snow, freezing rain, muddy roads, or a bug-heavy highway drive, inspect the sensor-cover and camera-viewing areas before assuming a component failed.
How to Check the System After Basic Cleaning
After removing an obstruction or allowing a temporary condition to clear, restart the Camry and read the entire display. Confirm whether the original warning disappears and whether any PCS, lane, cruise, VSC, ABS, brake, steering, engine, or charging warning remains.
If no warning returns, continue to drive as an attentive driver and watch for recurrence. If the message returns under normal conditions, save the photo and arrange diagnosis. An intermittent message can still leave useful diagnostic or vehicle-control-history information.
Do not test PCS by driving toward a vehicle, pedestrian, wall, box, or other target. Toyota and NHTSA both treat these systems as assistance, not a guarantee that warning or braking will occur in every situation.
Note: A cleared dashboard message does not prove that required camera or radar calibration was completed correctly after glass or body repair.
What If the Pre-Collision Warning Stays On?
A warning that remains after the radar cover and camera viewing area are clear should move from cleaning to diagnosis. Do not replace a radar sensor, camera, emblem, control module, or windshield based only on the dashboard wording.
Request a Toyota-Capable Diagnostic Scan
The technician should scan the relevant safety, chassis, camera, radar, and network modules, not only the engine computer. Ask the shop to record diagnostic trouble codes and vehicle-control-history information before clearing anything. Stored data can separate a communication fault, power-supply issue, camera fault, radar fault, or uncompleted adjustment.
A generic code reader that reports “no codes” does not rule out an ADAS problem. The scan tool and software must support the systems installed on the exact Camry.
Have Radar and Camera Alignment Checked
A clean sensor can still be out of alignment. Collision damage, a replaced grille or bumper, removed radar hardware, windshield replacement, a disturbed camera bracket, suspension work, or ride-height changes may affect what the sensors see.
Visual inspection can identify a broken mount or crooked cover, but it cannot confirm the optical or radar axis. Toyota service procedures may require targets, measured setup distances, level-floor conditions, scan-tool utilities, a driving adjustment, or a combination of steps. Use the procedure specified for the model year.
Choose a Qualified Repair Facility
A Toyota dealer or an independent shop with Toyota-capable diagnostics and documented ADAS calibration capability can perform the work. Before authorizing repairs, ask:
- Will the shop provide the pre-scan, post-scan, and calibration result?
- Does its equipment cover this Camry model year and Toyota Safety Sense generation?
- Will it inspect recent windshield, grille, bumper, collision, alignment, or electrical work?
- Will it diagnose the stored fault before recommending a sensor or module?
- Will it road-verify the vehicle according to Toyota’s procedure without using an unsafe improvised target?
If radar cruise is also unavailable, compare the symptoms with the site’s Camry adaptive cruise unavailable guide.
How to Keep Toyota Safety Sense Sensors in Good Shape
Keep the exterior radar-cover area and the outside windshield area in front of the camera clean. Avoid stickers, tint, accessories, paint, badges, grille covers, or mounting hardware in the sensor paths unless Toyota’s instructions specifically permit them.
After windshield, camera, grille, bumper, radar, collision, suspension, or alignment work, ask the repairer whether inspection or calibration is required for the exact model year. Keep the calibration report with the repair invoice.
Investigate new warnings as soon as they appear. Record the exact wording and conditions, especially if the alert is intermittent. Do not use battery disconnection or repeated code clearing as a repair because it can erase evidence without correcting the cause.
Frequently Asked Questions
Where Is the Pre-Collision Sensor on a Camry?
Many Camry models use a front radar sensor behind a grille emblem or radar cover and a front camera near the top of the windshield by the rearview mirror. Location and equipment vary by model year, so use the owner’s manual before cleaning or inspecting an area.
Can I Drive With a Pre-Collision Malfunction Warning?
The car may still be drivable, but PCS and related driver-assistance functions may be limited or unavailable. Drive as though automatic warning and braking will not operate, and arrange diagnosis promptly. Stop driving if braking or steering feels abnormal, collision damage is present, or another serious warning appears.
Will Cleaning the Sensor Clear the Warning?
Cleaning may clear a temporary-unavailable or blocked-sensor message caused by dirt, snow, ice, water, or windshield fog. It will not correct a damaged sensor, wiring fault, module fault, or camera/radar misalignment.
Does a New Windshield Require Camera Calibration?
For the 2025 Camry, Toyota’s driving-support manual states that front-camera recalibration is necessary after windshield replacement. Other model years must follow their own Toyota repair information, but a warning after glass work should be treated as a calibration or installation concern until verified.
Why Does My Camry Say “Visit Your Dealer”?
That wording indicates the system detected a fault or adjustment condition that needs diagnosis rather than only a temporary visibility problem. Record the exact message and request a Toyota-capable scan before parts are replaced or codes are cleared.
Can a Weak 12-Volt Battery Cause a Pre-Collision Warning?
Low or unstable voltage can contribute to electronic and communication warnings, especially during startup, but the dashboard message alone cannot prove the battery is the cause. If several unrelated warnings appear together or starting is slow, have the 12-volt system and stored codes tested before replacing ADAS parts.
Can I Reset the Warning by Disconnecting the Battery?
Disconnecting the battery may clear some temporary information, but it does not repair an obstruction, damaged component, wiring fault, or calibration error. It can also remove diagnostic evidence and create additional initialization needs. Diagnose the cause instead of using battery disconnection as the fix.
Conclusion
Start a Toyota Camry pre-collision warning diagnosis with the exact message, not with parts replacement. Clear obvious exterior obstructions and wait for temporary weather or temperature limits to pass. Do not remove trim, touch the camera lens, adjust mounts, or test automatic braking against an object. A persistent malfunction, a warning after windshield or front-end work, or multiple related warnings needs Toyota-capable scanning and model-year-specific calibration verification.
References
- Toyota Owners Manuals and Warranty Information – Toyota
- 2025 Camry Owner’s Manual Excerpt for Driving Support Systems – Toyota
- Toyota Safety Sense – Toyota
- Driver Assistance Technologies – National Highway Traffic Safety Administration