
Park on level ground, turn off the 4Runner, and lift the wiper arms to mid‑point. Confirm you have Rain‑X Weatherbeater 9 x 3 Small J‑Hook blades and gloves. Press the release tab on the arm, slide the old blade down off the J‑Hook, and discard it. Insert the hook into the blade top opening until it clicks, tug to verify lock, then lower the arm. Test for streaks or skipping and inspect the rubber; continue for troubleshooting and maintenance tips.
Quick How‑To: Replace Toyota 4Runner Wiper Blades
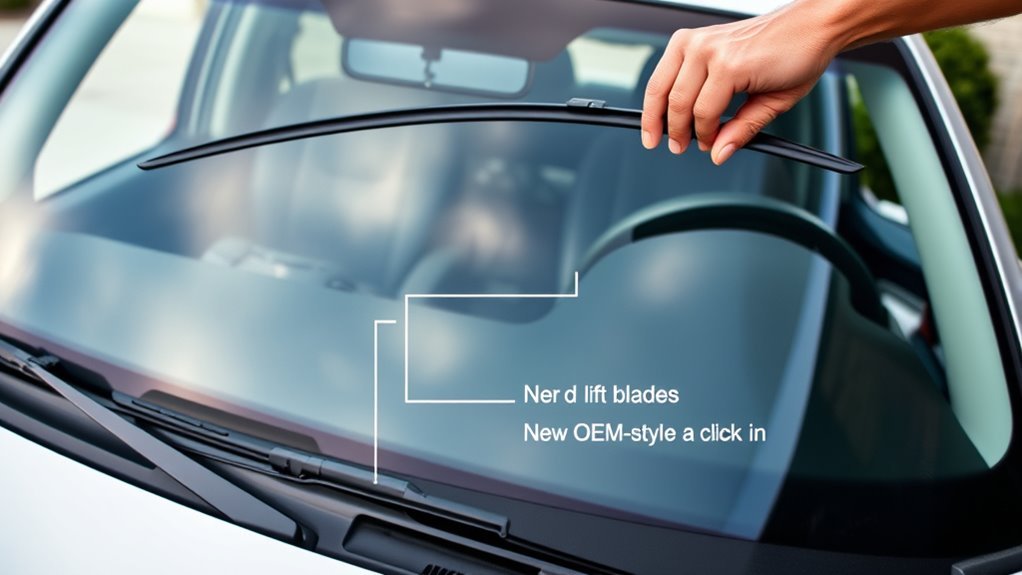
Start by parking on level ground and lifting the wiper arms to their midpoint so you can reach the blades easily. You’ll perform wiper care with deliberate steps that preserve blade longevity. First, locate the small metal tab on the wiper arm, squeeze it, and slide the old blade assembly down toward the truck to disengage. Hold the arm steady; don’t let it snap back. Align the new blade’s J‑hook with the arm, insert it, and slide until it clicks into place. Tug gently to verify the locking mechanism engaged; a secure click means proper seating. Lower the arms carefully onto the windshield to avoid impact damage. Dispose of the old blades and packaging responsibly to complete the task. This procedural sequence frees you from dependency on service bays, giving you control over routine maintenance while maximizing performance and blade longevity.
Gather Parts, Tools, and Position Your 4Runner
Before you begin, gather the new Rain‑X Weatherbeater blades (9 x 3 Small J‑Hook for a 2015 4Runner, $14.95 each) and a flat screwdriver in case the old clips stick. Position your 4Runner by running the wipers to mid‑windshield and turning the vehicle off so the arms stop half up. Lift each arm away from the glass so the blades stick out and you can work without strain.
- Confirm you have two Rain‑X Weatherbeater blades sized for the 2015 4Runner.
- Keep a flat screwdriver nearby to release stubborn clips quickly.
- Set the wiper arms upright to access attachment points safely.
- Wear gloves to protect hands and maintain grip while you work.
This step focuses on preparation and ergonomic positioning to speed wiper maintenance and support blade longevity. You’re setting conditions that free you from repetitive trips and mistakes—efficient, safe, and focused on durable results.
Identify Your Wiper Hook Type (Small J‑Hook Explained)
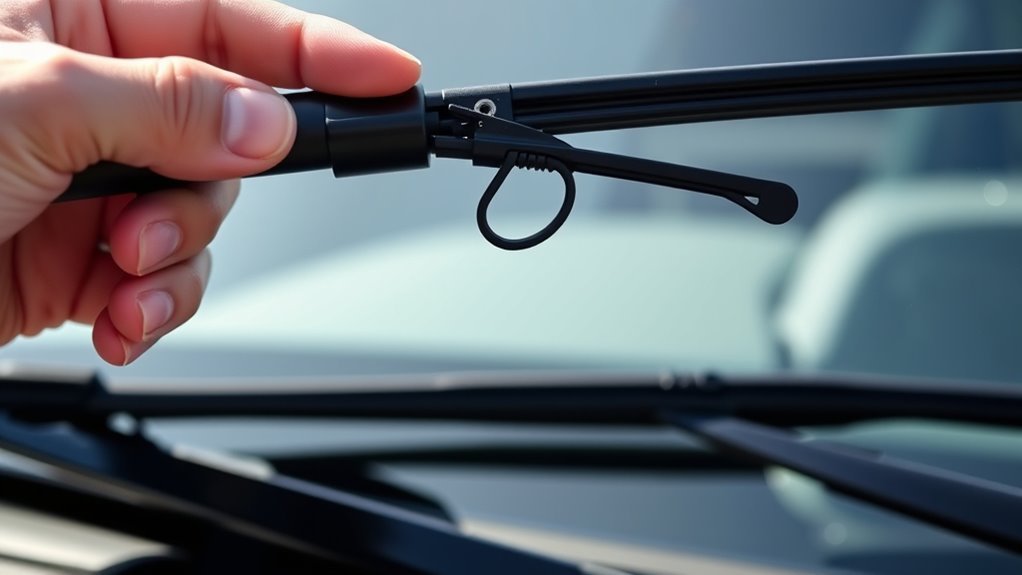
With the arms lifted and blades exposed, identify the Small J‑Hook on your 2015 4Runner by locating the curved metal hook that fits into the blade’s top opening; this style (labeled 9 x 3) is common and locks without extra hardware. You’ll recognize the Small J‑Hook among attachment types by its pronounced curved profile that cradles the blade’s connector. For accurate wiper maintenance, verify the hook’s dimensions and shape against the new blade’s specifications; mismatched attachment types cause poor seating or failure.
Visually inspect the hook for wear, deformation, or corrosion that could compromise lock engagement. The Small J‑Hook’s design enables tool‑free installation: insert the curved hook into the blade’s top slot and pull upward until you feel the positive lock. Note the release tab or button location; you’ll press it when you remove the old blade. Correct identification guarantees compatibility and lets you replace blades confidently, reclaiming control of your vehicle maintenance.
Remove Old Small J‑Hook Blades Step‑By‑Step
Position the wiper arm perpendicular to the windshield so the blade assembly is easy to access. Press the release button on the arm, lift the assembly slightly, and slide the blade downward off the small J‑hook. Use a flat screwdriver only to shift the rubber refill if it’s stuck, avoiding prying the tabs to prevent damage.
Position Wiper Arm Perpendicular
Pivot the wiper arm so it sits perpendicular to the windshield; this gives you clear access to the small J‑hook connection and prevents the arm from snapping back while you work. You’ll use precise wiper arm positioning as a foundation for efficient blade replacement techniques. Work confidently and stay safe.
- Visually confirm the arm is perpendicular and stable before touching the blade.
- Locate the small metal tab that runs parallel to the arm; it releases the assembly.
- Squeeze the tab firmly, then slide the blade assembly down the arm toward the truck until it disengages.
- Verify the old blade is fully detached and dispose of it; consult a video guide if you need visual clarification.
This procedural approach frees you from dependence on shops and empowers self‑service.
Unlock And Slide Assembly
Lift the wiper arm away from the windshield and grasp the blade assembly; locate the small metal tab running parallel to the arm, squeeze it firmly, and slide the entire blade downward toward the truck to disengage the J‑hook. You’ll free the old small J‑hook blade by maintaining steady pressure on the tab while guiding the assembly along the arm. Different blade types use similar assembly mechanisms, but confirm the 2015 model’s push‑button variant before forcing removal. Once the blade clears the hook, lift it off and set it aside for disposal. You’re reclaiming control—work deliberately, avoid bending the arm, and keep fingers clear of springs. Prepare replacement blades and reverse the steps, aligning the new assembly mechanism with the J‑hook until it locks.
Install Rain‑X Weatherbeater Blades and Check Fit

Start by turning the 4Runner off and resting the wipers midway on the windshield so you can access the arms safely; confirm the old blades use the Small J Hook (9 X 3 HOOK) and depress the release button to slide them off. Inspect wiper blade materials and gather installation tools so you’re efficient and free from dependence on service shops. Insert the J hook into the Rain‑X Weatherbeater top opening, guide the curved arm into the hook, then pull upward until it clicks.
- Align the blade center with the hook opening and seat it fully.
- Pull gently on the blade to verify the locking tab engages.
- Remove debris and discarded old blades to keep the workspace clear.
- Lower the arms carefully to avoid glass contact.
You’re reclaiming control—precise, deliberate actions replace uncertainty. Verify tactile lock and visual seating; a secure fit prevents failure. Finish by disposing of packaging and used blades, leaving the vehicle ready for the next step.
Test Wipers, Troubleshoot Common Issues, and Maintenance Tips
1. Test the wipers immediately after installation: activate the system and verify a clear, smooth wipe across the windshield without streaks or skipping. You want consistent wiper performance for safe, liberated travel.
| Check | Action | Result |
|---|---|---|
| Visual wipe | Run wipers | No streaks/skips |
| Attachment | Tug on arm | Locked in place |
| Fit type | Verify hook | Small J Hook for 2015 |
If the wipers skip or resist, stop and inspect the attachment. Resistance often means improper installation—re-seat the blade and confirm the attachment matches your 4Runner. For blade longevity, inspect rubber for cracking or splitting; replace when damaged. Clean the windshield routinely with glass cleaner to remove debris that degrades blade contact and reduces wiper performance. Recheck fasteners after a few uses to verify secure locking. These steps keep you independent on the road and reduce unexpected failures during storms. Follow this procedural routine to maintain reliable visibility and extend blade longevity.
Frequently Asked Questions
Can I Replace Blades Without Parking Wipers Midway on Windshield?
Yes, you can, but you should stop wipers in service position or manually hold arms to avoid damage. Follow wiper maintenance tips, use seasonal wiper considerations, apply steady pressure, detach blades carefully, protect the windshield.
Are Heated Wiper Blades Compatible With a 4runner?
Yes — you can fit heated wiper blades on a 4Runner. Think of winter armor freeing movement; check heated blade benefits, wiper blade materials, mounting adapter type, fuse capacity, and follow installation steps for reliable, empowered performance.
How Often Should I Replace Both Blades Versus Just One?
You should replace both blades every 6–12 months; replace one only if the other’s new. Monitor wiper blade lifespan, perform seasonal maintenance each change, inspect rubber wear and streaking, and swap both for consistent performance and safety.
Can OEM Wiper Arms Be Upgraded for Better Performance?
Boldly better: you can upgrade OEM wiper arms for boosted balance. Compare wiper blade materials, run performance comparisons, follow installation tips, and schedule wiper arm maintenance. You’ll reclaim control and resist factory limits.
Do Blade Sizes Differ Between Driver and Passenger Sides?
Yes — driver and passenger blades often differ; you’ll check blade compatibility, confirm lengths, then follow installation tips: align adapters, secure clips, test sweep coverage, and tighten arms so visibility and control empower your driving freedom.
Conclusion
You’ve swapped old, streaking blades for new Rain‑X Weatherbeaters and given your 4Runner clear sight—simple, safe, done. Like a surgeon with a scalpel, you worked precisely: confirmed the J‑hook, released the latch, slid old blades free, and snapped the new ones into place. Test for streaks, lift or reseat as needed, and inspect weekly. Routine checks keep visibility sharp and rainy drives predictable—don’t wait until visibility fails.