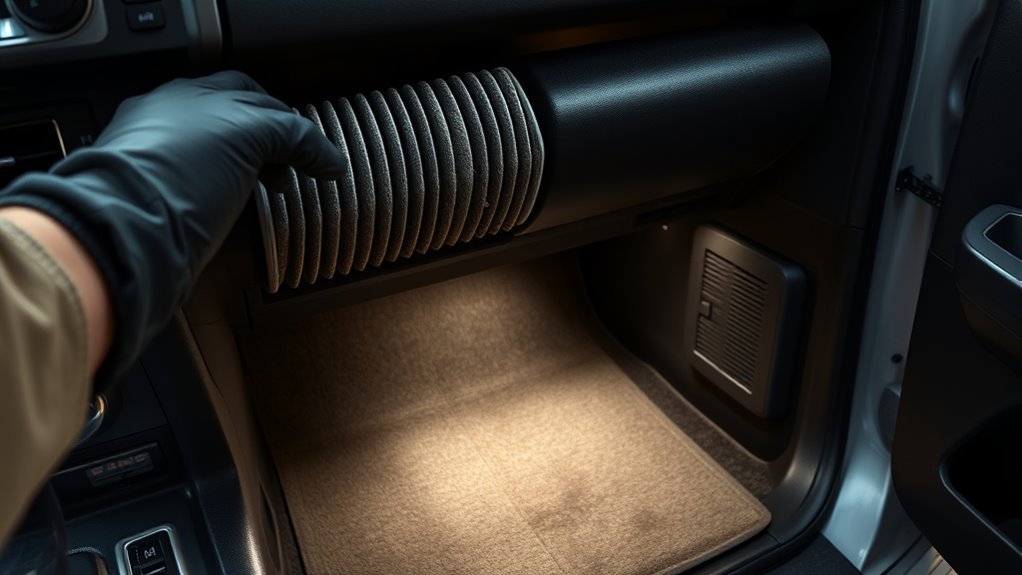
If your 4Runner smells musty, start by checking the cabin filter, HVAC intake and evaporator drain for dampness or debris — a sour odor usually means mold on wet surfaces. Remove and inspect the filter, vacuum the intake, spray a 50/50 vinegar solution into the plenum, run the fan on high to dry things, and clear the A/C drain and door seals. If smells persist, there are deeper leaks or evaporator issues you’ll want to troubleshoot further.
Is It Mold, the Cabin Filter, or a Leak?
Wondering where that musty smell’s coming from? You’ll diagnose it fast by considering three culprits: mold on the evaporator, a clogged cabin filter, or a leak. For mold identification, check for musty odors when the A/C first engages and for dampness under the dash or wet spots near the evaporator drain. A sour, persistent scent usually points to microbial growth on wet surfaces. For filter maintenance, pull the cabin air filter—if it’s dark, packed with debris, or smells stale, replace it (every 12,000–15,000 miles) to restore airflow and reduce odors. Inspect seals, door drains, and the A/C drain line for slow leaks or pooled water; standing moisture creates ideal mold conditions. Run the system in fresh-air mode and note whether the smell lessens; persistent odor despite a fresh filter and dry drains indicates deeper evaporator contamination. Act now: finding the true source frees you from repeated masking and puts you back in control.
Quick Fixes You Can Try Today (Vinegar, Lysol, Fan Drying)
You can try two fast, effective steps to cut musty odors: spray an equal mix of white vinegar and water into the HVAC intake after removing the cabin filter to neutralize smells, then run the interior fan on high for a few minutes with the A/C off to dry the ducts. Do the vinegar spray sparingly and let it sit a bit before reinstalling the filter so it can work without oversaturating components. These quick checks will tell you if moisture-related grime is the source and often clear light odors immediately.
Vinegar Spray Procedure
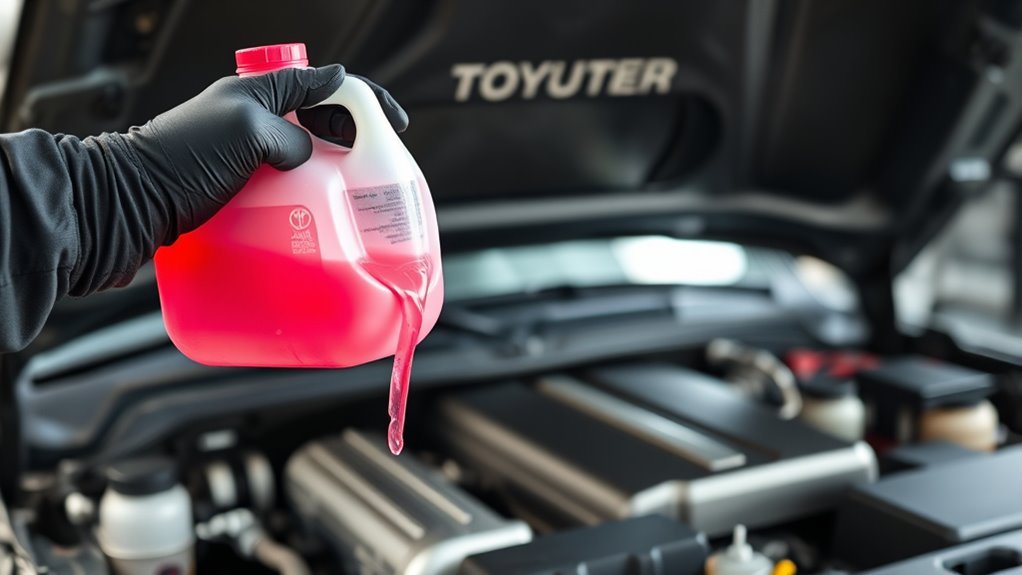
One simple, effective quick fix is to spray a 50/50 white vinegar-and-water solution into the HVAC intake with the cabin filter removed to maximize airflow; then run the engine with the fan at medium and fresh-air mode (no recirculation) so the vinegar circulates through the ducts. You’ll get immediate Vinegar benefits: acetic acid neutralizes organic odors and inhibits mildew. Spray evenly, let the solution sit in the ductwork for a few minutes, then turn the system off and let everything dry overnight for full Solution effectiveness. Replace the cabin filter every 12,000–15,000 miles to prevent recurrence. As a diagnostic check, if the smell persists after this treatment, suspect deeper moisture or drain issues. This method gives you quick control and moves you toward a fresher, liberated cabin.
Fan Drying Method
If moisture’s the culprit, run the blower on medium with fresh-air mode (no recirculation) and the A/C off for several minutes to flush and begin drying the ducts. You’ll spray a 50/50 vinegar solution into the HVAC intake after removing the cabin filter, then run the fan to push the solution through. Follow with a Lysol spray into the plenum while the fan runs to kill bacteria. Keep the fan on a few minutes after shutting A/C to finish drying and prevent mold. Replace the cabin air filter every 12k–15k miles. Turn off A/C about 10 minutes before arrival to aid moisture control.
| Action | Goal | Frequency |
|---|---|---|
| Fan run (medium) | Duct drying | As needed |
| Vinegar spray | Deodorize | After filter out |
| Lysol spray | Disinfect | When odor returns |
| Filter replace | Airflow | 12k–15k miles |
Deep‑Clean Intake, Cabin Filter, and Evaporator : Step‑by‑Step
Start by removing the cabin air filter to expose the HVAC intake so you can clear out leaves, dust, and other debris that trap moisture and feed mold. Use basic cleaning tools—vacuum, soft brush, and spray bottle—and follow a maintenance schedule so this step becomes routine. Vacuum the intake and surrounding cavity, removing visible gunk.
Mix 50% white distilled vinegar and water in the spray bottle. Spray the solution into the HVAC intake duct and onto accessible evaporator surfaces, targeting areas where moisture pools. Run the fan on high for several minutes to pull the vinegar through the evaporator and ducts; this circulates the biocide and dries surfaces.
Inspect evaporator coils visually; if you see residue, gently brush or use a coil cleaner labeled for automotive use. Consider a mold inhibitor after cleaning for added protection. Finish by reinstalling a fresh cabin filter and recording the task on your maintenance schedule to prevent recurrence and reclaim a fresh, liberated cabin.
Inspect & Clear AC Drain, Door Seals, and Common Leak Points
Next, check the AC drain to make sure condensate is flowing freely—blockages trap moisture and feed musty odors. Inspect all door seals for cracks, compression loss, or trapped debris that can let water into the cabin. If you spot damp areas around the windshield, sunroof, or floor mats, trace and seal those leak points before mold sets in.
Check AC Drain
Because moisture trapped in the HVAC system is a common source of musty smells, check the AC drain and nearby seals for clogs or damage that let water accumulate in the cabin. You’ll start AC maintenance by locating the drain tube under the vehicle, then run a thin flexible brush or compressed air through the line to remove sludge and debris causing drainage issues. Listen for steady water flow when the system runs; intermittent dripping or backups signals a clog. Inspect the HVAC box and sunroof drainage channels for signs of leaks or pooled water that feed mold. Clear any blockages, dry the area, and recheck after a drive. Keep drainage pathways open and you’ll cut off the moisture that fuels musty odors.
Inspect Door Seals
While you’re checking drainage and vents, inspect each door seal for cracks, compression, or missing sections that let water and humidity into the cabin. You want tight seals to stop leaks and support cabin liberation from odors. Focus on visible splits, flattened areas, and spots where the seal lifts away from the frame.
- Peel back and run your fingers along seals; feel for soft spots, voids, or detachment that signal failed door seal maintenance.
- Test by slowly pouring a small amount of water near common leak points (roof rack bolts, windshield area) and watch for ingress; repair or replace seals that fail.
- Keep HVAC grill and cabin air filter clear and replaced per schedule to aid moisture prevention and stop mold before it starts.
Prevent AC Smells in Your 4Runner: Daily & Monthly Habits
If you want to keep musty smells out of your 4Runner, adopt a few simple daily and monthly habits that stop moisture and bacteria before they start. For daily maintenance, run the heater at full blast for a few minutes after using the A/C to dry the system and reduce condensation. Use fresh air intake instead of recirculation to move humidity out and bring in clean air—this is key to moisture management.
Monthly, change the cabin air filter every 12,000–15,000 miles and inspect the A/C drain lines for clogs or puddles; clear any blockages you find. Periodically spray a disinfectant into the intake with the fan running to kill bacteria and odor sources. These checks take minutes but prevent progressive mold buildup and reclaim control of your cabin air. If you stay disciplined with these habits, your 4Runner will stay fresh and free from musty, trapped smells.
When to Call a Pro (Evaporator Replacement & Professional AC Service)

When your 4Runner still smells musty after thorough DIY cleaning and routine maintenance, it’s time to get a pro involved—these persistent odors often point to hidden moisture, a clogged drain, or a failing evaporator that DIY fixes won’t reach. You want freedom from the smell, not repeated band-aids. A technician will diagnose evaporator issues, locate leaks, and inspect for water pooling that signals core replacement.
- If you hear odd noises or feel weak airflow, suspect compressor problems or blockages that need expert testing.
- Visible water accumulation near the evaporator or consistent damp carpets means the core or drain is compromised.
- Recurring odor after ozone or fog treatments calls for professional disassembly and deep cleaning or evaporator replacement.
Call professional A/C service to prevent bigger repairs, restore air quality, and reclaim a fresh, liberated cabin you can trust.
Frequently Asked Questions
Why Does My Toyota AC Smell Bad?
Your Toyota AC smells bad because mold, mildew, or a clogged cabin filter trap moisture and debris; you should prioritize AC maintenance and odor prevention by replacing filters, running fresh air mode, and disinfecting the system regularly.
Why Does My Cabin Smell Musty?
Your cabin smells musty because mold growth forms on the evaporator and filters when humidity levels stay high; you’ll diagnose clogged filters, stagnant condensation, and poor ventilation, then reclaim fresh air by cleaning, replacing parts, and improving airflow.
How to Get Rid of Musty AC Smell in Car?
Don’t worry—you’ll breathe fresh air again: run the heater to dry vents, clear drainage, spray disinfectant into intake, replace the cabin air filter for air filter maintenance, and manage humidity control so mold can’t hold you back.
Conclusion
You’ve pinpointed the likely culprits — mold, a clogged cabin filter, or a leak — and tried quick fixes like vinegar, Lysol, and fan drying. If odors persist after cleaning the intake, filter, evaporator and clearing the AC drain, don’t drag your feet; inspect door seals and common leak points or get professional AC service. Small, regular checks keep the stink at bay and save you from costly repairs down the road.