Your Toyota Tundra’s intercooler system cools the compressed air coming from the twin turbochargers before that air enters the engine. Cooler charge air is denser, more stable, and easier for the ECU to manage under towing, off-road use, hot weather, and repeated wide-open-throttle pulls. On 2022–2026 Tundra and Sequoia models, the main upgrade discussed here is not a full intercooler replacement; it is the STILLEN Intercooler Reservoir Relocation Kit, which moves the intercooler reservoir away from the radiator reservoir to reduce heat soak and improve temperature recovery.
Quick Answer
The Toyota Tundra intercooler cools compressed turbo air so the engine can maintain consistent power under load. The STILLEN kit does not replace the intercooler core; it relocates the intercooler reservoir to separate it from radiator heat. That can reduce heat soak and speed recovery after towing, idling, or repeated throttle pulls.
Key Takeaways
- The 2022–2026 Tundra uses turbocharged powertrains, so charge-air temperature directly affects consistency, timing, knock resistance, and throttle response.
- The OEM intercooler system already cools compressed intake air; the STILLEN upgrade mainly addresses reservoir placement and heat soak, not the intercooler core itself.
- STILLEN’s manufacturer testing reports a return to operating temperature in about 2 minutes, while the OEM system remained heat-soaked after 8+ minutes.
- Use the correct Toyota coolant, bleed the system carefully, and check for leaks after installation.
- If your Tundra has major power loss, warning lights, or rough running, scan for codes and check your VIN for recalls before assuming the intercooler is the only cause.
Intercooler Basics and Why It Matters for Your Tundra
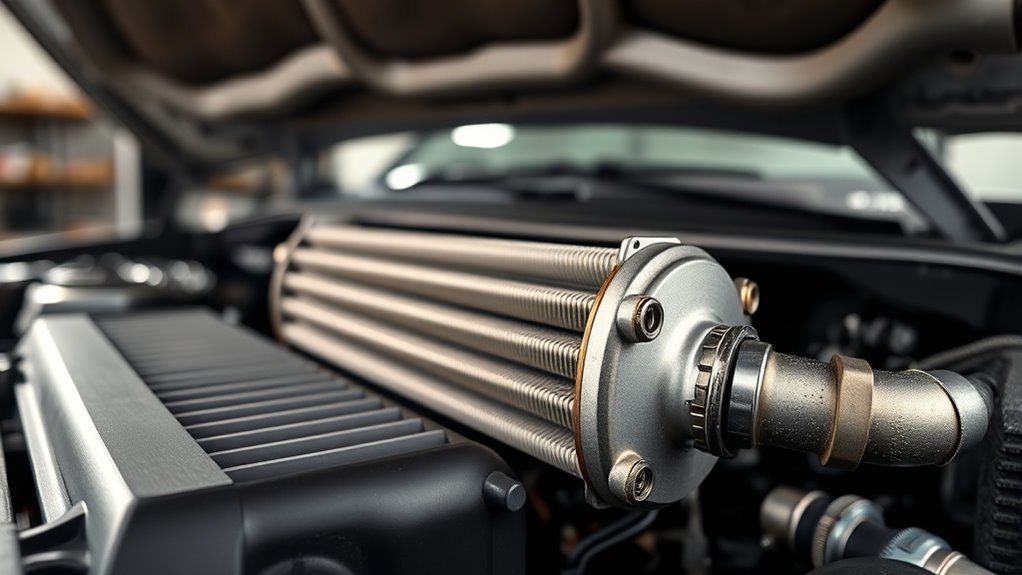
A turbocharger compresses incoming air so the engine can make more power. The downside is heat: compressed air gets hotter, and hot air is less dense. As Garrett Motion explains, the intercooler’s job is to remove heat from the charge air so denser air reaches the engine.
That matters on the Tundra because Toyota’s current full-size truck relies on twin-turbo V6 power. Toyota lists the i-FORCE twin-turbo V6 at 389 horsepower and 479 lb.-ft. of torque, while the i-FORCE MAX hybrid version is rated at 437 horsepower and 583 lb.-ft. of torque. Those power levels depend on the ECU managing boost, fuel, spark timing, knock control, and charge temperature together.
When intake-air temperatures climb, the engine management system may reduce timing, enrich the mixture, or limit torque to protect the engine. You may feel that as softer throttle response, less consistent power, or slower recovery after a hard pull. The intercooler system helps prevent that by controlling heat before it becomes an ECU problem.
Note: On this Tundra platform, “intercooler upgrade” can mean different things. A full charge-air cooler replacement changes the intercooler core. The STILLEN part discussed here is a reservoir relocation kit that targets heat soak in the cooling layout.
Why Intake-Air Temperature Affects Power and Engine Life
Intake-air temperature affects how much oxygen reaches the cylinders. Cooler air is denser, so each combustion event can support more stable power. Hotter charge air does the opposite: it lowers oxygen density and increases knock risk, especially under boost, towing load, high ambient temperature, or repeated full-throttle use.
Intake Temperature Effects
When intake temperature rises, the ECU has less room to run aggressive spark timing and boost targets. That does not always show up as an immediate check engine light. Sometimes the truck simply feels less sharp after sitting in traffic, climbing a grade, towing, or making repeated highway pulls.
- Cooler charge air supports higher air density and more stable torque.
- Stable temperatures help the ECU maintain predictable timing and fueling.
- Heat control reduces knock risk under boost.
- Faster recovery after heat soak helps the truck feel more consistent from pull to pull.
Combustion Efficiency Risks
Heat does not automatically damage an engine, but sustained high charge temperatures can push the system closer to knock limits. When that happens, the ECU may protect the engine by pulling timing or changing fuel delivery. That protection is useful, but it can make the truck feel inconsistent.
For a Tundra owner, the practical goal is not chasing one peak dyno number. The goal is keeping charge temperatures repeatable so the truck behaves the same while towing, off-roading, merging, climbing grades, or driving in summer heat.
Air-to-Air vs. Air-to-Water Intercoolers: Pros and Cons
Intercoolers generally use either air-to-air or air-to-water heat exchange. An air-to-air intercooler sends hot compressed air through a core that sheds heat into outside airflow. It is simple and usually lighter, but performance can depend heavily on vehicle speed, airflow, grille packaging, and ambient temperature.
An air-to-water system transfers heat from compressed air into coolant, then sends that coolant to a heat exchanger. This can package well in tight engine bays and can offer stable temperatures when designed properly, but it adds a pump, reservoir, coolant lines, bleeding requirements, and more possible leak points.
| Type | Strengths | Tradeoffs |
|---|---|---|
| Air-to-air | Simple, fewer parts, no coolant circuit | Can depend more on vehicle speed and airflow |
| Air-to-water | Compact packaging and strong heat transfer potential | Adds coolant, pump, reservoir, bleeding, and leak-check steps |
The Tundra discussion is mainly about improving the factory air-to-water cooling layout, not converting a traditional air-to-air system. That distinction is important because the STILLEN kit targets reservoir heat soak rather than the basic existence of an intercooler.
[Products Worth Considering]

DESIGNED TO INCREASE HORSEPOWER AND TORQUE: Dyno-tested with up to 50% more airflow than restrictive factory box air filter and intake tube
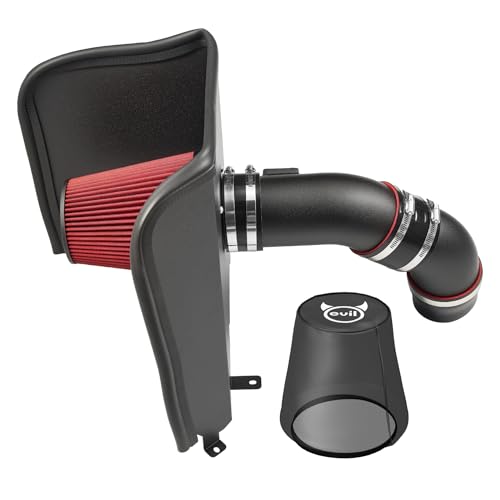
【Compatibility & Easy Installation】- EVIL ENERGY cold air intake compatible for 2012-2021 Toyota Tundra 5.7L. Please confirm fitment before purchase. Installs in 40 minutes with basic tools – no cutting or drilling required, thanks to the included step-by-step instructions.

[Compatibility] - EVIL ENERGY cold air intake compatible for 2012-2021 Toyota Tundra 5.7L. Simple installation completed in about 40 minutes using standard hand tools; no cutting or drilling needed, supported by clear, guided instructions
Toyota’s Shared-Reservoir Design Problem and Its Impact
STILLEN identifies the OEM layout as a heat-soak problem because the radiator reservoir and intercooler reservoir share a wall. In that layout, radiator heat can warm the intercooler fluid before the truck is even under heavy boost. The result is a smaller temperature buffer when you tow, idle, climb, or accelerate repeatedly.
Shared Reservoir Heat Transfer
The issue is not that the Tundra lacks an intercooler. It is that the intercooler fluid can start at a disadvantage when it is exposed to heat from the radiator side of the system. If the coolant entering the intercooler circuit is already warmer, it has less capacity to absorb heat from the compressed air.
- Radiator heat can pre-warm the intercooler reservoir area.
- Warmer intercooler fluid reduces the system’s thermal buffer.
- Heat soak can make the truck feel less consistent after repeated load.
- Separating the reservoir path can improve temperature recovery.
Preheated Intercooler Effects
Preheated intercooler fluid can show up as slower cooldown after a pull, more frequent timing correction, and softer repeat performance. It may be most noticeable in stop-and-go traffic, hot climates, towing, off-roading, and long grades where the engine stays loaded for an extended time.
| Condition | What You May Notice |
|---|---|
| Idling after a hard drive | Slower recovery because airflow and coolant heat rejection are limited |
| Towing or climbing grades | More heat load and less consistent throttle response |
| Repeated WOT pulls | Higher intake-air temperatures and possible timing reduction |
STILLEN’s Cooling Architecture: How It Separates Intercooler and Radiator
The STILLEN Intercooler Reservoir Relocation Kit moves the intercooler reservoir away from the radiator reservoir and gives the intercooler system a dedicated thermal path. Instead of sharing heat through the factory reservoir layout, the relocated reservoir is positioned near the passenger-side fender well for cleaner separation and service access.
That change is designed to improve cooling consistency under load. It does not magically create more boost, and it does not guarantee a horsepower increase by itself. Its value is in helping the truck recover faster from heat soak so power delivery stays more repeatable.
- What it changes: reservoir location, thermal separation, and cooldown behavior after heat soak.
- What it does not change: the engine, turbochargers, ECU calibration, or the full intercooler core.
- Best use case: towing, hot weather, off-road use, repeated throttle pulls, and owners already monitoring intake-air temperature.
- Fitment: STILLEN lists the kit for 2022–2026 Toyota Tundra and Sequoia 3.4L twin-turbo V6 applications, including i-FORCE MAX compatibility. Always verify by VIN, trim, and current manufacturer fitment before ordering.
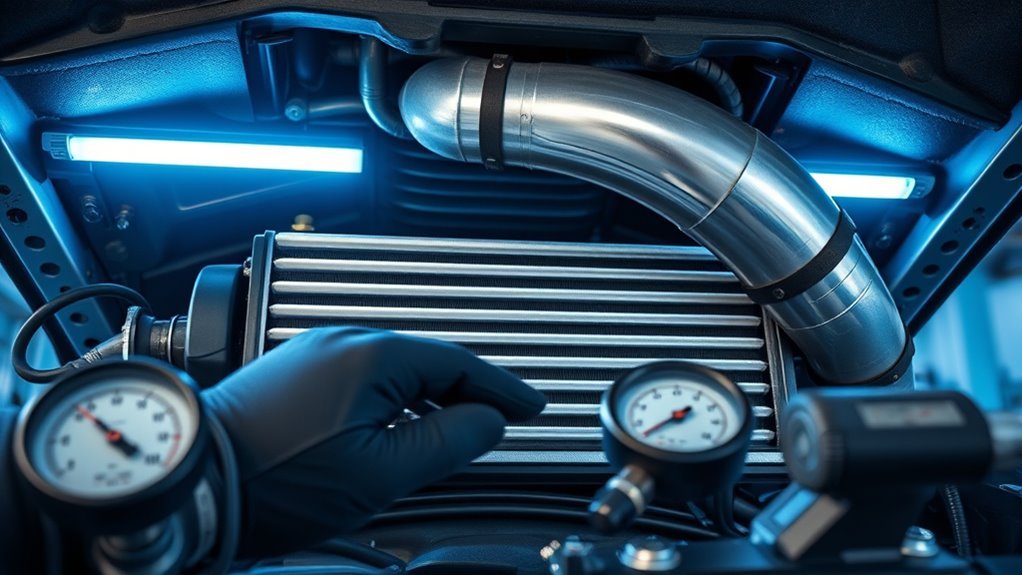
STILLEN vs. OEM Intercooler: Test Results and Real-World Impact
STILLEN says it tested the OEM layout against its relocated reservoir system using an AEM AQ-1 data logger and additional sensors in real driving cycles, including freeway pulls, idle time, and stop-and-go conditions. In that manufacturer test, the STILLEN setup returned to operating temperature in about 2 minutes, while the OEM system remained heat-soaked after 8+ minutes.
STILLEN’s published test result is best read as a consistency claim: faster cooldown after heat soak, not a guaranteed peak-horsepower claim.
That distinction matters. If your Tundra is already heat-soaked, faster recovery can help the ECU return to a more stable operating window sooner. But if you are expecting the kit alone to deliver a specific horsepower number, that is the wrong expectation. A reservoir relocation kit supports consistency; it is not the same as a tune, turbo upgrade, or full charge-air cooler replacement.
| System | Published Recovery Result | What It Means |
|---|---|---|
| STILLEN relocated reservoir | Returned to operating temperature in about 2 minutes | Faster recovery after heat soak in manufacturer testing |
| OEM reservoir layout | Still heat-soaked after 8+ minutes | Longer recovery window after load |
Scenario Breakdown: Idle, Freeway, and WOT Performance
Heat soak is not one single driving condition. It shows up differently at idle, on the freeway, and during wide-open throttle. Looking at those scenarios separately helps you decide whether a reservoir relocation kit is useful for your truck.
- Idle: Low vehicle speed means less airflow through heat exchangers. Under-hood heat builds, so reservoir placement matters more.
- Freeway: Airflow improves, but repeated acceleration or towing still adds heat quickly. A faster-recovering system can return to stable temperatures sooner.
- Wide-open throttle: Turbocharger heat rises quickly. The intercooler must absorb and reject that heat without staying saturated.
- Stop-and-go traffic: Heat can build even without aggressive driving because airflow is low and under-hood temperatures remain high.
If you mostly drive unloaded in mild weather, the OEM layout may feel fine. If you tow, live in a hot region, drive off-road at low speeds, or run repeated pulls, you are more likely to notice the difference between fast and slow cooldown.
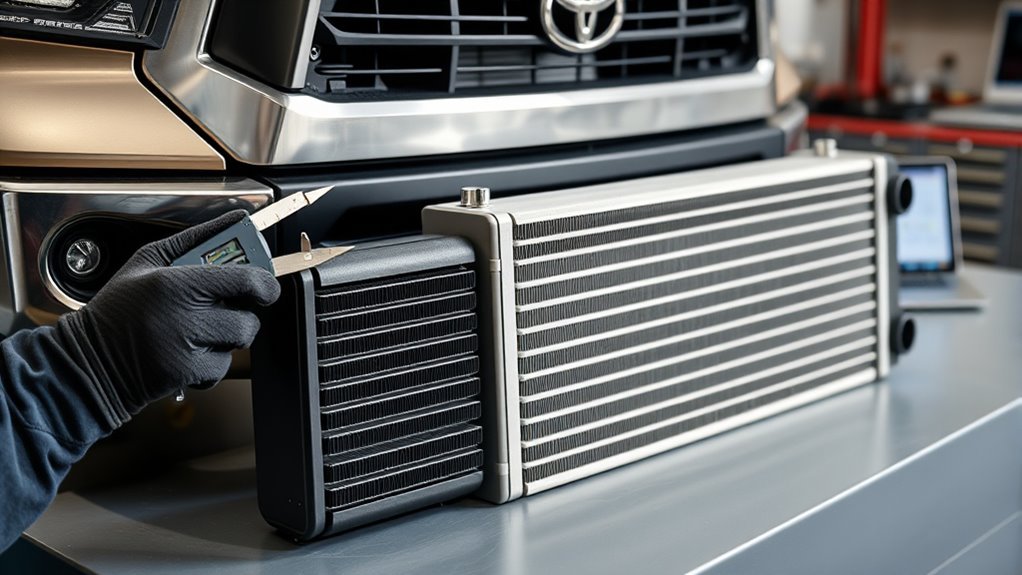
Installation, Fitment, and Coolant Best Practices
At a Glance
| Time Required | About 30–60 minutes for the STILLEN reservoir relocation kit, according to the manufacturer |
| Difficulty | Moderate DIY if you are comfortable with coolant service; professional install recommended if unsure |
| Tools Needed | Basic hand tools, hose-clamp tools, drain pan, correct coolant, funnel or vacuum-fill equipment, gloves, eye protection |
| Cost | Kit price varies; STILLEN listed the kit at $299 at the time of this review, before tax, shipping, coolant, and labor |
[Products Worth Considering]

Reference Numbers: TO3014116; 16470-07042; 16470-0F010; 1647007042; 164700F010

Compatible with Toyota Tundra 2007-2021, Sequoia 2008-2022
![A-Premium Coolant Overflow Recovery Reservoir Tank [W/Sensor & Cap] Compatible with Chevrolet Silverado 1500 2500 3500, Suburban, Tahoe & GMC Sierra, Yukon & Cadillac Escalade](https://m.media-amazon.com/images/I/412oP03H4HL._SL500_.jpg)
[Vehicle Fitment]: ➀Compatible with Cadillac Escalade 2002-2006; ➁Compatible with Chevrolet Avalanche 1500 2500 2002-2006 // Silverado 1500 1999-2006 // Silverado 2500 1999-2004 // Silverado 3500 2001-2006 // Suburban 1500 2500 2000-2006 // Tahoe 2000-2006; ➂Compatible with GMC Sierra 1500 1999-2006 // Sierra 2500 1999-2004 // Sierra 3500 2001-2006 // Yukon, Yukon XL 1500, Yukon XL 2500 2000-2006; ➃Compatible with Hummer H2 2003-2009
Installation Timeframe
STILLEN lists the installation as a 30–60 minute job with basic tools, and the kit is designed to work with both OEM and STILLEN intake setups. That makes it a practical upgrade compared with a full intercooler replacement, but it still involves coolant handling and careful bleeding.
Warning: Never open a hot pressurized cooling system. Let the vehicle cool fully, wear eye protection and gloves, catch all coolant safely, and keep coolant away from children, pets, and storm drains.
Before road use, check hose routing, clamp seating, mounting points, coolant level, and leaks. After the first heat cycle, inspect the system again because small leaks or trapped air can show up only after temperature and pressure change.
Bottle Relocation Tips
The relocated reservoir should sit securely near the passenger-side fender well with hose routing that avoids sharp bends, hot exhaust parts, rubbing edges, and moving components. Shorter, cleaner routing helps serviceability and reduces the chance of chafing or kinks.
| Item | Best Practice |
|---|---|
| Reservoir placement | Secure it where service access is easy and radiant radiator heat is reduced |
| Hose routing | Avoid kinks, rubbing points, belt paths, fans, and exhaust heat |
| Bleed points | Keep fill and bleed access reachable so trapped air can be removed |
| Post-install check | Warm the truck, inspect for leaks, cool it down, and recheck coolant level |
Coolant Selection Guidance
Use Toyota Genuine Super Long Life Coolant or the exact coolant specification listed in your owner’s manual or factory service information. Do not mix unknown coolant types. Mixing coolants can reduce corrosion protection, create deposits, or make future diagnosis harder.
Pro Tip: Mark the coolant level after the first full bleed and heat cycle. Recheck it the next morning when the truck is cold. A small level drop can mean trapped air has finally moved into the reservoir.
How to Diagnose Intercooler or Heat-Soak Problems
Do not assume every power-loss issue is heat soak. A Tundra can lose power from boost leaks, sensor issues, coolant pump problems, ECU protection, fuel issues, drivetrain faults, or unrelated recalls. Use symptoms and data before buying parts.
Symptoms to Watch
- Power feels strong at first, then fades after traffic, towing, or repeated acceleration.
- Intake-air temperature climbs quickly and recovers slowly after load.
- Throttle response feels inconsistent in hot weather.
- You hear hissing or whistling under boost, which may indicate a charge-air leak.
- You see a check engine light, underboost code, misfire code, or coolant-related warning.
- You notice coolant smell, low coolant, white exhaust smoke, or visible leaks.
Simple Checks Before Upgrading
- Scan for codes: Record all current and pending diagnostic trouble codes before clearing anything.
- Log intake-air temperature: Compare idle, cruise, towing, and post-pull recovery instead of relying on feel alone.
- Inspect charge pipes and clamps: Loose couplers can mimic intercooler problems.
- Check coolant level cold: Low coolant or trapped air can reduce intercooler performance.
- Check for open recalls: Use the NHTSA VIN recall lookup or Toyota’s recall lookup before assuming a drivability problem is only heat soak.
When to Upgrade: Signs, Benefits, and Target Drivers
The OEM intercooler system may be enough for light daily driving, especially in mild weather. An upgrade becomes more attractive when your use case repeatedly exposes the truck to heat load.
[Products Worth Considering]

【Part Number】443050C040 443600C050 603-828
[Vehicle Fitment]: Compatible with Toyota Sequoia 2001-2007, Tundra 2000-2006 V8 4.7L

Compatibility: Power steering reservoir, replacement for 2000-2007 Toyota Sequoia Tundra
Good Candidates for a Reservoir Relocation Kit
- Drivers who tow in warm climates or climb long grades.
- Off-road users who spend time at low speed with limited airflow.
- Owners who see high intake-air temperatures after idling or repeated acceleration.
- Drivers running supporting intake or tuning upgrades and wanting more consistent thermal behavior.
- Owners who want a bolt-on cooling-support upgrade without replacing the full intercooler assembly.
Drivers Who May Not Need It
- Owners who drive mostly unloaded in mild weather.
- Trucks with unresolved check engine lights, boost leaks, or coolant leaks.
- Vehicles still under warranty where the owner does not want any modification risk.
- Drivers expecting a guaranteed peak horsepower gain from the reservoir kit alone.
Cost vs. Reliability: Is the STILLEN Intercooler Reservoir Kit Worth It?
The value depends on how you use your truck. For a daily driver that rarely sees heavy load, the benefit may be modest. For a Tundra that tows, idles in heat, runs off-road, or sees repeated pulls, faster recovery from heat soak can be worth the cost because it improves consistency.
| Benefit | How Strong Is the Case? | Why |
|---|---|---|
| Faster cooldown | Strong | Supported by STILLEN’s published manufacturer testing |
| More consistent feel under heat | Moderate to strong | Most useful for towing, hot weather, idling, and repeated load |
| Peak horsepower gain | Weak by itself | The kit supports cooling consistency; it is not a tune or turbo upgrade |
| Long-term reliability | Possible but not guaranteed | Lower heat stress is helpful, but maintenance, driving conditions, installation quality, and vehicle condition still matter |
For many owners, the strongest argument is confidence: the truck is more likely to feel the same after sitting in traffic, towing on a hot day, or making another pass up a grade. Just keep the expectation realistic. This is a thermal-management upgrade, not a stand-alone power package.
Frequently Asked Questions
How does the intercooler work on a Toyota Tundra?
The intercooler cools compressed air from the turbochargers before it enters the engine. Cooler charge air is denser and helps the ECU maintain more consistent spark timing, fueling, and torque output under load.
What is the difference between turbo and turbo intercooled?
A turbocharger compresses air to help the engine make more power. A turbo-intercooled engine adds a charge-air cooler after the turbocharger so the compressed air is cooled before combustion. That helps improve density, consistency, and knock resistance.
Does the STILLEN kit replace the Tundra intercooler?
No. The STILLEN kit is an intercooler reservoir relocation kit. It moves the reservoir away from the radiator reservoir to reduce heat soak and improve temperature recovery. It does not replace the full intercooler core.
Will a reservoir relocation kit add horsepower?
Do not expect a guaranteed peak horsepower gain from the reservoir kit alone. Its main benefit is reducing heat soak and helping the truck recover temperature faster, which can make power delivery more consistent under repeated load.
What coolant should I use after installing a Tundra intercooler reservoir kit?
Use Toyota Genuine Super Long Life Coolant or the exact coolant specification listed in your owner’s manual or factory service information. Avoid mixing unknown coolant types, and make sure the intercooler circuit is properly bled after service.
Conclusion
Your Tundra’s intercooler system is about thermal control, not guesswork. Cooler and more stable charge-air temperatures help the ECU maintain consistent power, especially when towing, idling in heat, driving off-road, or making repeated throttle pulls. The STILLEN reservoir relocation kit addresses a specific weak point: heat transfer from the factory shared reservoir layout. It is not a full intercooler replacement and should not be treated as a guaranteed horsepower part, but for heat-heavy use, it is a practical way to improve cooldown and repeatability.
Before upgrading, confirm fitment, scan for codes, check for leaks, verify coolant condition, and look up your VIN for open recalls. If your truck’s only issue is slow temperature recovery under load, the reservoir kit makes sense. If you have warning lights, underboost codes, coolant loss, or rough running, diagnose those problems first.
Sources
- Garrett Motion — Performance Intercoolers — supports how intercoolers remove heat from compressed turbo air.
- Toyota — Tundra specifications — supports current Tundra twin-turbo V6 powertrain output references.
- Toyota Genuine Parts — Intercooler Assembly With Duct #17900-F4010 — supports the OEM intercooler’s role in routing and cooling compressed air.
- STILLEN — Intercooler Reservoir Relocation Kit 401200 — supports fitment, installation time, reservoir relocation purpose, and published cooldown claims.
- Toyota Genuine Parts — Super Long Life Coolant — supports correct coolant guidance.
- NHTSA — Recall Lookup — supports VIN recall-check guidance before assuming a drivability issue is only intercooler-related.