If your Camry’s steering feels loose, you hear a clunk over bumps, or one front tire is wearing faster than the other, the front lower ball joint is one of the first suspension parts to inspect. A worn ball joint can affect steering control, so treat obvious play, loud clunks, or a torn dust boot with grease loss as a safety issue—not just an annoying noise.
Quick Answer
A Toyota Camry ball joint may be bad if you hear clunking over bumps, feel loose or wandering steering, see a torn dust boot, notice uneven tire wear, or find movement when the lifted wheel is rocked at 12 and 6 o’clock. Do not keep driving if the joint has obvious looseness or separation.
Key Takeaways
- The most common Camry ball-joint check is at the front lower ball joint, where the control arm meets the steering knuckle.
- A torn boot, grease loss, rust, clunking, or vertical wheel play means the joint needs prompt inspection.
- The 12/6 wheel test can point to ball-joint wear, but wheel bearings and other suspension parts can mimic the same movement.
- Use the correct Toyota service information for your model year before replacing a ball joint or control arm.
- After ball-joint or control-arm work, torque fasteners to spec, check locking hardware, road-test carefully, and get an alignment if suspension geometry was disturbed.
At a Glance
| Time Required | 15–30 minutes for inspection; longer for repair |
| Difficulty | Beginner for visual checks; intermediate to advanced for replacement |
| Tools Needed | Flashlight, gloves, wheel chocks, floor jack, rated jack stands, pry bar, torque wrench, service manual access |
| Cost | Inspection can be free at home; repair cost depends on model year, parts, labor, and whether the ball joint or control arm is replaced |
Warning: Never get under a Camry that is supported only by a jack. Work on level, solid ground, chock the wheels, use properly rated jack stands at approved support points, and stop the inspection if the vehicle feels unstable.
Quick Toyota Camry Ball Joint Symptom Checklist
Start with the symptoms you can notice before lifting the car. A failing Camry ball joint often gives more than one clue, especially when the dust boot has already torn and dirt or water has entered the joint.
- Clunking over bumps or during low-speed turns: A dull knock from the front suspension can point to a loose ball joint, sway bar link, strut mount, or control-arm bushing.
- Loose, wandering, or vague steering: Ball-joint play can make the wheel feel less precise, especially over uneven pavement.
- Uneven tire wear: Feathering, cupping, or one tire wearing faster can come from looseness or poor alignment.
- Torn dust boot or grease loss: A cracked boot lets grit and moisture into the joint, which speeds up wear.
- Visible rust around the joint or mounting area: Corrosion does not prove failure by itself, but it raises the urgency of a closer inspection.
If the steering feels unstable, the wheel visibly shifts in the wheel well, or the joint looks separated, do not drive the car. Have it towed or inspected by a qualified technician.
[Products Worth Considering]

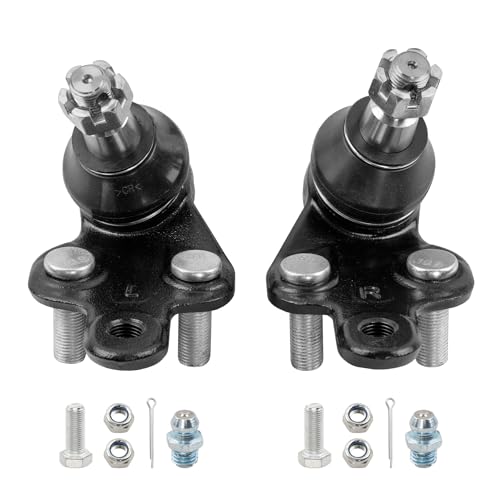
Front Ball Joints Replacement for 2007-2017 Toyota Camry - [2005-2018 Toyota Avalon] - 2013-2018 Lexus ES300h - [2007-2018 Lexus ES350]

Premium Material: Ball joint kit. With over 30 years of experience, built with high quality material, referring to international original factory standard and multiple tests, ensure quality and durability.

Kit Includes: 2 Front Inner Tie Rods; 2 Front Lower Ball Joints; 2 Front Lower Control Arms; 2 Front Outer Tie Rods; 2 Front Sway Bar Links
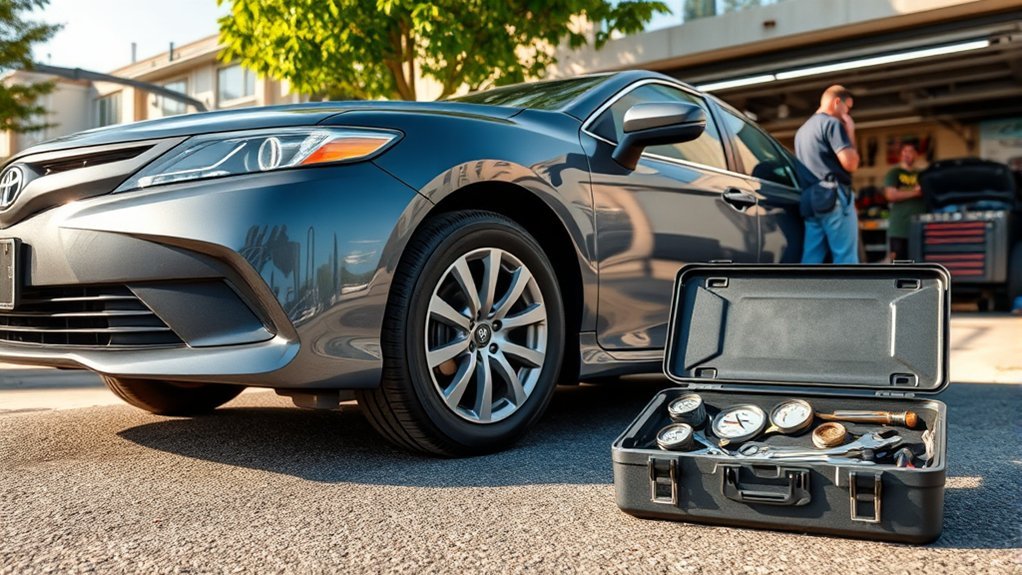
Before You Lift the Camry: Safety and Tools
A ball-joint inspection is simple, but the safety setup matters. Park on flat concrete, set the parking brake, place the transmission in Park, and chock the wheels that stay on the ground. Lift only at approved jacking points and support the vehicle with rated jack stands before shaking the wheel or using a pry bar.
For model-specific lifting points, maintenance guidance, and repair information, use the correct Toyota owner manual and warranty resources. For torque specs, removal procedures, and service bulletins, Toyota’s Technical Information System is the official service-support source for Toyota vehicles marketed in North America.
Note: A floor jack is for lifting, not for holding the vehicle while you work. Safety guidance from the Canadian Centre for Occupational Health and Safety also says not to get under a vehicle supported by a jack only.
[Products Worth Considering]

【Best Protection for Your Car Undercarriage】: These jack stand pads protect your car undercarriage and surface paint, and prevent your frame rails and pinch welds from bending, when you use a car jack.

Specifications:2 ton (4,000 lb) capacity for single jack stand; Lifting range from min 9.8 " to max 15"; Net weight: 10.5 lb, which suitable for most 2 Ton Low profile autos, not recommendable for Pick-Up, Truck, too big SUVs etc. whose automobile chassis higher than 15".

Slotted Design: The jack pads for floor jack features a slotted configuration, enabling precise alignment with the vehicle's lifting points, such as the car's side weld seam. This design helps avoid bending and scratching of the frame guide rail
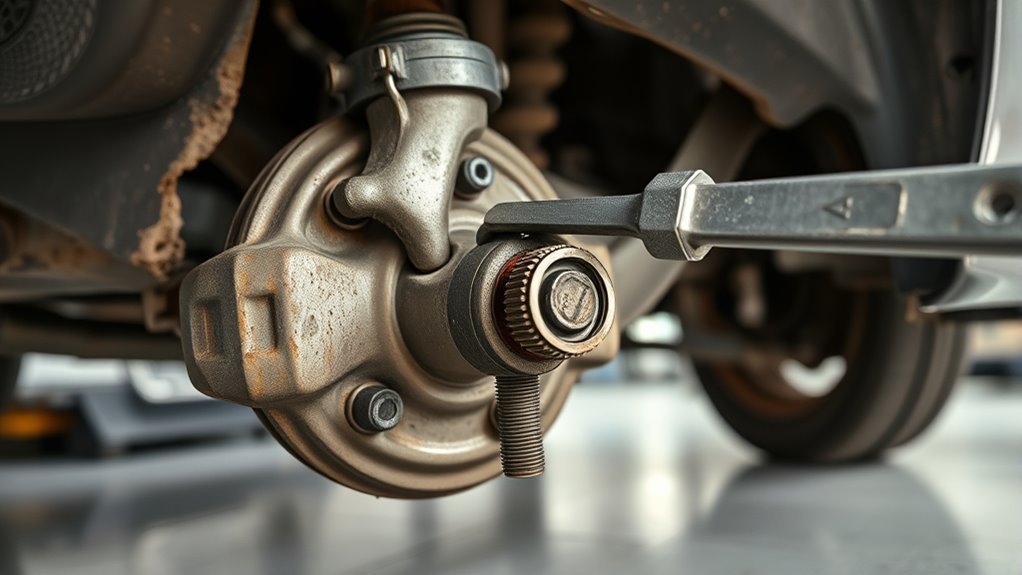
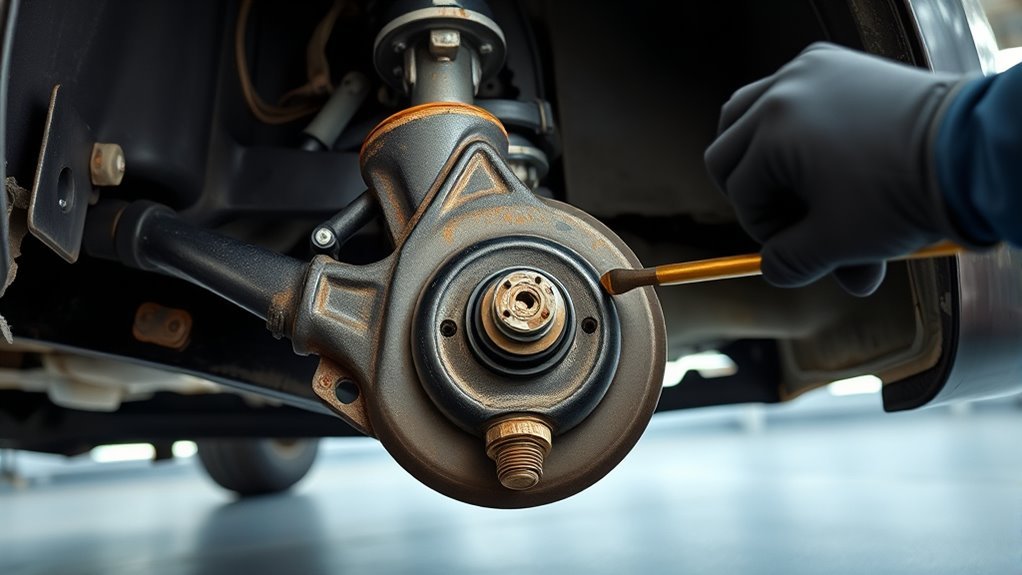
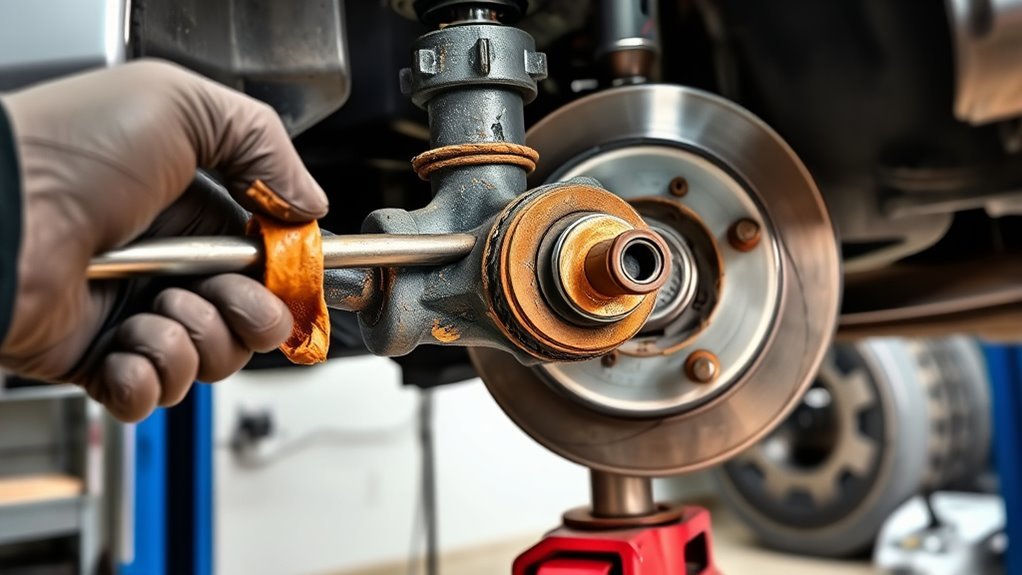
How to Visually Inspect Camry Ball Joints (What to Look For)
Look behind the front wheel where the lower control arm meets the steering knuckle. On most Camry front suspensions, this is the main ball-joint inspection point. Use a flashlight and compare the left and right sides so one damaged boot or loose-looking area stands out.
| What to Check | What It Means | Urgency |
|---|---|---|
| Dust boot cracks, tears, or missing clamp | Contamination can enter the joint and accelerate wear | Prompt inspection or replacement |
| Fresh grease around the boot | Boot may be torn or seal may be compromised | Prompt service |
| Rusty stud, housing, or mounting area | Corrosion may weaken hardware or make removal harder | Inspect closely |
| Visible gap or shifted mounting | Joint or fasteners may be loose | Do not drive until checked |
| Uneven or feathered tire tread | Possible looseness, alignment issue, or worn suspension part | Diagnose soon |
[Products Worth Considering]

Premium Material: Ball joint kit. With over 30 years of experience, built with high quality material, referring to international original factory standard and multiple tests, ensure quality and durability.
1️⃣ Vehicle Fitment & OEM Replacement: Compatible with 2002–2006 Toyota Camry, 2001–2007 Highlander, 2004–2010 Sienna, 2004–2008 Solara; 2002–2003 Lexus ES300, 2004–2006 ES330 & RX330, 2007–2009 RX350, 2006–2008 RX400h. Direct replacement for OEM K90346 (driver side) & K90347 (passenger side).

Kit Includes: 2 Front Inner Tie Rods; 2 Front Lower Ball Joints; 2 Front Lower Control Arms; 2 Front Outer Tie Rods; 2 Front Sway Bar Links
Step-by-Step Tests With the Wheel Off the Ground
After the visual check, lift and support the Camry safely. Keep your hands clear of pinch points and watch the joint itself while force is applied. A phone camera aimed at the ball joint can help you see movement if you are working alone.
- Confirm the vehicle is stable. The car should rest on jack stands, with the opposite wheels chocked.
- Grip the tire at 12 and 6 o’clock. Push in at the top while pulling out at the bottom, then reverse the motion.
- Watch the lower ball joint. Movement between the control arm and steering knuckle points toward ball-joint wear.
- Grip the tire at 3 and 9 o’clock. Side-to-side play often points to tie rods or steering linkage, but it can overlap with bearing or suspension looseness.
- Use a pry bar carefully. Apply controlled upward and downward pressure near the control arm while watching for joint movement or a clunk.
- Compare sides. If one side moves, clicks, or feels loose while the other side stays tight, the loose side needs further diagnosis.
| Test Position | Expected Result | Possible Problem If Loose |
|---|---|---|
| 12/6 o’clock wiggle | No visible joint movement | Ball joint, wheel bearing, or suspension play |
| 3/9 o’clock wiggle | No side-to-side looseness | Tie rod, steering linkage, bearing, or control-arm bushing |
| Pry bar lift | No clunk or separation | Worn ball joint or loose mounting |
| Feel test | Smooth and tight | Loose, gritty, or binding joint |
| Action | Confirm with service info | Repair before driving if play is obvious |
Pro Tip: The wheel-play test is a screening test, not a full repair procedure. Some suspension designs require the joint to be loaded a specific way, so confirm the test method in the service information for your Camry’s model year.
What Each Sound or Movement Means: Urgency and Diagnosis
Specific sounds and movements help you decide how fast to act. Ball joints are part of the steering and suspension connection, so obvious looseness should be handled as a safety issue.
A clunk plus visible vertical play is not a “wait and see” symptom. Inspect the joint immediately and avoid driving if the wheel or control arm shifts under load.
| Symptom | Most Likely Meaning | What to Do |
|---|---|---|
| Single clunk over bumps | Ball joint, sway bar link, strut mount, or control-arm bushing | Inspect soon |
| Clunk while turning slowly | Ball joint, CV joint, strut mount, or steering component | Diagnose before long trips |
| Visible 12/6 wheel play | Possible ball joint or bearing looseness | Do not ignore |
| Torn boot with grease loss | Joint contamination likely | Schedule replacement or professional inspection |
| Wheel shifts or steering feels unsafe | Possible severe suspension or steering failure | Do not drive; tow for repair |
Ball Joint vs. Tie Rod vs. Wheel Bearing: Quick Difference
A loose wheel does not automatically prove the ball joint is bad. Use the direction of play, sound, and where movement appears to narrow the cause.
| Part | Typical Clue | How It Differs |
|---|---|---|
| Ball joint | Vertical play, clunking, torn boot, movement at control arm/knuckle | Often shows movement at 12/6 when the joint is watched directly |
| Tie rod end | Side-to-side play, steering looseness, wandering | Often moves during 3/9 wheel shake |
| Wheel bearing | Growling or humming that changes with speed | May show play without visible ball-joint movement |
| Sway bar link | Light clunk over small bumps | Usually does not cause major wheel play |
| Strut mount | Creak, pop, or clunk while steering | Noise may come from upper strut area rather than the lower joint |
Repair Choices: Lower Ball Joint, Control Arm, or Shop Diagnosis
When deciding repairs, start with the exact model year and suspension design. On many Camrys, the front lower ball joint is the key service point, but parts packaging and procedures can vary by generation, trim, market, and previous repairs. Do not assume an “upper ball joint” repair applies to your Camry unless the correct service information or parts catalog confirms it.
| Finding | Likely Action | Why |
|---|---|---|
| Boot is intact and no play is found | Record the inspection and keep monitoring | No immediate repair is proven |
| Boot is torn but joint is still tight | Plan prompt service | Contamination can shorten joint life |
| Joint has visible play or clunks | Replace the failed joint or required assembly | Loose joints can affect steering control |
| Control-arm bushings are also cracked or loose | Consider control-arm assembly replacement | Replacing one worn part may not fix the full problem |
| Severe looseness, separation, or unsafe steering | Tow to a shop | Driving can increase crash risk |
After replacement, use the service manual torque specs, replace single-use or damaged hardware, install locking hardware such as cotter pins where the design uses them, and road-test carefully. If the control arm, ball joint, or steering geometry was disturbed, schedule an alignment to prevent tire wear and restore proper handling.
Note: Recalls and service campaigns can change. Before buying parts, check your VIN through the NHTSA safety issues and recalls search and Toyota’s owner resources.
Frequently Asked Questions
How long do Toyota Camry ball joints last?
There is no single mileage that applies to every Camry. Ball-joint life depends on road salt, potholes, torn boots, driving conditions, part quality, and whether the suspension has been repaired before. Inspect them during routine service and any time you hear clunks, feel loose steering, or see uneven tire wear.
Why do Toyota Camry ball joints fail?
They usually fail from normal wear, torn dust boots, grease loss, water and dirt contamination, corrosion, impact damage from potholes, or loose/damaged mounting hardware. Once the boot is torn, the joint can wear faster because abrasive grit reaches the bearing surface.
Can I drive with a bad Camry ball joint?
Do not keep driving if the joint has visible play, the wheel shifts, the steering feels unstable, or the joint looks separated. A badly worn or separated ball joint can affect vehicle control. If symptoms are severe, tow the car instead of driving it.
Should I replace Camry ball joints in pairs?
You do not always have to replace both sides, but it is smart to inspect both. If one side failed from age, corrosion, or torn boots, the other side may be close behind. Replace the failed parts and any matching worn components that testing confirms are loose.
Does a Camry need an alignment after ball-joint replacement?
An alignment is recommended if the control arm, steering knuckle, strut, tie rod, or other geometry-related part was loosened or replaced. Even when the car drives straight, alignment can help prevent uneven tire wear after suspension work.
Is 12 and 6 o’clock wheel play always a bad ball joint?
No. The 12/6 test is useful, but wheel bearing play, loose control-arm bushings, or other suspension movement can feel similar. Watch the ball joint directly while the wheel is rocked. If the joint does not move but the wheel does, keep diagnosing before replacing parts.
Conclusion
Bad Camry ball joints usually warn you with clunks, loose steering, torn boots, rust, grease loss, or uneven tire wear. The safest approach is simple: inspect visually first, lift the vehicle only with proper support, test for wheel play, and confirm the failed part before replacing anything. If the joint has obvious movement or the car feels unsafe, stop driving and repair it before the problem turns into a loss-of-control risk.
Sources
- Toyota Owners Manuals and Warranties — model-year owner manual and maintenance resources.
- Toyota Technical Information System — official Toyota service-support source for repair information and torque procedures.
- Canadian Centre for Occupational Health and Safety: Working Under Vehicles — jack-stand and vehicle-support safety guidance.
- NHTSA Search Safety Issues — recall and safety-campaign lookup by vehicle or equipment.
- MOOG: How to Check Ball Joints — wheel-play inspection concepts and service-manual caveats.