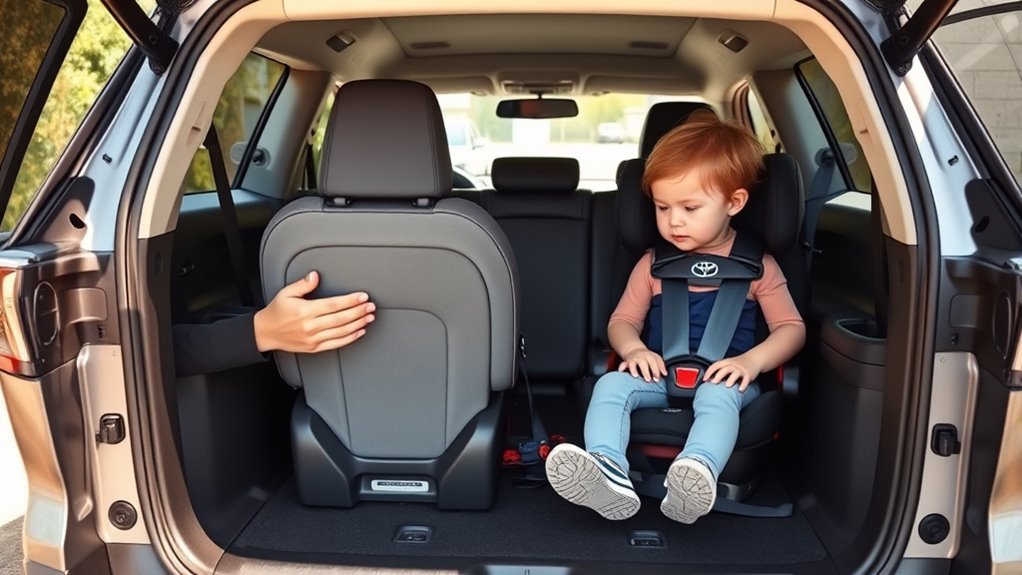
If your RAV4 backup camera is black, flickering, blurry, delayed, or not turning on in reverse, do not replace the camera first. Start with the simple checks: clean the lens, restart the vehicle, confirm the screen is switching to reverse view, inspect the hatch wiring, and check the correct fuses. A failed camera is possible, but wiring, software, reverse-signal, power, and ground faults are just as common.
Quick Answer
If your Toyota RAV4 backup camera is not working, clean the camera lens, restart the vehicle, check the reverse lights, inspect the hatch wiring and connectors, and verify power, ground, and fuses. If the image freezes or does not appear on newer RAV4 models, check your VIN for Toyota or NHTSA recall and software update eligibility.
Key Takeaways
- A dirty lens causes blurry or hazy images, but a black screen usually points to power, wiring, display, reverse-signal, or software trouble.
- If the reverse lights do not work, diagnose the reverse circuit before blaming the camera.
- Intermittent camera failure often comes from loose connectors, corrosion, or broken wires in the rear hatch hinge harness.
- Some newer RAV4, RAV4 Hybrid, and RAV4 Prime vehicles may be covered by recall or software updates, especially if equipped with Panoramic View Monitor.
- Drive as if the camera is unavailable until it is fixed: use mirrors, turn your head, back up slowly, and use a spotter when needed.
At a Glance
| Time Required | 10 minutes for basic checks; 30–90 minutes for fuse, connector, and voltage testing |
| Difficulty | Easy for cleaning and resets; moderate for electrical testing |
| Tools Needed | Microfiber cloth, mild cleaner, flashlight, owner’s manual, fuse puller, multimeter, trim tools, gloves |
| Typical Cost | $0–$20 for DIY cleaning/fuse checks; roughly $100–$350 for wiring diagnosis or repair; higher if an OEM camera or module is replaced |
Quick Fixes: RAV4 Backup Camera Won’t Turn On
Start with the checks that cost nothing and do not require disassembly. Many RAV4 backup camera complaints are caused by dirt, moisture, a temporary multimedia glitch, a loose connector, or a blown fuse rather than a bad camera.
- Clean the camera lens. The RAV4 rear camera is usually above the rear license plate. Wipe it gently with a microfiber cloth and a mild, non-abrasive cleaner.
- Restart the vehicle. Turn the vehicle off, open the driver door, wait about a minute, then restart and shift into reverse again while parked safely.
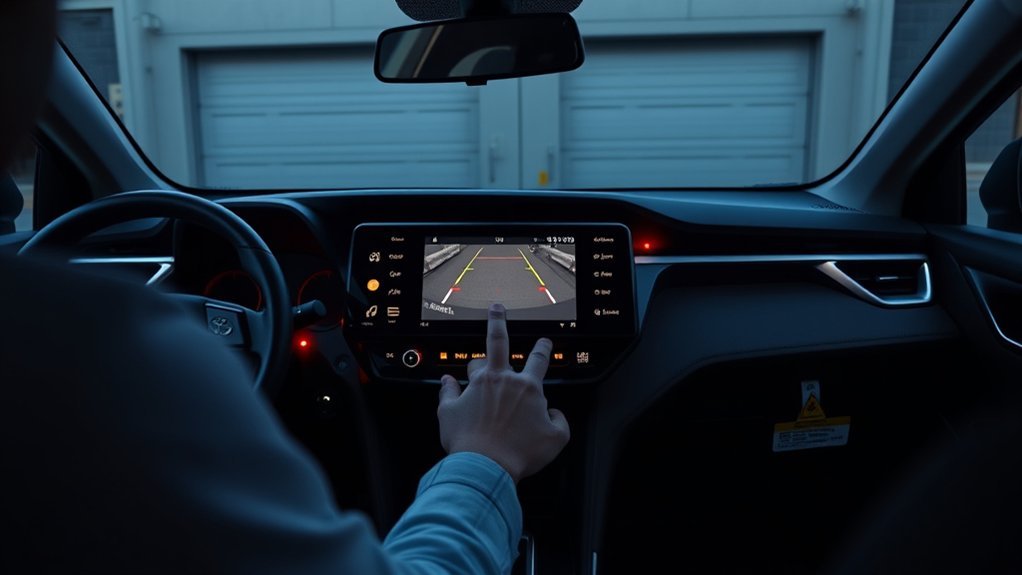
- Check camera and display settings. If the camera image is too dark, check the multimedia display brightness and camera display settings in the infotainment menu.
- Look for a message on the screen. A blank screen, “no signal,” frozen image, or normal display with no camera view each points to a different fault.
- Check the reverse lights. If the reverse lights do not turn on, the vehicle may not be sending a proper reverse signal to the camera system.
- Inspect the visible wiring. Look around the rear hatch, liftgate trim, and hinge area for pinched, frayed, or stretched wiring.
- Check recalls by VIN. Use the official Toyota recall lookup or NHTSA recall lookup before paying for parts.
Warning: Do not rely only on the backup camera. Toyota describes the rear view monitor as a driver aid, not a replacement for checking around the vehicle. Use your mirrors and turn your head before and while reversing.
Is It the Camera, the Display, or the Reverse Signal?
The fastest way to avoid wasted money is to match the symptom to the most likely failure area. A bad image does not always mean a bad camera, and a black screen does not always mean a bad display.
| Symptom | Most Likely Area | What to Check First |
|---|---|---|
| Blurry, foggy, or washed-out image | Lens, moisture, lighting, camera housing | Clean lens, inspect for condensation or cracked housing |
| Black screen only in reverse | Camera power, ground, video signal, software | Fuses, connector voltage, recall/software update |
| “No signal” message | Camera connector, video line, display input | Rear camera connector and hatch harness |
| Image flickers when hatch moves | Broken wire or loose hatch-harness connector | Flex-test the liftgate hinge harness |
| Reverse lights do not turn on | Reverse switch, circuit, fuse, body ECU signal | Reverse-light fuse, bulbs, wiring, scan tool diagnosis |
| Camera freezes briefly after startup | Software or Parking Assist ECU logic on affected vehicles | VIN recall lookup and dealer software update |
Camera vs. Display
When you shift into reverse, notice what the multimedia screen does. If the display changes to a camera screen but stays black, the display is likely receiving the reverse command but not a usable camera image. If the screen does not change at all, the reverse signal, multimedia unit, software, or vehicle settings may be involved.
- Blank or “No signal”: suspect a loose connector, failed camera power supply, video-signal fault, software issue, or display input fault.
- Grainy or static image: inspect the camera wiring, ground, connector pins, and possible interference from an aftermarket stereo or adapter.
- Intermittent image: check the hatch hinge harness and connector pins because movement often exposes broken conductors.
- Normal screen but no automatic camera view: confirm the vehicle recognizes reverse and that no multimedia fault codes are stored.
Reverse Signal Check
The backup camera normally depends on the vehicle knowing it is in reverse. If the reverse lights do not turn on, trace that issue first. A camera can be perfectly good and still fail to activate if the vehicle does not send the reverse command to the multimedia or camera system.
With the parking brake set and the vehicle safely secured, have a helper confirm whether the reverse lights illuminate when you shift into reverse. If they do not, check the relevant fuse, bulb, wiring, and reverse-switch or transmission-range input. On newer RAV4 models, a scan tool may be needed to see whether the body ECU and multimedia unit are receiving the reverse signal.
Note: Fuse names and camera wiring colors vary by model year, trim, market, and audio system. Use the fuse-box cover, owner’s manual, or Toyota service information for your exact RAV4 instead of guessing.
Inspect the Camera Lens, Mount, and Connectors Step by Step
Once the basic screen and reverse-signal checks are done, inspect the rear camera area. The goal is to separate an optical problem from an electrical problem.
[Products Worth Considering]

The Autovir windscreen shade offers full windshield coverage for Toyota RAV4 models from 2019 to 2026, blocking up to 99.95% of UV rays and reducing interior heat. Its multi‑layer reflective material provides SPF 100 and UPF 80+ protection while keeping the dashboard, seats, and steering wheel cooler. The foldable design installs quickly and stores conveniently in the glove box, and reinforced stitching ensures long‑lasting durability for daily use.

Protect your Toyota RAV4 interior with this custom‑fit windshield sun shade that blocks 99% of harmful UV rays and reduces cabin heat. The mirror cut‑out ensures a seamless fit without gaps, while durable 240T polyester and bendable wire keep it sturdy through repeated use. Foldable and stored in a convenient pouch, it offers easy installation and removal for everyday comfort.

Upgrade your 2026 Toyota RAV4 interior with this soft, breathable armrest cover that offers full protection against scratches, dirt, and wear. Made from eco‑friendly material, it fits the console perfectly and stays securely in place with elastic straps. Installation is tool‑free, providing added comfort and reducing fatigue during long drives.
Clean the Lens
A dirty camera lens can make the image look blurry, cloudy, dark, or streaked. Road salt, wax, rain residue, snow, mud, and car-wash chemicals can all block the camera view.
- Use a soft microfiber cloth and mild cleaner. Avoid abrasive pads, harsh solvents, or high-pressure water directly on the camera.
- Wipe gently in small circles. If grime is stuck, dampen the cloth instead of spraying cleaner directly into the camera area.
- Dry the lens immediately to avoid streaks.
- Check for cracked plastic, water inside the lens, or a loose camera housing. Condensation inside the camera usually means the camera assembly or seal is compromised.
Check the Mount
A loose or misaligned mount can make the image point too high, too low, or off to one side. Press lightly around the camera housing and license-plate garnish area. You are checking for movement, missing fasteners, impact damage, or broken plastic tabs.
| Check | Action |
|---|---|
| Lens | Wipe and inspect for scratches, fogging, or cracks |
| Mount stability | Push gently and check for movement |
| Alignment | Compare the guide lines and view angle to normal operation |
| Fasteners | Tighten or replace missing hardware |
| Evidence | Photograph damage before visiting a shop or dealer |
Inspect Wiring Connectors
If the image is black, flickers, or cuts in and out, move from the lens to the wiring. The rear hatch area is exposed to water, vibration, and repeated opening and closing, so connectors and wires can loosen or corrode over time.
- Inspect the connector behind the camera, if accessible, for bent pins, looseness, broken locking tabs, or green/white corrosion.
- Follow the visible harness path toward the liftgate hinge. Look for crushed insulation, pinched sections, cracked rubber boots, or prior repair tape.
- Reseat connectors only with the vehicle off. Make sure the locking tab clicks back into place.
- If corrosion is heavy, the connector may need replacement rather than cleaning only.
Pro Tip: If the camera works with the hatch open but fails when the hatch is closed, focus on the hinge harness and liftgate wiring before buying a new camera.
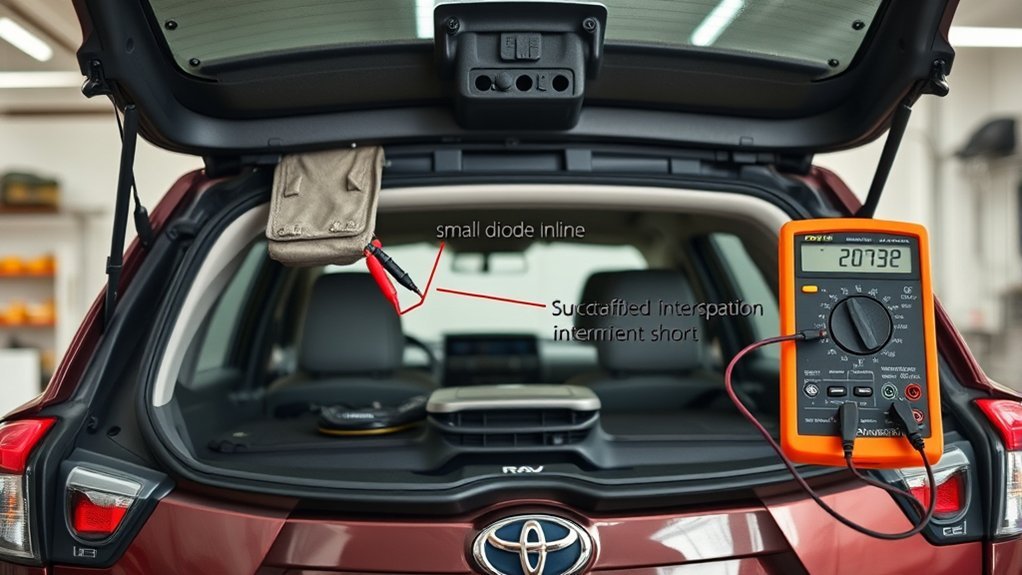
Check Fuses, Power, and Ground for the Backup Camera
Before replacing the camera, confirm that it is getting power and ground. A blown fuse, weak ground, damaged wire, or failed module can create the same black-screen symptom as a bad camera.
- Find the correct fuse locations. Check the owner’s manual and fuse-box labels for camera, multimedia, ECU, back-up light, or display-related circuits. Exact names vary.
- Inspect and test the fuse. A fuse can look good and still be open, so use a multimeter or test light when possible.
- Replace only with the same rating. Never install a higher-amp fuse to “see what happens.” That can overheat wiring and cause bigger damage.
- Check power at the camera connector. With the vehicle safely in reverse and parking brake set, test for the specified voltage at the camera connector.
- Check the ground side. A high-resistance ground can cause flicker, static, dim images, or total failure.
- Inspect for water intrusion. Moisture near the hatch, tailgate trim, or camera connector can short the circuit or corrode terminals.
If there is no power at the camera connector, move upstream to the fuse, wiring, body ECU, or multimedia system. If power and ground are good but there is no image, the fault may be the camera, the video-signal line, the display input, or a software/module issue.
[Products Worth Considering]

Upgrade your RAV4 interior with a sleek, retractable 4‑port USB hub that adds vibrant RGB lighting and fast charging for phones, tablets, and accessories. The intelligent retractable cables keep the console tidy while the snap‑in design ensures easy installation. Compatible with 2020‑2025 RAV4 models, it blends modern tech with a clean aesthetic.
This high-quality silicone mat offers a custom‑fit, anti‑slip protective layer for the wireless charging area and center console of a 2026 Toyota RAV4. It resists scratches, water, and noise while enhancing interior style, and installs easily without tools. The mat does not include a charger but works with existing wireless charging configurations, and includes a 30‑day refund and lifetime replacement service.
Diagnose Wiring Faults: Hinge Harnesses and Intermittent Shorts
Intermittent backup camera problems are often wiring problems. The liftgate harness flexes every time you open and close the hatch. Over years of use, wires can break inside the insulation even when the outside looks mostly normal.
Use a flashlight and inspect the rubber boot between the body and liftgate. Look for stretched wiring, hard bends, cracks, chafing, or evidence that the harness has been rubbing against metal. If you have a multimeter and wiring diagram, perform a continuity test while gently moving the hatch and harness. A reading that jumps or drops out during movement points to an internal break or weak connector.
- Flex-test the harness: watch the camera screen while opening and closing the hatch slowly.
- Check continuity: test suspect wires while moving the harness to reveal intermittent opens.
- Look for shorts: inspect crushed insulation, water tracks, melted tape, or exposed copper.
- Repair properly: soldered or crimped repairs should be sealed and strain-relieved so the same section does not fail again.
A camera that works only sometimes is rarely “fixed” by clearing codes. Find the movement, moisture, or voltage drop that makes it fail.
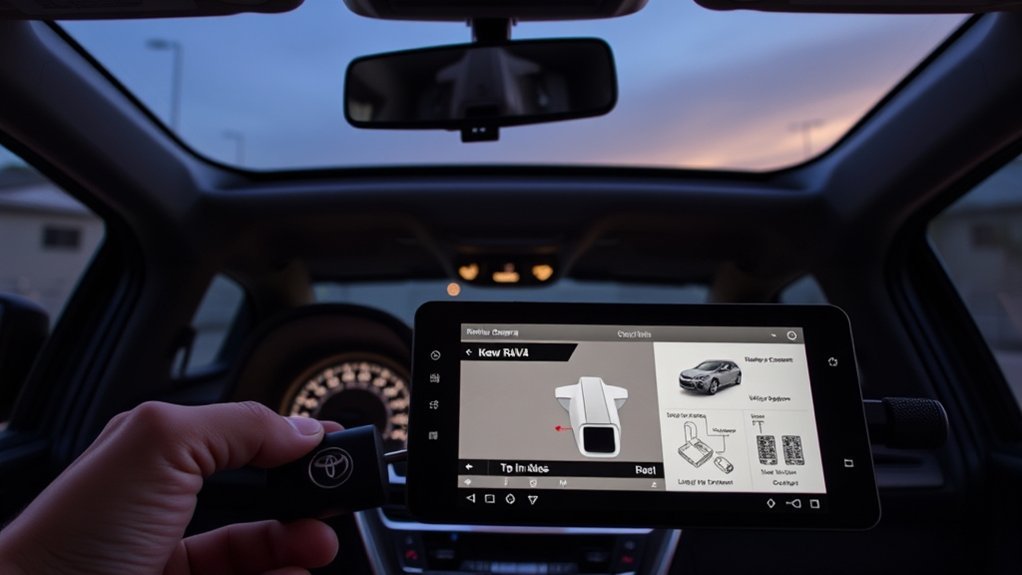
Software, Recalls, and Dealership Diagnostics for RAV4 Cameras
After basic lens, fuse, power, ground, and wiring checks, verify whether your RAV4 is affected by a Toyota safety recall or service campaign. This matters most for newer RAV4, RAV4 Hybrid, and RAV4 Prime vehicles with camera systems that depend on software-controlled modules.
Toyota announced a safety recall for certain Toyota and Lexus vehicles where the backup camera image may freeze briefly or may not display while reversing. Toyota says dealers will update the Panoramic View Monitor system’s Parking Assist ECU software at no cost for involved vehicles. You can check your vehicle by entering the VIN at the official Toyota Safety Recalls & Service Campaigns page or at NHTSA.gov/recalls.
The official NHTSA recall report for campaign 25V744 lists certain RAV4-related vehicles, including some 2023–2025 Toyota RAV4, 2023–2025 Toyota RAV4 Hybrid, and 2023–2024 Toyota RAV4 Prime vehicles, but VIN status is the deciding factor. Do not assume your RAV4 is included or excluded based only on model year.
Note: A recall repair is different from a general diagnosis. If your VIN is not included, a dealer or qualified shop may still need to diagnose wiring, camera, display, or module faults.
What to Ask the Dealer
- Is my VIN included in any Toyota safety recall, service campaign, or software update related to the camera, display, multimedia unit, or Parking Assist ECU?
- What software version is currently installed?
- Were any camera, multimedia, body ECU, or parking assist fault codes stored?
- Did the technician confirm power, ground, and video signal at the camera connector?
- If the camera is being replaced, what test confirmed the camera itself failed?
- Is the repair covered by basic warranty, extended warranty, certified used warranty, recall, or goodwill assistance?
Aftermarket Stereo or Camera Upgrades
If the backup camera stopped working after a stereo, amplifier, dash camera, trailer wiring, alarm, or aftermarket camera installation, start there. Factory RAV4 camera systems may need the correct adapter harness, voltage conversion, video format, and reverse-trigger connection. A wrong adapter can cause a black screen, rolling image, no guide lines, or intermittent signal.
Common upgrade-related issues include:
- incorrect reverse-trigger wire connection;
- missing camera power converter;
- RCA adapter mismatch;
- poor chassis ground;
- loose head-unit connector;
- aftermarket display not configured for the camera input;
- factory dynamic guide lines no longer supported after the radio swap.
If the camera worked before the upgrade, ask the installer to verify the harness and reverse-trigger wiring before replacing factory camera parts.
Temporary Safety and Driving Tips if the Camera Fails
A failed backup camera is more than an inconvenience. The federal rear visibility standard exists because rear blind zones can create serious backing risks. Until the system is fixed, use old-school backing habits every time.
- Walk behind the vehicle before backing out of a driveway or tight parking spot.
- Use both side mirrors and the rearview mirror.
- Turn your head and look through the rear glass where visibility allows.
- Back up slowly and pause if pedestrians, children, pets, carts, or vehicles are nearby.
- Roll down a window in crowded areas so you can hear warnings or movement.
- Use a spotter when backing near trailers, garages, walls, or low objects.
- Do not assume rear parking sensors can replace the camera. Sensors can miss low, narrow, soft, or angled objects.
Warning: A frozen image can be more dangerous than a black screen because it may look real. If the image does not move naturally as the vehicle moves, stop and use mirrors and direct visual checks.
Cost & Parts: Replace the Camera vs. Repair Wiring
The right repair depends on the diagnosis. Replacing the camera is not always the cheapest or most reliable fix, especially if the real problem is a hatch harness, corroded connector, blown fuse, or software issue.
| Repair Path | When It Makes Sense | Typical Cost Range |
|---|---|---|
| Clean lens or adjust display | Image is blurry, hazy, too dark, or dirty | $0–$20 |
| Fuse replacement | Fuse tests open and no deeper short is found | $5–$30 DIY; more with diagnosis |
| Wiring or connector repair | Image flickers, cuts out, or changes when hatch moves | About $100–$350 for many simple repairs; more for hidden harness damage |
| Software update or recall repair | VIN is included in a recall or dealer confirms software issue | Usually no cost for covered recall repairs |
| Camera replacement | Power/ground are good and the camera output fails | Often several hundred dollars; OEM parts and labor can cost more |
| Display or module repair | Camera tests good but display input, multimedia unit, or ECU fails | Varies widely; get a written estimate |
Out of warranty, wiring repair is usually worth checking before camera replacement. If the camera has water inside, physical damage, a cracked lens, or confirmed failed output, replacement makes more sense. For newer vehicles, always rule out recall and software coverage first.
When to Get Professional Help and How to Document Issues for Escalation
Get professional help if the camera remains black after basic checks, if fuses keep blowing, if the wiring is damaged inside the hatch, if the multimedia unit stores fault codes, or if your RAV4 may be affected by a recall or software update. Electrical diagnosis is faster and cheaper when you bring clear evidence.
Document the issue like this:
- Date and time: note when the camera failed.
- Exact symptom: black screen, no signal, flicker, static, frozen image, delayed image, blurry image, or wrong guide lines.
- Conditions: cold start, rain, car wash, after opening hatch, after stereo work, after jump-start, or after software update.
- Repeatability: every time, once per week, only when cold, only when hatch moves, or only after startup.
- Photos and video: record the screen and any damaged wiring or corrosion.
- Previous repairs: list fuses replaced, connectors cleaned, battery resets, stereo work, or dealer visits.
- VIN check results: save screenshots from Toyota or NHTSA recall lookup pages.
Ask for written diagnostic results before authorizing major parts. A useful repair order should say what was tested, what failed, and why the recommended part will fix the problem.
Frequently Asked Questions
Can a dirty RAV4 backup camera cause intermittent image glitches?
A dirty lens can cause blurry, hazy, streaked, or low-contrast images, especially in rain or at night. It usually does not cause a true black screen. If the image disappears, flickers, or shows “no signal,” inspect the wiring, connectors, power, ground, and software.
Will an aftermarket stereo affect the factory backup camera?
Yes. An aftermarket stereo can affect the factory camera if the installer uses the wrong adapter, misses the reverse-trigger wire, supplies the wrong camera voltage, or does not configure the camera input. If the problem started after a radio upgrade, check the installation before replacing the camera.
How does cold weather affect a RAV4 backup camera?
Cold weather can make the image slow to appear, fog the lens, freeze moisture on the camera, or expose weak wiring and connector problems. Clean ice gently, avoid scraping the lens, and check for condensation inside the camera housing if the image stays cloudy.
Are there RAV4 model years with known backup camera recalls?
Some newer RAV4-related vehicles are listed in official recall documents for a rearview camera image that may freeze or fail to display, especially vehicles equipped with Panoramic View Monitor. Model year alone is not enough. Check your VIN on Toyota’s recall page or NHTSA’s recall lookup.
Can a blown brake light bulb disable the backup camera?
A brake light bulb by itself usually does not disable the backup camera, but reverse-light or shared circuit problems can. If the reverse lights do not work, diagnose that circuit first because the camera system may not be receiving the correct reverse signal.
Why does my RAV4 backup camera work sometimes and fail other times?
Intermittent failure often points to a loose connector, corroded pin, weak ground, broken liftgate harness wire, water intrusion, or software fault. If the image changes when you move the hatch, focus on the hinge harness and rear camera connector.
Should I disconnect the battery to reset the backup camera?
A battery reset may clear a temporary multimedia glitch, but it will not fix a blown fuse, broken wire, corroded connector, failed camera, or required software update. If you disconnect the battery, follow your owner’s manual and be aware that some vehicle settings may reset.
Can I drive my RAV4 if the backup camera is not working?
You can usually still drive, but you should treat the camera as unavailable and back up with extra caution. Use mirrors, turn your head, move slowly, and use a spotter in tight areas. Schedule diagnosis soon, especially if the screen freezes or the vehicle may be under recall.
Conclusion
When your RAV4 backup camera fails, start simple and work in order: clean the lens, restart the vehicle, check the reverse lights, inspect the camera mount, test the right fuses, and look closely at the rear hatch wiring. If the image is intermittent, prioritize connectors and hinge-harness faults. If the image freezes or does not display on a newer RAV4, check your VIN for Toyota and NHTSA recall coverage before paying for parts. Until the camera is fixed, back up slowly and rely on mirrors, head checks, and a spotter when needed.
Sources
- Toyota Safety Recalls & Service Campaigns — VIN-based recall lookup for Toyota vehicles.
- NHTSA Recalls — official U.S. safety recall lookup by VIN.
- Toyota USA Newsroom: Toyota Recalls Certain Toyota and Lexus Vehicles — Toyota statement on backup camera image freezing or not displaying and dealer software remedy.
- NHTSA Part 573 Safety Recall Report 25V744 — official recall report for rearview camera image freeze or no-display condition.
- 49 CFR § 571.111, Standard No. 111; Rear Visibility — federal rear visibility standard.
- Toyota RAV4 Manuals and Warranties — owner manual and vehicle documentation source for RAV4 operation, limitations, and warranty information.