If your Tacoma won’t start or you see white or bluish crust, wear gloves and goggles, prepare baking soda, water, brushes, cloths and a backup 12V supply, then shut off the engine and work in a ventilated area. Disconnect the negative clamp first, scrub posts and clamps with baking-soda paste, rinse and dry, then apply dielectric grease if posts are sound. Reconnect positive first, snug clamps, check lights and cranking; continue for tips on prevention and troubleshooting.
Quick Steps: Clean Tacoma Battery Terminals in 5 Minutes
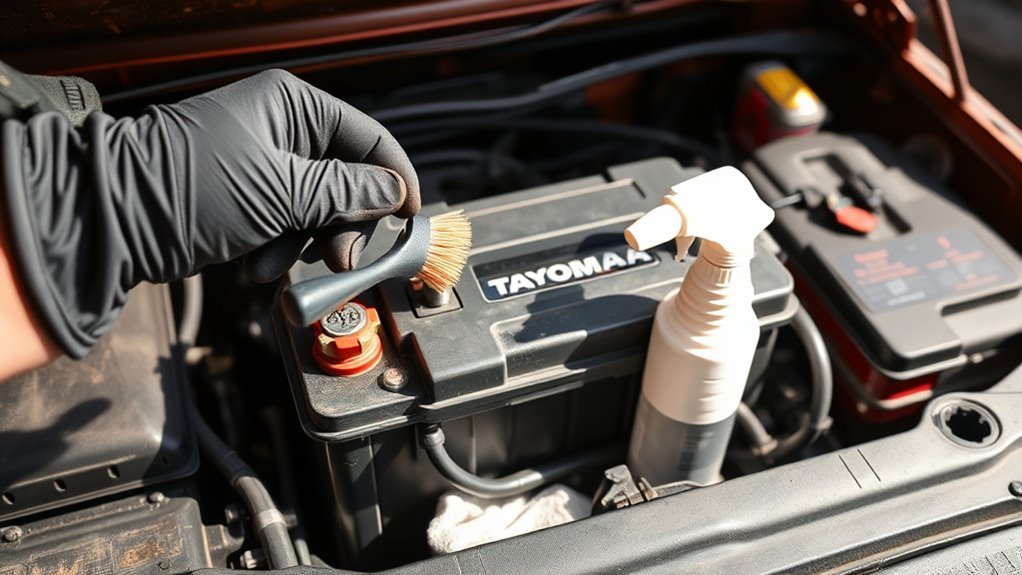
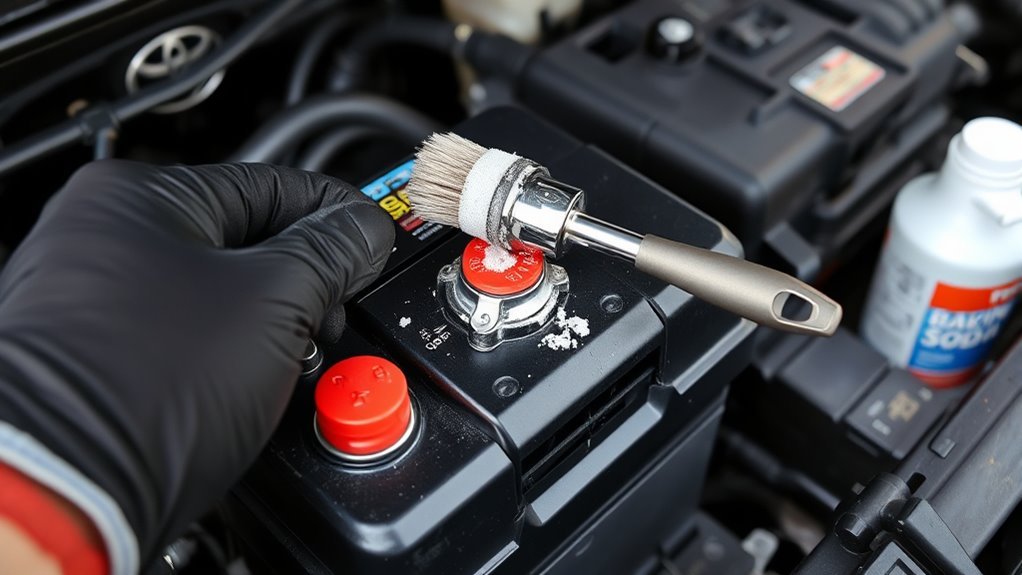
Grab your tools and shut the engine off before you start: for safety, disconnect the negative battery terminal first, then the positive. You’ll perform swift battery maintenance and a focused terminal inspection. Mix baking soda with water to form a paste. Apply the paste with an old toothbrush, scrubbing each terminal and clamp until visible corrosion’s gone. Rinse thoroughly with water to remove all residue; don’t leave cleaning agents on metal. Dry terminals and clamps completely before reconnecting. Reattach the positive terminal first, then the negative, tightening until snug to prevent arcing. Finish by applying dielectric grease or a battery terminal protector spray to slow future corrosion and reduce repeat work. You’re reclaiming control over your vehicle’s reliability with minimal time and maximum effect. These steps keep you liberated from unexpected failures and costly shop visits while ensuring secure electrical connections and confidence on the road.
Check: Are Your Tacoma Battery Terminals Corroded?
Wondering whether your Tacoma’s battery needs attention? Inspect terminals visually and by feel to evaluate battery health and spot corrosion signs. Look for white, chalky deposits on the positive terminal—this often signals buildup that can impede charging and starting, especially in cold weather. Minimal deposits may be cosmetic; frequent off-grid use raises the chance of heavier accumulation, so be proactive.
- Visually scan both terminals for white, green, or bluish crusts.
- Gently probe connections (with engine off) to detect looseness or flaking.
- Note starting difficulty, dim lights, or slow cranking as indirect corrosion signs.
- Record frequency of use off-grid to predict recurrence and maintenance intervals.
Assess severity: light powder needs simple cleaning, extensive crust requires a baking soda solution or battery cleaner spray. After cleaning, plan to apply dielectric grease and tighten connections to preserve function and prevent arcing. Regular checks free you from unexpected failure and protect long-term battery health.
Safety Prep: Tools, PPE, and Preserve Vehicle Settings
Before you touch the battery, turn off the engine and put on safety glasses so you’re protected from acid and debris; then gather a wire brush, baking soda paste, dielectric grease, and a backup 12‑volt power supply to preserve radio presets and trip data while the battery’s disconnected. You’ll act deliberately: confirm you have safety equipment—gloves, goggles, and a long‑sleeve top—and place tools within reach on a nonconductive surface. Inspect the battery for cracks, leakage, or swelling before proceeding. Keep the backup 12‑volt supply ready but disconnected until you remove the cable clamps. Lay out the wire brush, a small brush for crevices, baking soda mixed to paste consistency, clean rags, and dielectric grease for terminal protection after cleaning. Plan steps so you won’t improvise: protective eyewear and gloves stay on; tools remain organized; the backup power attaches only to memory‑preserve points per its instructions. This prep minimizes risk and keeps your battery maintenance efficient and empowering.
Disconnect the Battery : Negative Terminal First
Before you touch the battery, shut off the engine and wear your PPE so you’re working safely. Grab a socket wrench or the correct tool, then loosen and remove the negative terminal clamp first to prevent shorts or sparks. Keep the terminal off the post and inspect both clamp and post for corrosion before proceeding with cleaning.
Safety First Always
When you’re ready to clean the battery terminals, turn off the engine, set the parking brake, and remove the key so the truck can’t start while you work; then loosen and remove the negative terminal first with a proper wrench to prevent any short circuit, followed by the positive terminal, and always wear safety glasses to protect your eyes from possible acid splashes. You’ll practice strict battery safety and clear terminal maintenance steps so you stay in control. Work methodically: isolate the battery, loosen clamps without twisting posts, lift cables away from posts, and inspect for corrosion. Keep movements deliberate and unhurried; liberation comes from competence, not haste. Confirm both terminals are fully disconnected before cleaning or touching any electrical component.
- Turn engine off and secure vehicle
- Remove negative terminal first
- Then remove positive terminal
- Wear safety glasses
Tools And Preparation
Since you’ll be isolating the battery, gather the right tools and prep the truck: a wrench or socket set (usually 10mm) for the terminal clamps, a 12‑volt backup power supply to preserve settings, safety glasses and gloves, a wire brush or terminal cleaner, baking soda and water for neutralizing acid, a small bucket or spray bottle, and rags to catch drips; park on flat ground, turn the engine off, set the parking brake, and keep metal objects away so you can disconnect the negative (black) terminal first without risking a short. Inspect terminals visually and with a terminal inspection techniques checklist: corrosion, loose clamps, cracked insulation. Use battery maintenance tips: backup power on, polarity identified, protective gear on. Arrange tools within reach and work deliberately to reclaim control.
Negative Terminal Removal
- You’ll start by turning off the engine and claiming control—safety first. Disconnect the negative terminal first to prevent shorts. Use a wrench with a secure grip on the clamp; don’t let it slip. Once loose, lift the negative clamp clear and store it away from the battery to avoid accidental contact. Remember terminal types affect clamp fit—check before you twist.
- Verify engine is off and keys removed.
- Use appropriate wrench for your clamp type.
- Move the negative clamp at least a foot from the battery.
- Note terminal types and condition for future reference.
Work methodically; liberation comes from knowledge. Reconnect positive first after maintenance, then the negative. Track maintenance frequency to keep connections reliable.
Cleaning Methods Compared: Baking Soda, Commercial Sprays, Coke
Although each cleaner works differently, you’ll want to choose a method that balances safety, effectiveness, and cleanup effort. You’ll find baking soda benefits obvious: mix with water to form a paste that neutralizes battery acid and loosens corrosion without harming metal. Apply, let sit briefly, then agitate and remove residue. Commercial sprays efficiency shows when you want speed and low scrubbing — sprays foam, lift buildup, and rinse away fast; they’re ideal if you value convenience and consistent results. Coke drawbacks matter: its acidity can dissolve some corrosion quickly, but it won’t neutralize acid and leaves a sticky residue that demands follow-up cleaning. For liberation-minded DIYers, pick the method that minimizes risk and effort while maximizing longevity. After cleaning, protect connections to aid corrosion prevention — use dielectric grease to seal out moisture and delay recurrence. Each choice trades convenience for thoroughness; choose deliberately and follow safe handling steps.
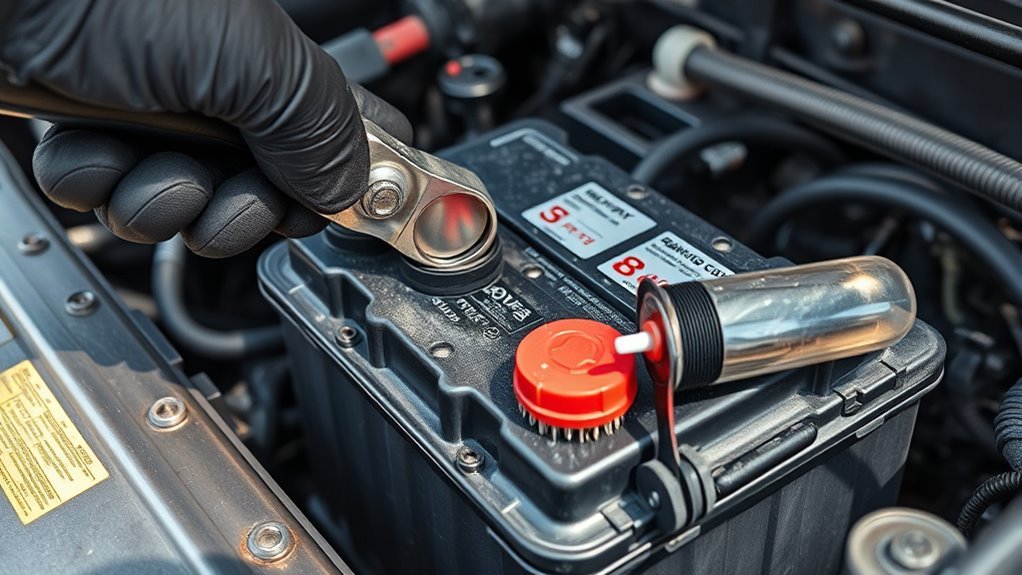
Scrub, Rinse, Dry, and Inspect Tacoma Battery Terminals
Start by disconnecting the negative terminal first, then the positive, and use a baking-soda-and-water paste with an old toothbrush to scrub each terminal and clamp until visible corrosion is removed. You’ll work deliberately: scrub all crevices, remove powdery buildup and green or white deposits, then rinse thoroughly with clean water to wash away residue from the paste. Dry every surface completely with a lint-free cloth or compressed air so moisture won’t invite new corrosion.
Inspect terminals and clamps closely for pitting, cracks, or persistent corrosion. If damage is minor, finish with dielectric grease to seal contacts and aid corrosion prevention; if severe, plan replacement. This routine reinforces terminal maintenance and frees you from recurring electrical trouble.
- Scrub terminals and clamps until deposits are gone.
- Rinse thoroughly to remove baking-soda residue.
- Dry completely; no trapped moisture.
- Inspect for damage; apply dielectric grease if sound.
Follow each step precisely to maintain power reliability and personal autonomy over your Tacoma’s electrical system.
Reconnect Battery (Positive First) and Post-Clean Checks
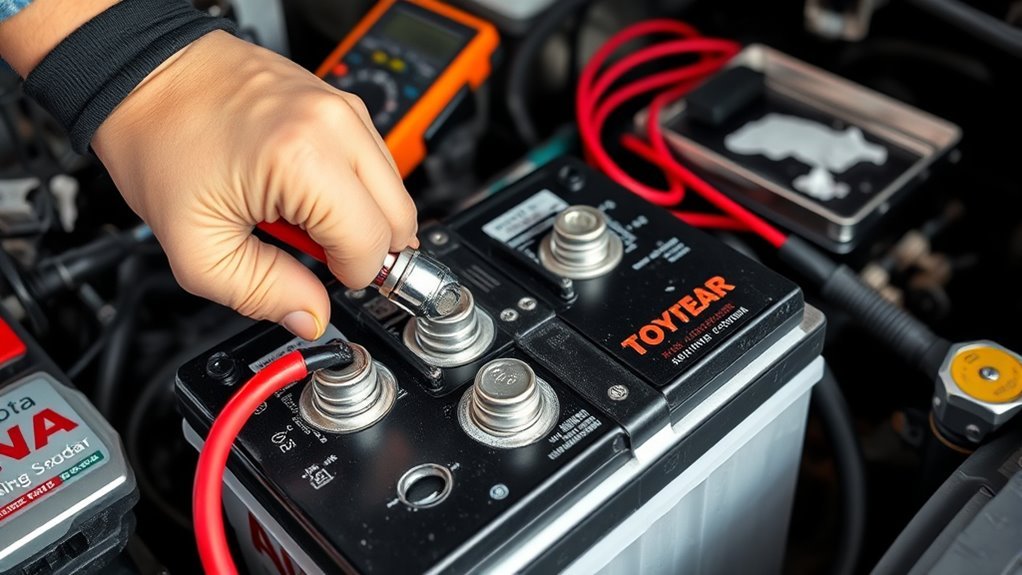
With the terminals clean, reconnect the battery by attaching the positive terminal first—this reduces the risk of accidental grounding—and tighten the clamp until it’s snug but not over-torqued. Next, attach the negative terminal and secure it similarly. You’re following basic terminal maintenance that protects the vehicle’s electrical system and your freedom to travel.
Visually inspect both clamps and posts for any residual corrosion, ensuring metal-to-metal contact. Tug each terminal gently to confirm a firm connection; loose clamps can cause arcing and degraded battery performance. Start the Tacoma and observe electrical systems: headlights, interior lights, and dash indicators should be steady. Crank the engine; it should turn over briskly without hesitation.
If you notice dimming lights or slow cranking, log symptoms immediately and avoid unnecessary driving. Make a habit of checking terminals periodically as part of liberation-minded upkeep—consistent terminal maintenance preserves reliability and maximizes battery performance for the journeys ahead.
Prevent Corrosion and Troubleshoot Resets, Fuses, and Weak Batteries
If you want to keep corrosion from returning and avoid electrical headaches, apply a thin layer of dielectric grease to clean terminals and boot the clamps with anti-corrosion felt or protective caps, then tighten clamps to a snug fit; this barrier reduces oxidation and preserves metal-to-metal contact so charging and starting remain reliable. Keep a routine: inspect terminals monthly, wipe off grime, and reapply grease to sustain corrosion prevention.
- Check for flaky deposits and scrape them away; test connections with a wrench to verify snugness without overtightening.
- If resetting the battery, expect minor ECU or trip odometer resets; a disconnection under 10 minutes usually causes minimal disruption—plan resets if you need longer work time.
- For blown fuses or weak starts, perform electrical troubleshooting: clean terminals, confirm cable integrity, and load-test the battery before replacing fuses or modules.
- Monitor voltage and terminal condition; proactive checks free you from roadside failures and costly repairs.
Frequently Asked Questions
Do Battery Terminals Need to Be Cleaned?
Yes — you should clean battery terminals regularly to prevent battery corrosion, follow maintenance tips: disconnect safely, scrub with baking soda solution, rinse, dry, apply dielectric grease, and reclaim reliable starts while resisting premature battery failure.
Conclusion
You’ve finished the quick, safe clean: disconnect negative first, tackle corrosion with baking soda or a commercial cleaner, scrub, rinse, dry, then reconnect positive first. Think of the battery as the heart—clean terminals are like unclogged arteries keeping your Tacoma running strong. Recheck connections, reset any electronics, and monitor for recurring corrosion or weak charging. Regular inspections and anti-corrosion spray will keep problems small and prevent roadside surprises.