If you have a sticking 4Runner caliper, you will notice the truck pulling to one side, excessive wheel heat, a burning brake smell, a spongy pedal, and rapid pad or rotor wear. Because 1996–2024 Toyota 4Runners use fixed 4-piston calipers up front and floating single-piston calipers in the rear, pinpointing whether a corroded piston, a dry rear slide pin, or a collapsed brake hose is dragging saves you from buying unnecessary parts. Below you will find exact temperature thresholds, diagnostic steps, DIY rebuild instructions, and 2026 repair costs.
Quick Answer
Confirm a sticking 4Runner brake caliper by scanning each rotor with an infrared thermometer after a 10-minute drive; a corner reading over 50°F hotter than the opposite side is dragging. Front 4-piston calipers usually stick from corroded pistons or collapsed hoses, while rear calipers also bind on slide pins. Repairs cost $25–$250 DIY or $540–$695 professionally.
Last checked: October 17, 2026. Dates and figures were verified against official sources.
How a Sticking Caliper Affects Your 4Runner (Pulls, Heat, Wear)
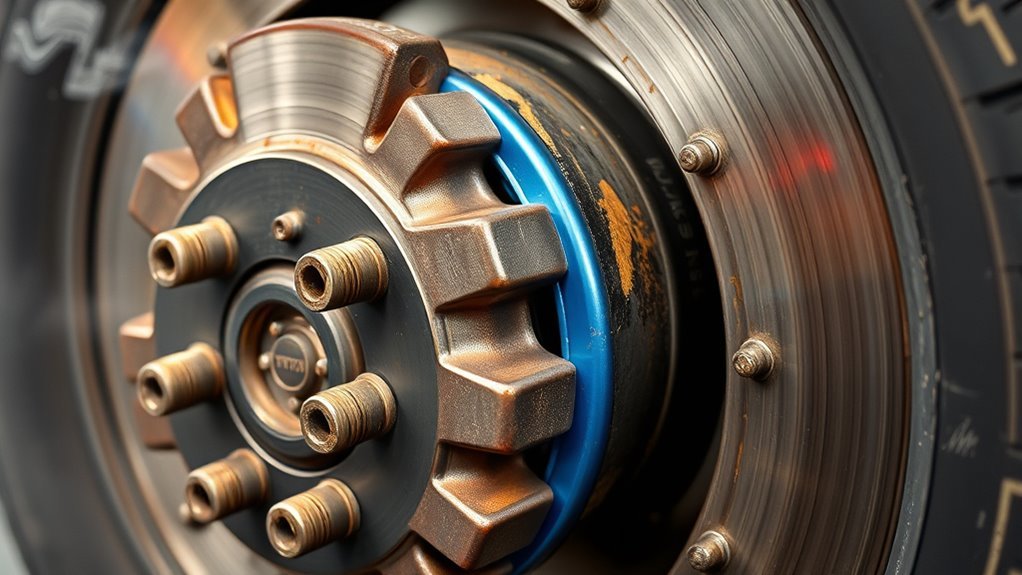
A sticking brake caliper on your 4Runner directly reduces control and raises operating costs by keeping at least one brake pad clamped against the spinning rotor after you release the pedal. That constant drag pulls the truck toward the binding side under cruising and braking, superheats the rotor, and creates an unmistakable acrid burning smell. Left unchecked, a dragging caliper can strip a brand-new brake pad down to bare metal in a few hundred miles and cut fuel economy by 2 to 4 mpg.
You will also notice reduced braking performance, including a spongy pedal and longer stopping distances, as trapped heat boils moisture in the brake fluid and causes brake fade. Extreme thermal cycling promotes disc thickness variation (DTV)—uneven high and low spots across the rotor face that make the steering wheel or brake pedal shudder under load. Uneven tire wear follows when one corner constantly resists rotation, throwing off straight-line tracking on and off the trail.
For practical maintenance, inspect front caliper piston boots, rear slide pins, and flexible rubber hoses for corrosion or swelling at every tire rotation. Measuring rotor runout and pad thickness early lets you replace seized hardware before excessive heat ruins your wheel bearings or hubs.
Quick Checks to Confirm a Stuck 4Runner Caliper
You can confirm a stuck 4Runner caliper in 15 minutes by combining a post-drive infrared rotor temperature comparison, a visual pad wear check, and a pedal feel test. Start by measuring heat across each axle after a short drive, then lift the offending corner to inspect the pads and caliper hardware. Pairing thermal data with how the truck steers under braking tells you exactly which corner is binding.
Wheel Temperature Check
Use an infrared thermometer right after a 5- to 10-minute city drive to scan each brake rotor through the wheel spokes. If one rotor reads more than 50°F hotter than the rotor on the opposite side of the same axle, that corner’s brake is dragging. Front rotors normally run 20°F to 40°F warmer than rear rotors because the front brakes handle 60% to 70% of the stopping load.
Aim the laser at the center of the swept rotor iron surface rather than the aluminum wheel rim or hub cap, which dissipate heat at different rates. Compare front-left (FL) against front-right (FR), and rear-left (RL) against rear-right (RR), then follow the targeted action in the table below.
| Wheel | Normal Range | Action if >50°F Hotter |
|---|---|---|
| FL | 120–220°F | Inspect 4 pistons, pad pins, and front hose |
| FR | 120–220°F | Inspect 4 pistons, pad pins, and front hose |
| RL | 100–200°F | Check slide pins, piston, and parking brake |
| RR | 100–200°F | Check slide pins, piston, and wheel bearing |
Visual Pad Inspection
With the vehicle safely supported on jack stands and the wheel removed, compare the inner and outer brake pads side by side. Tapered wear (one end of the pad worn thinner than the other) or severe inner-versus-outer pad differences point directly to a seized piston or binding hardware. Look for shiny, crystallized glazing on the friction material, cracked pad backing plates, and bluish-purple heat spots on the rotor face.
According to a Brake Parts Inc. technical bulletin on fixed vs. floating calipers, understanding your caliper design explains the wear pattern you see:
- Front brakes (fixed 4-piston calipers): Because two opposing pistons sit on each side of the rotor, a seized lower piston leaves one pad wedged at an angle, causing tapered top-to-bottom pad wear.
- Rear brakes (floating single-piston calipers): One inboard piston pushes the inner pad while the caliper body slides inward on two guide pins to pull the outer pad against the rotor. If the slide pins seize, only the inner pad wears down while the outer pad looks nearly new.
Brake Pedal Feel
How the brake pedal responds under your foot helps separate hydraulic failure from mechanical binding. A firm pedal accompanied by a sharp pull toward one side when braking indicates that one caliper piston is seized IN (refusing to clamp), forcing the opposite wheel on that axle to do all the stopping. Conversely, if the 4Runner pulls to one side while coasting off the brakes, that side’s caliper is stuck OUT (refusing to release).
A spongy or sinking pedal after driving a few miles means the dragging pad has heated the caliper enough to boil moisture inside old brake fluid. Because water vapor compresses under pedal pressure while liquid brake fluid does not, your pedal travel increases dangerously until the caliper cools down.
6 Common Causes of Caliper Sticking on Toyota 4Runners
Toyota 4Runner brake calipers rarely seize from a single defect; instead, road salt, water-logged brake fluid, torn rubber dust boots, and neglected hardware work together to lock up the assembly. Knowing all six failure points stops you from misdiagnosing a $35 rubber brake hose or rusted pad pin as a bad caliper.
- Corroded Lower Front Pistons: On 3rd, 4th, and 5th Gen 4Runner front 4-piston calipers, road spray and salt pool around the two lower pistons. Once moisture creeps past a cracked dust boot, rust forms a ridge on the steel piston wall and wedges it against the square-cut rubber seal.
- Seized Rear Slide Pins or Rusted Front Pad Pins: Rear floating calipers rely on two greased slide pins; when the rubber pin boots tear, grease washes out and the caliper locks onto the bracket. Up front, corrosion builds up on the two thin steel slide rods that hold the pads, preventing the pads from retracting off the rotor.
- Internally Collapsed Rubber Brake Hose: Age and heat cause the inner rubber lining of the flexible brake hose to delaminate and act like a one-way check valve. Hydraulic pressure forces fluid past the flap when you press the pedal, but the flap blocks fluid from returning to the master cylinder when you let off, keeping the whole caliper clamped.
- Moisture-Contaminated Brake Fluid: Glycol-based DOT 3 and DOT 4 fluids are hygroscopic, meaning they absorb water through microscopic hose pores over time. Moisture settles in the calipers—the lowest points in the hydraulic system—corroding piston bores from the inside out.
- Worn Anti-Rattle Springs and Pad Clips: Stainless steel abutment clips on the rear bracket and W-shaped anti-rattle springs on the front caliper lose tension from repeated heat cycles. Rust scale swelling underneath rear bracket clips pinches the brake pad ears so tightly that the pads cannot slide back.
- Bound Parking Brake Cables or Rear Drum Shoes: On 1996–2002 (3rd Gen) models with rear drums and 2003–2024 (4th and 5th Gen) models with a drum-in-hat parking brake inside the rear rotor hub, a rusted bellcrank lever or frozen cable keeps the internal parking brake shoes dragging—producing rear wheel heat that mimics a stuck rear caliper.
Rebuild vs Replace: When to Choose Which for Your 4Runner Calipers

When deciding whether to rebuild or replace a sticking 4Runner caliper, base your choice on piston bore pitting, rust severity, and how much downtime you can afford. Rebuilding a factory Toyota caliper with fresh OEM rubber seals costs far less and preserves the original casting tolerances, giving you an expected 2–5 year life extension when paired with clean brake fluid. However, replacing the whole unit is the safer call when deep rust has pitted the cylinder bores or seized the pistons solid.
- When to rebuild: Choose a rebuild if the caliper casting is structurally sound, the bleeder screw opens cleanly without snapping, and the pistons show only light surface staining that wipes off without catches. A Toyota Genuine Parts rear disc brake cylinder kit #04479-60081 carries an MSRP of $26.43, and aftermarket seal kits run $25–$50 per axle.
- When to replace: Replace the caliper immediately if chrome plating is flaking off the steel pistons, rust pits catch your fingernail inside the cylinder bore, or a piston refuses to budge under compressed air. A brand-new Genuine Toyota front disc brake caliper #47730-60350 for a 2015–2024 4Runner lists for an MSRP of $209.40 (often $150–$180 from online OEM dealers), while remanufactured units cost $80–$150 after core return.
Note: Always replace or rebuild brake calipers in axle pairs (both fronts or both rears) if your 4Runner has high mileage or heavy winter salt exposure. Matching hydraulic response across the axle prevents uneven braking pulls during emergency stops.
Step-by-Step Diagnosis: Tools, Temperatures, and What to Measure
A methodical diagnosis isolates whether your 4Runner’s brake drag comes from trapped hydraulic pressure, a seized caliper piston, or stuck mechanical hardware. Gather an infrared thermometer, a floor jack and rated jack stands, a 19mm and 17mm socket set, a 10mm flare-nut or box wrench, a C-clamp or pad spreader, a dial indicator, brake cleaner, and silicone brake grease before you start.
- Measure rotor temperatures after a short drive: Drive for 10 minutes with normal braking, park on level ground without setting the parking brake, and scan all four rotors. Any rotor exceeding its opposite corner by more than 50°F (or reading above 250°F after light street driving) confirms active drag.
- Spin-test the wheel off the ground: Chock the opposite wheels, place the suspect axle on jack stands, shift into Neutral, and spin the tire by hand. Have a helper press and release the brake pedal firmly; if the wheel becomes difficult or impossible to turn by hand, the brake is failing to retract.
- Perform the bleeder screw pressure test: Place a catch pan and hose over the 10mm caliper bleeder screw and crack it open a quarter-turn. Watch whether a spurt of fluid releases the rotor immediately.
- Test piston retraction and slide hardware: Remove the wheel and unbolt the caliper (or pull the two front pad retaining pins). Press each piston back into its bore using a pad spreader; on a front 4-piston caliper, all four pistons must press back smoothly without cocking. On a rear caliper, slide the caliper body back and forth on its two 17mm guide pins to check for binding.
- Measure pad thickness and rotor runout: Measure inner and outer pad lining with a caliper gauge (replace pads worn below 3mm) and mount a dial indicator 10mm inside the outer rotor edge with all six lug nuts torqued to 82 ft-lbs. Lateral runout exceeding 0.002–0.003 inches (0.05–0.07 mm) causes pedal pulsation.
Pro Tip: The 2-minute bleeder screw test in Step 3 is the fastest way to rule out a bad brake hose. If cracking the bleeder valve immediately frees the locked rotor, the flexible rubber hose has collapsed internally and is trapping pressure—meaning your caliper is fine and only the hose needs replacement.
DIY Caliper Rebuild : Parts, Steps, and Common Pitfalls
Rebuilding a lightly corroded 4Runner caliper takes 1 to 2 hours per corner and requires an OEM cylinder seal kit, replacement pistons (if pitted), 600-grit crocus or emery cloth, fresh DOT 3 brake fluid, brake cleaner, and glycol-compatible rubber assembly grease. Follow a clean, step-by-step sequence so you do not nick the new square-cut pressure seals during installation.
Warning: Never place your fingers between the pistons and caliper body when applying compressed air—pistons eject with enough force to cause severe injury. As outlined in the NHTSA brake caliper service bulletin, never clean brake parts with petroleum solvents, gasoline, or mineral oil, which swell and destroy internal rubber seals.
- Remove the caliper and clamp the hose: Unbolt the brake line banjo bolt (catch dripping fluid and plug the line to keep the master cylinder reservoir from running dry), then remove the caliper mounting bolts.
- Extract the pistons safely: Place a 1-inch wooden block in the center of the caliper slot. Blow low-pressure compressed air (20–30 psi) in short bursts through the fluid inlet port to ease the pistons out against the wood. On 4-piston front calipers, block the free pistons with C-clamps so air pressure pushes out the stuck piston last.
- Strip seals and polish the bores: Use a non-marring plastic or brass pick to remove the outer dust boots, wire retaining rings, and inner square-cut piston seals. Clean the seal grooves thoroughly, polish away minor oxidation in the bore with crocus cloth soaked in clean brake fluid, and flush with brake cleaner.
- Lubricate and seat new seals and pistons: Coat the new inner square-cut seals and piston walls with the pink lithium-soap glycol grease (Toyota Niglube RX-2 or equivalent) included in the OEM kit. Press each piston straight into the bore by hand—never hammer or force a cocked piston—then seat the dust boot into its groove and secure the retaining snap ring.
- Reinstall, torque to spec, and bleed: Mount the caliper using new copper crush washers on the banjo bolt. Torque 4Runner front caliper mounting bolts to 90–91 ft-lbs (19mm), rear caliper bracket bolts to 74 ft-lbs, rear slide pin bolts to 65 ft-lbs, and bleeder screws to 8 ft-lbs (11 N-m). Bleed all four corners starting farthest from the master cylinder until the pedal is rock-solid.
Common DIY pitfalls include installing the dust boot before coating the inner seal, reusing crushed copper banjo washers that weep fluid under pressure, and hanging the heavy caliper by its rubber brake hose during disassembly.
Preventive Maintenance to Stop Caliper Rust and Binding

Servicing your 4Runner’s brake hardware every spring—especially after winter road-salt exposure—stops piston rust and slide-pin binding before they start. A 30-minute annual cleaning removes corrosive brake dust, keeps moisture out of the hydraulic bores, and doubles the service life of your pads and rotors.
- Clean and lubricate pins every 12 months: Pull the two front pad retaining pins, buff off rust ridge buildup with a wire brush, and apply a whisper-thin film of high-temperature silicone brake grease. On the rear calipers, pull the slide pins, wipe out old darkened grease, and repack the rubber boots with silicone grease.
- Inspect dust boots at every pad change: Check all four front piston boots and both rear boots for pinholes or heat cracks before pushing pistons back. Pushing a rusty piston back through a torn boot drags grit across the hydraulic seal and guarantees a sticking caliper within weeks.
- Flush brake fluid every 2 to 3 years: Test reservoir fluid with a digital moisture meter or copper test strips; replace the fluid every 30,000 miles (or whenever moisture exceeds 3%) to prevent internal bore corrosion and protect the expensive ABS actuator.
- Cycle the parking brake regularly: Engaging and releasing the parking brake weekly keeps the rear cable and internal drum shoe adjusters moving freely instead of rusting in place from disuse.
- Keep rustproofing off friction surfaces: While wire-brushing exterior cast-iron caliper bodies and painting them with high-temp caliper enamel slows external scale, never spray lanolin undercoatings (like Fluid Film) near brake rotors, pads, or rubber piston dust boots, where heat will liquefy the oil and contaminate the pads.
Repair Costs and Shop Options (DIY, Indie, Chains Like Firestone)
Fixing a sticking 4Runner caliper costs between $25 and $250 per corner DIY, while professional replacement runs $565 to $622 on average according to the RepairPal Toyota 4Runner brake caliper replacement cost estimator. Your final bill depends on whether you rebuild with a seal kit, install a remanufactured or OEM caliper, or also need new pads and rotors after heat damage.
| Repair Path | Parts Cost (Per Caliper) | Labor Cost | Total Estimated Cost |
|---|---|---|---|
| DIY Seal Rebuild Kit | $25–$55 (plus $12 brake fluid) | $0 (1.5–2 hours DIY) | $37–$100 |
| DIY Caliper Swap (Reman or OEM) | $80–$210 | $0 (1 hour DIY) | $95–$250 |
| Independent Mechanic | $150–$350 | $100–$180/hr | $250–$530 |
| National Chain or Dealership | $250–$445 | $125–$200/hr | $540–$695 |
DIY Cost Breakdown
Doing the job yourself typically runs $50 to $200 per caliper once you include a bottle of DOT 3 brake fluid ($10–$15), brake cleaner ($6), and copper crush washers ($3). Rebuilding with a $25–$55 kit is the lowest-cost fix, while bolting on a remanufactured ($80–$150) or new OEM caliper ($150–$210) eliminates piston-cleaning labor and cuts install time in half.
If the sticking caliper overheated your rotor or wore the pad down to the backing plate, budget an extra $120 to $250 for an axle set of pads and rotors. Factor in a one-person vacuum or pressure bleeder ($30–$60) if you do not have a helper to pump the brake pedal.
Shop Choice Comparison
When comparing professional repair options, weigh labor rates, parts sourcing, diagnostic access, and nationwide warranty coverage. Most commercial shops will not rebuild a seized caliper with a seal kit because labor time exceeds the cost of a warrantied replacement unit, and they often recommend replacing both calipers, pads, and rotors on the affected axle ($750–$1,200 total).
- Independent Toyota/4×4 specialists: Usually bill $100–$180 per hour and will gladly install genuine Toyota or Advics OEM calipers on request, often saving you 20% to 30% over dealership rates.
- National chains: Chains offer standardized pricing, evening/weekend hours, and nationwide warranties. You can schedule a Firestone Complete Auto Care free brake inspection service to have a technician measure pad thickness, rotor runout, and brake fluid condition before you commit to DIY or paid shop work.
Frequently Asked Questions
How Much Does It Cost to Replace a Caliper on a 4Runner?
Replacing a single brake caliper on a Toyota 4Runner costs $250 to $695 at a repair shop (averaging $565 to $622 for OEM-grade parts and labor) or $95 to $250 if you do it yourself. Adding new brake pads and rotors on that axle typically adds $150 to $350 in parts and labor.
Can I Drive My 4Runner With a Sticking Brake Caliper?
No, you should not drive with a sticking brake caliper beyond pulling into a safe parking spot. Continuous pad friction can heat the rotor past 600°F in minutes, boiling your brake fluid into a complete loss of pedal pressure, warping the rotor, and cooking the wheel bearing grease.
Why Do 4Runner Front Calipers Seize So Often?
Toyota 4Runner front calipers use a cast-iron 4-piston fixed design where the two lower pistons sit directly in the path of water, mud, and winter road salt. When the rubber dust boots crack from heat or age, corrosion forms on the exposed piston lip and locks the piston in its bore.
Should I Replace Both Brake Calipers at the Same Time?
Yes, mechanics recommend replacing brake calipers in axle pairs (both fronts or both rears) on high-mileage 4Runners or trucks driven in road-salt states. Both calipers on an axle endure the same heat cycles and moisture exposure, and matching calipers ensure even clamping force during hard stops.
Conclusion
A sticking 4Runner caliper is more than a minor annoyance—it is an active safety hazard that ruins pads, rotors, and fuel mileage when ignored. Start today by scanning your four rotors with an infrared thermometer after a normal drive, and run the 2-minute bleeder screw test on any corner running more than 50°F hotter than its mate. Whether you rebuild lightly corroded bores with an OEM seal kit or bolt on a fresh pair of calipers, pairing your repair with a clean DOT 3 fluid flush and annual pin lubrication will keep your 4Runner stopping straight for years to come.
Sources
- Brake Parts Inc. (Technical Bulletin 18-16): Fixed 4-piston caliper operation versus single-piston floating caliper slide-pin mechanics and inboard pad wear patterns.
- Toyota Genuine Parts (#04479-60081): OEM disc brake cylinder seal rebuild kit specifications and $26.43 MSRP pricing.
- Longo Toyota OEM Parts (#47730-60350): Genuine 2015–2024 Toyota 4Runner front disc brake caliper MSRP ($209.40) and dealer pricing.
- National Highway Traffic Safety Administration (NHTSA Service Bulletin): Brake drag inspection procedures, Niglube RX-2/silicone rubber grease requirements, and solvent warnings.
- RepairPal Estimator: 2026 Toyota 4Runner brake caliper replacement cost averages ($565–$622 total; $541–$693 across 2010–2025 model years).
- Firestone Complete Auto Care: Complimentary brake inspection scope covering pad thickness, rotor wear, brake fluid condition, and parking brake checks.