
You’ll relearn your RAV4’s TPMS after rotations, sensor or battery changes, or fitting a full spare; inflate each tire to spec, turn ignition off then on, plug an Autel OBD‑II TPMS tool into the port, follow prompts to capture each sensor ID in the specified order, and confirm the TPMS lamp extinguishes. Use new valve stems and torque to spec, avoid interference between tools, and verify live pressures; continue for step‑by‑step procedures and troubleshooting tips.
Quick RAV4 TPMS Relearn Overview
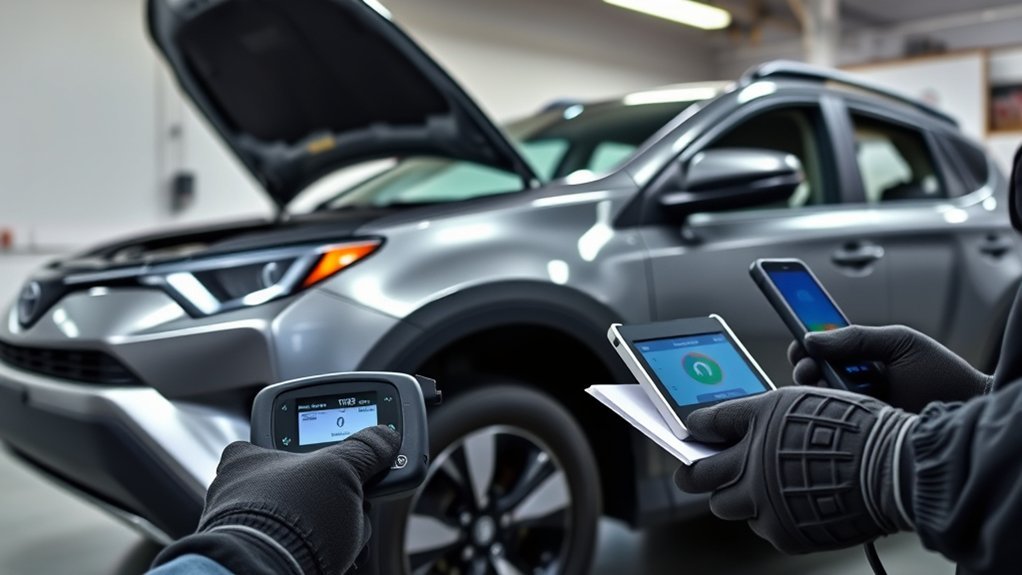
Before you begin, turn the ignition off and confirm each tire is inflated to the specified psi; the 2011 RAV4 requires a dedicated TPMS scan tool plugged into the OBD-II port to perform the relearn. You’ll use that scan tool as the primary diagnostic tools interface to capture sensor IDs and live tire pressure. Keep replacement sensor types identified and spaced apart to prevent radio interference during capture.
Work methodically: connect the device, follow the RAV4-specific relearn routine, and trigger each wheel’s transmission as instructed by the tool. The scan tool will log IDs and pressures, then program the ECU. Successful completion is confirmed when the TPMS warning lamp extinguishes on the dash. You’ll want to verify pressures and drive briefly to guarantee stable communications. This process frees you from guesswork, lets you control replacements, and secures accurate monitoring without depending on dealership scheduling or vague instructions.
When to Relearn RAV4 TPMS (Rotation, New Sensors, Spare, Battery)
After you rotate the tires, replace sensors or their batteries, or fit a full‑size spare, you’ll need to relearn the RAV4’s TPMS so the ECU maps each sensor ID to the correct wheel. New sensors must be programmed via an OBDII‑connected TPMS tool so the vehicle recognizes their IDs. Relearn whenever sensors are older (5–10 years) or show low battery signs to keep pressure reporting accurate.
After Tire Rotation
While rotating tires on a 2011 RAV4 can change sensor positions, you’ll often need a TPMS relearn so the vehicle correctly maps each sensor ID to its new wheel location; this requires a dedicated OBDII TPMS tool to program the sensor IDs, after which the TPMS light should extinguish if communication is restored. You’ll want to confirm tire pressure manually and document rotation to avoid future confusion.
- Use the OBDII TPMS tool to perform relearn and write new sensor IDs into ECU memory.
- Verify sensor calibration by comparing tool readings to manual pressure checks.
- Watch the TPMS warning lamp; it confirms successful communication.
- Log rotations and pressures to maintain system reliability and freedom on the road.
Replacing Sensors Or Battery
If you replace a TPMS sensor, swap in a full-size spare, or install a new sensor battery, you’ll need to perform a TPMS relearn so the RAV4’s ECU recognizes the new sensor IDs and locations. You’ll use a dedicated TPMS scan tool plugged into the OBDII port—there’s no reset button—then inflate tires to spec and put the ignition in ON while the tool reads and programs IDs. Confirm success when the TPMS warning lamp goes out. Consider sensor compatibility and approved battery types before fitting replacements to avoid communication failures. New sensors last about 5–10 years; monitor system faults and relearn whenever you change a sensor or its battery so you keep control and freedom on the road.
Including Full-Size Spare
When you swap in a full-size spare for a 2011 RAV4, you’ll need to include its sensor in the TPMS relearn so the ECU tracks that wheel’s pressure along with the others. You’ll use a dedicated TPMS scan tool and follow the relearn sequence at the OBDII port; there’s no dashboard reset. Before starting, set tire inflation to the specified PSI on every wheel including the spare sensor so readings are valid.
- Mount the spare, confirm its sensor is installed and inflated to spec.
- Connect the TPMS scan tool to OBDII and initiate the relearn routine.
- Cycle through each wheel until the tool confirms sensor IDs are registered.
- Verify the TPMS light extinguishes, confirming liberation from uncertainty.
Tools You Need (Autel, OBD‑II Adapter, Valve Kit)
Gather the right tools before you start: an Autel TPMS programmer that’s compatible with a 2011 RAV4, an OBD‑II adapter to link the tool to the vehicle’s diagnostic port, and a valve kit containing new valve stems and cores. You’ll follow a TPMS tools overview mindset: pick the Autel model that lists Toyota RAV4 2011, verify firmware, and keep the OBD‑II adapter handy for secure communication. The valve kit importance is clear — never reuse valve stems or cores; leaks or sensor faults will undermine your work.
| Tool | Purpose |
|---|---|
| Autel TPMS programmer | Read/write sensor IDs |
| OBD‑II adapter | Link tool to ECU |
| Valve kit | Replace stems/cores |
You’ll act decisively: install fresh valve components, connect the Autel via the adapter, then proceed with the relearn routine. This gear lets you reclaim control of vehicle safety systems and prevents repeat failures.
Prepare the Vehicle: Pressures, Ignition, and Spacing

Start by setting each tire to the manufacturer’s recommended pressure and leave the ignition in the “ON” position (engine off) so the vehicle’s TPMS module can communicate with your scan tool. You’ll confirm tire pressure first, then perform ignition preparation to enable OBD communication. Keep sensors separated and avoid crowding to prevent radio interference.
- Inflate each tire to the specified pressure from the owner’s manual; verify with a calibrated gauge.
- Turn the key to ON (engine off) for ignition preparation; this powers the TPMS module and readies the OBD port.
- Space tools and spare sensors apart; maintain clear physical distance between active sensor antennas to avoid signal collisions.
- Connect the TPMS scan tool to the OBDII port and follow prompts after pressures and ignition are set.
This sequence frees you from guesswork, guarantees reliable sensor registration, and readies the vehicle for the relearn without entering the actual OBD relearn steps.
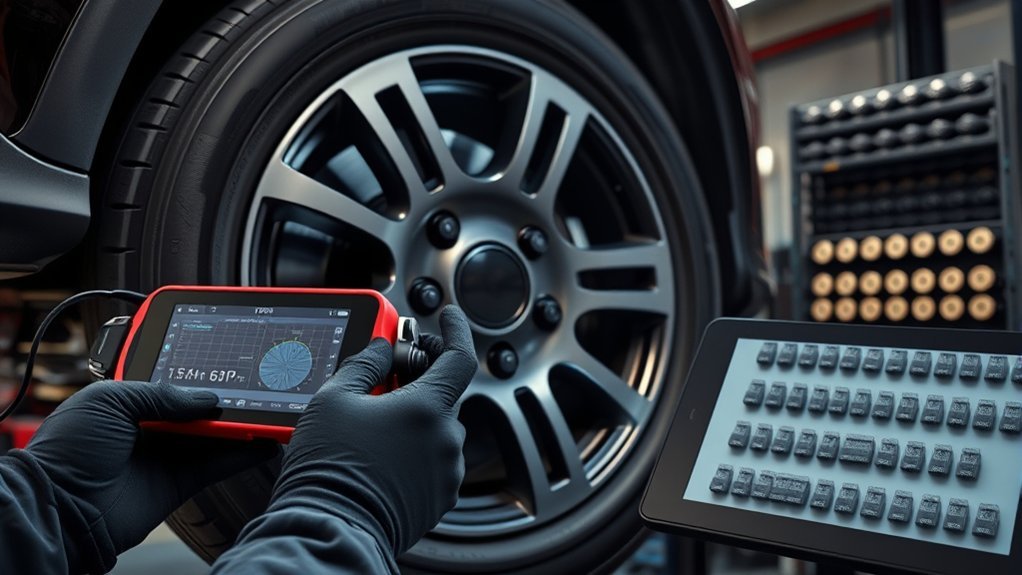
OBD TPMS Relearn for 2011+ RAV4 (Step‑by‑Step, Autel)
Before you begin the OBD TPMS relearn on a 2011+ RAV4 with an Autel tool, shut the ignition off, confirm all tires are at spec pressure, and position the tool and spare sensors so antennas are spaced to prevent interference; then plug the Autel into the OBDII port and follow its prompts to read, capture, and program each sensor ID in sequence. You’ll use the Autel to interrogate each wheel sensor, capturing unique IDs in the order shown on-screen. Work methodically: front-left, front-right, rear-left, rear-right (or as the tool instructs). Maintain clear antenna spacing to avoid cross-talk and guarantee programming accuracy. Verify sensor compatibility before writing IDs—mismatched protocols will fail. After programming, cycle ignition per the tool’s guidance and watch the dash: a successful relearn extinguishes the TPMS warning lamp. If the lamp stays lit, recheck pressures, spacing, and retry the capture sequence. This process frees you from guesswork and secures reliable TPMS operation.
Alternative Relearn Methods by RAV4 Model/Year
Now that you’ve seen the OBD method with an Autel tool, note that relearn steps vary by RAV4 model year and sometimes avoid OBD programming entirely. You’ll want tires at recommended pressure before any procedure to guarantee accurate relearn results and maintain sensor compatibility across replacement parts.
Now that you’ve seen the OBD Autel method, note relearn steps vary by RAV4 year — set tires to recommended pressure first.
- 2007–2010: Use the vehicle’s settings or dash controls to initiate a manual TPMS reset; confirm relearn frequency after initial drive cycle per owner’s manual.
- 2011: Expect to use a dedicated TPMS scan tool for programming—no manual reset button exists; scan-tool programming guarantees correct sensor compatibility.
- 2013 and later: Reset usually completes automatically by driving at ~30 mph for about 10 minutes; check relearn frequency if you change sensors.
- All years: Consult the specific owner’s manual for exact steps and intervals; follow recommended pressures and verify successful relearn with a scan tool or dash confirmation.
RAV4 TPMS Troubleshooting: Sensor IDs, Interference, Lights
When your RAV4’s TPMS light stays on after tire service, check sensor IDs with a dedicated OBDII TPMS tool and confirm each sensor communicates properly; the light should extinguish when the vehicle recognizes all programmed IDs. You’ll verify sensor communication by reading each ID and ensuring the tool sees a response from every wheel. If a sensor fails to respond, isolate it and swap positions to rule out a bad sensor versus a placement issue.
Be aware of interference sources: low-frequency TPMS signals can be disrupted by electric motors, household appliances, nearby metal, or crowded sensor spacing during relearn. Maintain spacing and perform relearn away from heavy electrical equipment. After relearn, monitor the TPMS warning light while driving; if it returns, repeat ID checks and inspect for damaged sensors or battery failure. You’ll reclaim control by methodically verifying IDs, eliminating interference, and confirming the system clears the warning light.
TPMS Maintenance: Sensor Life, Installation Tips, Record‑Keeping
Plan on replacing TPMS sensors every 5–10 years or whenever they fail or you mount new tires to keep the system reliable. When you install sensors, always fit new valve stems and the provided valve cores, and never reuse seals or grommets to prevent leaks and false readings. Track pressure readings and rotation dates so you can spot sensor degradation and schedule timely replacements.
Sensor Lifespan Guidance
A TPMS sensor will generally last 5–10 years, and you should replace sensors when fitting new tires or when they fail to keep readings accurate and avoid roadside failures. You’ll monitor sensor durability and replacement indicators to act before a failure compromises safety. Keep concise records and swap aging units proactively.
- Track installation date, rotations, and pressure logs so you can spot drift and predict end-of-life.
- Replace sensors when battery or signal loss appears, when leak signs occur, or when mounting hardware ages.
- Use the valve core from the sensor kit and never reuse valve stems, grommets, nuts, or seals to prevent slow leaks.
- Proactive replacement at tire change aligns maintenance with liberation—you’re free from unexpected TPMS faults.
Installation Best Practices
Because proper TPMS installation prevents leaks and signal failures, you should use the new valve stem, core, nut, and seals supplied with each sensor and torque them to the manufacturer’s specification. Replace sensors every 5–10 years or when faulty. Verify sensor compatibility before fitting and use calibrated installation tools to avoid damage. Don’t reuse hardware; corrosion and slow leaks undermine freedom on the road. After installation, relearn the sensor IDs per the RAV4 procedure and log pressure baselines, rotation dates, and sensor ages to track performance. Record-keeping lets you spot failing units early and reclaim control.
| Task | Frequency | Tool |
|---|---|---|
| Replace sensors | 5–10 yrs/if fail | Installation tools |
| Torque hardware | Every install | Torque wrench |
| Log data | Every rotation | Digital log |
Frequently Asked Questions
How to Relearn Toyota Tire Sensor Positions?
You use a TPMS scan tool at the OBDII port to perform sensor calibration methods: turn ignition off, inflate tires per specs, follow tool prompts, keep sensors spaced per tire rotation guidelines, and confirm the TPMS light turns off.
How Long Does TPMS Auto Relearn Take?
You’ll usually finish auto relearn in a few minutes driving above 25 mph; testing the theory, you’ll sense TPMS functionality restoring as sensor calibration completes. If light stays on, you’ll need manual scan-tool intervention.
Conclusion
You’ve got the know‑how to keep your RAV4’s TPMS humming—relearn after rotations, sensor swaps or battery changes, and use the right tools and pressures. Follow the OBD or tool-specific steps, document IDs, and replace worn valve cores or sensors before they fail. If a light won’t clear, troubleshoot IDs, interference, and wiring. Stay proactive and keep records; when the rubber meets the road, you’ll avoid surprises and drive with confidence.