If a 2021–2025 Toyota RAV4 Prime or RAV4 Plug-in Hybrid says charging is interrupted, first rule out a charging schedule, loss of outlet or EVSE power, a connector that is not fully latched, charge-port contamination, and a weak 12-volt battery. Then compare two known-good AC charging sources. Stop testing if the plug or outlet becomes hot, a breaker or GFCI trips again, the charge-port indicator rapidly flashes and shuts off, or the vehicle shows a charging-system malfunction.
Last updated: July 23, 2026 — revised to separate 2021–2025 charging hardware from the redesigned 2026 RAV4 Plug-in Hybrid.
Model-year check: This guide is primarily for U.S.-market 2021–2024 RAV4 Prime models and the renamed 2025 RAV4 Plug-in Hybrid. The 2026 model uses different charging hardware by trim: SE and GR SPORT use J1772 AC charging, while XSE and Woodland add a CCS1 inlet and DC fast-charging capability. Use the owner’s manual for your exact year and trim.
Quick Answer
For a 2021–2025 RAV4 Prime/RAV4 Plug-in Hybrid, check the charging schedule, outlet or station power, breaker/GFCI, connector latch, and visible charge-port debris. Use Charge Now for a schedule test, then compare a known-good 120V source with a compatible Level 2 J1772 station. If both fail, the port indicator rapidly flashes and turns off, or a system-malfunction message appears, document the fault and contact Toyota service.
Key Takeaways
- A charging schedule can make the RAV4 Prime appear broken when it is simply waiting for a programmed time.
- Comparing two known-good AC charging sources helps separate a vehicle-side fault from an outlet, station, or portable-cable problem.
- A weak 12-volt battery can cause confusing plug-in hybrid warnings even when the high-voltage battery is healthy.
- Do not probe orange high-voltage cables or open the onboard charger; those checks belong to a Toyota dealer or EV-qualified technician.
- The 2026 RAV4 Plug-in Hybrid must be diagnosed by trim because its charging inlet and DC fast-charging capability differ from 2021–2025 models.
- Warranty coverage depends on the failed part, model year, in-service date, mileage, bulletin conditions, and applicable emissions rules.
At a Glance
| Applies To | Primarily 2021–2025 U.S. RAV4 Prime/RAV4 Plug-in Hybrid; see the model-year note for 2026 |
| Time Required | 10–30 minutes for safe checks; longer if you test another charging station |
| Difficulty | Easy for visual checks; professional level for onboard charger or high-voltage diagnosis |
| Tools Needed | Flashlight, clean dry cloth, non-metallic soft brush, phone camera, basic 12V multimeter if you know how to use one |
| Cost | Usually $0 for basic checks; diagnostic and repair costs vary by dealer, fault, and warranty status |
How to Fix a RAV4 Prime That Won’t Charge
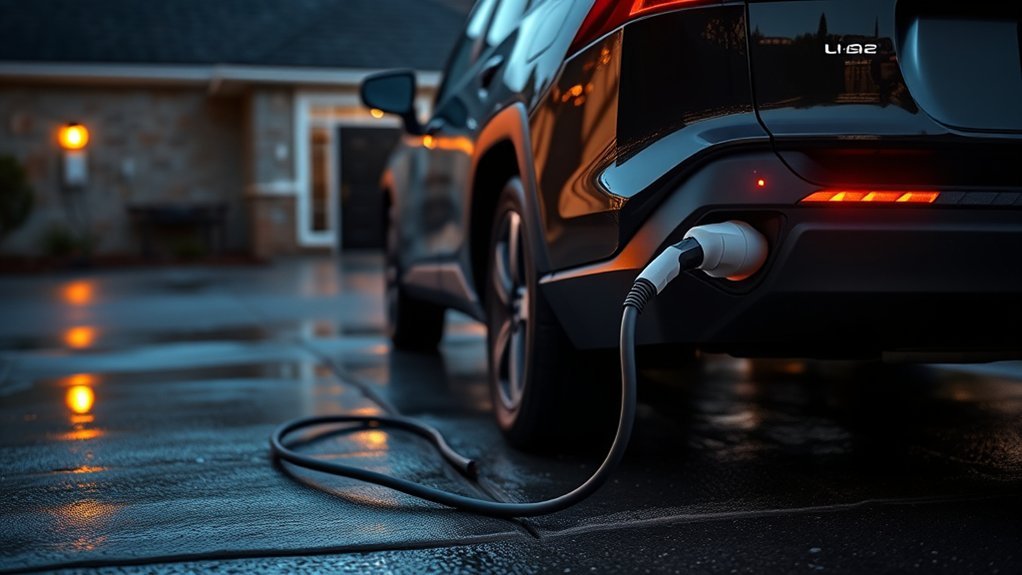
For 2021–2025 U.S. models, start with the causes Toyota identifies in the owner’s manual: the power source, charging procedure, and charging schedule. Use a properly grounded outlet and charging equipment that meets the manual for your model year. If a schedule is registered, select Charge Now for an immediate test. A receptacle that powers a small appliance is not automatically safe for the continuous load of vehicle charging.
- Confirm the vehicle is not waiting for a schedule. Open the charging settings in the vehicle or Toyota app. If a schedule is active, select Charge Now or temporarily turn the schedule off.
- Check the outlet or station first. Make sure the breaker and GFCI have not tripped and the EVSE has power. Do not open the electrical panel or treat a small-appliance test as proof that the receptacle is safe for EV charging.
- Reseat the plug and connector. Unplug from the wall and vehicle, wait a few seconds, then reconnect firmly. Do not force the connector.
- Inspect the charge port. Look for dirt, ice, moisture, bent pins, damaged plastic, or anything preventing a full latch.
- Try a second compatible charging source. On 2021–2025 models, compare a known-good 120V source with a known-good Level 2 J1772 station. On a 2026 model, confirm the inlet and station type for your trim before testing.
- Record the exact message and lights. Take photos or video of dashboard messages, the charging-port indicator, and the EVSE/CCID lights.
- Call Toyota service if the same failure repeats. Repeated faults on both 120V and 240V sources can point to the onboard charging system, wiring, control module, or a stored diagnostic trouble code.
Warning: Do not touch connector pins, open the onboard charger, probe high-voltage wiring, disconnect orange cables, or attempt internal EVSE repairs. Stop if you see heat damage, exposed conductors, melted plastic, or repeated breaker/GFCI trips.
[Products Worth Considering]

High Charging Speed: The Seguma 32amp Level 2 EV charger equipped with NEMA 14-50 plug, provides faster charging (approx. 6 times faster) compared to standard Level 1 EV chargers, allowing you to charge your electric vehicle more quickly

[2026 INTELLIGENT CHARGING UPGRADE — PRECISION CONTROL MEETS SMART SCHEDULING] After surveying 100K+ U.S. EV owners, the Raylix R&D team found that nearly all drivers recognized the necessity of adjustable current and scheduled charging. Our upgraded J1772 charger features 4-level adjustable current (8A/10A/12A/16A) and a 1–12 hour smart delay timer. Whether you're charging overnight or during off-peak hours, enjoy smarter energy use, lower costs, and total convenience—on your schedule.

[Up to 9x Faster Charging Speed]: Provides up to 46 miles/hour charging speed via hardwired connection (48 amp - up to 9x faster than a standard wall outlet) or up to 38 miles/hour via the NEMA 14-50 plug (40 amp). Professional installation recommended for optimal safety and performance. [Install The Power Outlet Cord]: No smaller than 8AWG if charge 40-48A, we suggest 6AWG cord.(1.The input side is belongs to the electrician electric automobile regulation scope, need to use three 6AWG cable wires for 48A; 2.The charging cable belongs to the automotive connector certification standard, so the 8AWG cable can meet the 48A.)
Quick Checklist to Try First When Your RAV4 Prime Won’t Charge
Run these checks in order before assuming the high-voltage battery is bad. They quickly rule out common user-configurable and external-power issues.
- Charging schedule: Make sure the car is not waiting until a scheduled departure time or overnight window. Use Charge Now for an immediate test.
- Outlet and breaker: Confirm the outlet has power and the breaker/GFCI is not tripped. Reset only once; repeated trips mean stop and have the circuit inspected.
- Connector fit: Make sure the connector is fully seated and latched at the vehicle inlet.
- Charge port: Remove loose visible debris with a soft, non-metallic brush. If moisture is present, disconnect and let the inlet air-dry. Do not spray cleaner or compressed air into the port.
- CCID or EVSE lights: Note whether the power indicator illuminates, whether a fault light appears, or whether the unit shuts off after handshake.
- Different source: Try both a known 120V source and a known Level 2 AC charging station.
- Vehicle message: If the multi-information display shows a charging-related message, follow the message and save a photo for the dealer.
Model-year note: U.S. 2021–2025 RAV4 Prime/RAV4 Plug-in Hybrid models use AC charging and do not accept DC fast charging. For 2026, SE and GR SPORT use J1772 AC charging, while XSE and Woodland use CCS1 and can DC fast charge. A charger that does not match the vehicle inlet is not a valid diagnostic test.
How to Test the 12-Volt Battery and Fuses (Fast Checks)
The RAV4 Prime has a high-voltage traction battery and a separate 12-volt auxiliary battery. The 12-volt battery powers control modules, relays, and startup logic. If it is weak, the vehicle may show misleading warnings or fail to manage charging correctly.
[Products Worth Considering]

Catch Battery Problems Early: Featured in two videos by Project Farm, a popular YouTube channel with millions of subscribers, the ANCEL BA101 helps you quickly spot battery issues before they leave you stranded. It provides easy-to-understand readings for State of Health (SOH), State of Charge (SOC), voltage, current, CCA, plus cranking and charging system tests, so you can better understand your battery and help avoid unexpected breakdowns
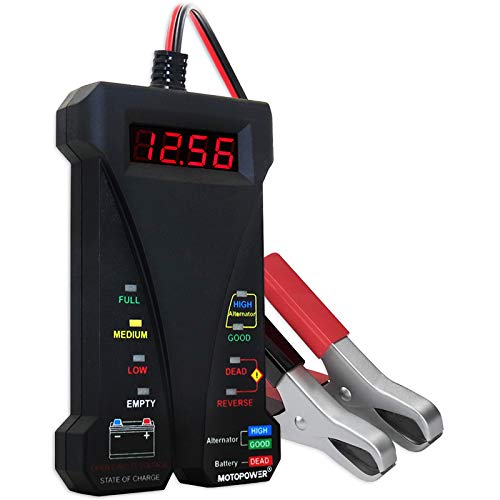
Effortless Operation - Boasting a “plug-and-test” design, there's no need for complex set-up procedures. Just connect it to the battery following simple steps. Without starting the vehicle, you can read the battery status, and after starting, quickly obtain the alternator status. Whether you're a professional mechanic or an ordinary car owner, you can easily use it to quickly determine if the battery needs jump - starting, replacement, or if the alternator output is normal.

【Reliable Automotive Car Battery Tester】 KW208 is the most cost-effective battery load tester compared to other brands, it has all the functions you need and the lowest cost that you can afford. KW208 can test all 12V batteries(100-2000CCA) including regular flooded, AGM flat plate, AGM spiral or gel batteries. Provide overall analysis of batteries’ condition and help you know their status in advance before it dies. KW208 battery analyzer supports cranking and charging system tests also alternator and starter test. Conveniently store this car battery tester for batteries in your glove box or garage, ready for use whenever needed.
Check Battery Voltage
Use a digital multimeter only if you are comfortable working around a 12-volt battery. Measure after the vehicle has been off and resting. Open-circuit voltage is only a screening check: a fully charged lead-acid battery is often near 12.6 volts, while a reading near 12.2 volts or lower indicates a low state of charge. Temperature, recent charging, and surface charge affect the number, so voltage alone cannot prove that the battery is healthy.
When the vehicle is in READY mode, the DC-DC converter supports the 12-volt system instead of a conventional alternator. A professional load or conductance test is more useful than replacing the battery from one voltage reading. If the battery will not hold charge, voltage remains abnormally low in READY mode, or multiple electronic warnings return, have the 12-volt system tested.
- Measure the 12-volt battery with the vehicle off and accessories off.
- Inspect battery terminals for corrosion, looseness, swelling, leakage, or damaged cables.
- Check the battery age; many 12-volt batteries become suspect after several years, especially in heat or repeated short-trip use.
- If the battery tests weak, correct that issue before chasing more complex charging faults.
Inspect Charging Fuses
Fuse checks are useful only for low-voltage fuse boxes and only when you can identify the correct fuse from the owner’s manual, fuse-box cover, or service information for your exact model year. Do not guess at fuse locations, do not upsize a fuse, and do not replace a fuse repeatedly if it blows again.
| Check | What You Want to See | What It Means If Bad |
|---|---|---|
| 12V battery, vehicle off | Near 12.6V when fully charged; interpret with temperature and battery test results | Low battery can trigger confusing charging behavior |
| 12V system, READY mode | Voltage should rise above the rested reading; exact value varies with system conditions | Possible 12V charging/control issue |
| Low-voltage fuses | Correct amperage, intact element, seated firmly | A blown fuse may indicate a downstream fault |
Pro Tip: If the RAV4 Prime has multiple strange symptoms at once, such as no-start behavior, random warnings, app connection issues, and charging interruption, test the 12-volt battery before replacing charging parts.
Diagnose the Charging Cord and EVSE: 120V vs. 240V Tests
The fastest way to isolate a RAV4 Prime charging interruption is to compare two known-good charging sources. You are not trying to repair the charger internally; you are looking for a pattern.
[Products Worth Considering]

【Delay Timer - Adjustable Current】Ev charger can adjust the current (8A/10A/12A/16A) through the physical button of level 1 ev charger. Charging power can reach up to 3.68KW (240V/16A). One-touch switch for ev charger operation. Built-in 2–8 hour delay timer for off-peak charging to save on electricity bills.

Flex Level 1 EV Charger - The EVDANCE Level 1 electric car charger is compatible with J1772 electric vehicles and plug-in hybrid vehicles (North American Standard). *Tesla requires a SAE J1772 adapter.

Charge with Confidence: ChargePoint builds reliable, flexible EV charging stations for home, business, and fleets. Get 24/7 support and access to hundreds of thousands of North American charging locations.
120V Basic Checks
For a Level 1 test, use a grounded 120V outlet that meets the owner’s-manual requirements for your model year and is protected as specified. Avoid loose, worn, weather-damaged, shared, or overloaded receptacles. Do not use an extension cord, power strip, smart plug, or improvised adapter. If the receptacle or plug becomes hot, stop and have the circuit inspected by a qualified electrician.
- Plug the charging cable directly into a proper wall outlet, not a power strip.
- Make sure the CCID power indicator illuminates after plugging into the wall.
- Connect to the vehicle and listen/feel for a normal latch.
- Watch whether charging starts, stops immediately, or stops after several minutes.
- Check whether the outlet, plug, or cable becomes unusually warm; if it does, stop charging.
240V Level 2 Station Tests
For a 2021–2025 Level 2 test, use a known-good AC J1772 EVSE. A public station can remove your home wiring and portable cable from the comparison. Check the station screen or app for authorization, timeout, or station-fault messages before blaming the vehicle. For a 2026 model, match the test station to the inlet fitted to your trim.
If the vehicle charges normally on a known-good Level 2 station but not from the home 120V setup, suspect the receptacle, breaker/GFCI, circuit, or portable charging cable. If it fails on two compatible known-good AC sources with the same vehicle message, dealer-level scanning is justified.
What the Test Patterns Mean
| Test Result | Most Likely Area | Next Step |
|---|---|---|
| Fails only at one home outlet | Outlet, GFCI, breaker, circuit load, or wiring | Use a different circuit and have the outlet inspected |
| Fails with one portable cord but works elsewhere | Charging cable/CCID or plug connection | Stop using the suspect cable and ask Toyota to test it |
| Fails on 120V and Level 2 | Vehicle-side charging system, onboard charger, wiring, or ECU | Save messages and schedule dealer diagnosis |
| Station reports a fault before the car starts charging | Station, account authorization, connector, or handshake | Try another station and record the station error |
When the Onboard Charger or ECU Is Likely the Problem
The onboard charger converts AC power from the wall or Level 2 EVSE into DC power the traction battery can use. It is a vehicle-side component, so a failure may show up no matter which AC source you use.
Suspect a vehicle-side onboard charging fault when:
- The RAV4 Prime will not accept charge from both a known-good 120V source and a known-good Level 2 station.
- The charging-port indicator rapidly flashes and then turns off, which Toyota describes as a behavior that can occur when a system malfunction happens during charging.
- The multi-information display shows a charging-related system malfunction message.
- The check-engine light or hybrid-system warning appears with charging failure.
- A dealer scan finds plug-in charger DTCs such as P0D2A19, P1C1B00, P0E8919, P1BD300, or charging fan-related DTCs on affected model years.
Toyota has issued narrow technical service bulletins for specific RAV4 Prime conditions. T-SB-0021-21 Rev1 applies to certain 2021 vehicles with DTC P1CE931 and calls for charger-control reprogramming after VIN and calibration checks; it does not direct routine charger replacement. T-SB-0067-22 Rev1 covers certain 2021–2023 RAV4 Prime XSE vehicles with a 6.6 kW charger and specific DTCs, including P0D2A19, P1C1B00, P0E8919, and P1BD300. A bulletin is not a recall and does not apply without the listed condition, VIN/production criteria, and diagnosis.
Note: Ask for the actual diagnostic trouble codes, not just a verbal “charger failed” summary. The code list helps confirm whether the issue is the onboard charger, charger cooling fan, EVSE handshake, wiring, 12V system, or another control module.
Check Connectors, Debris, Moisture, and Temperature Effects
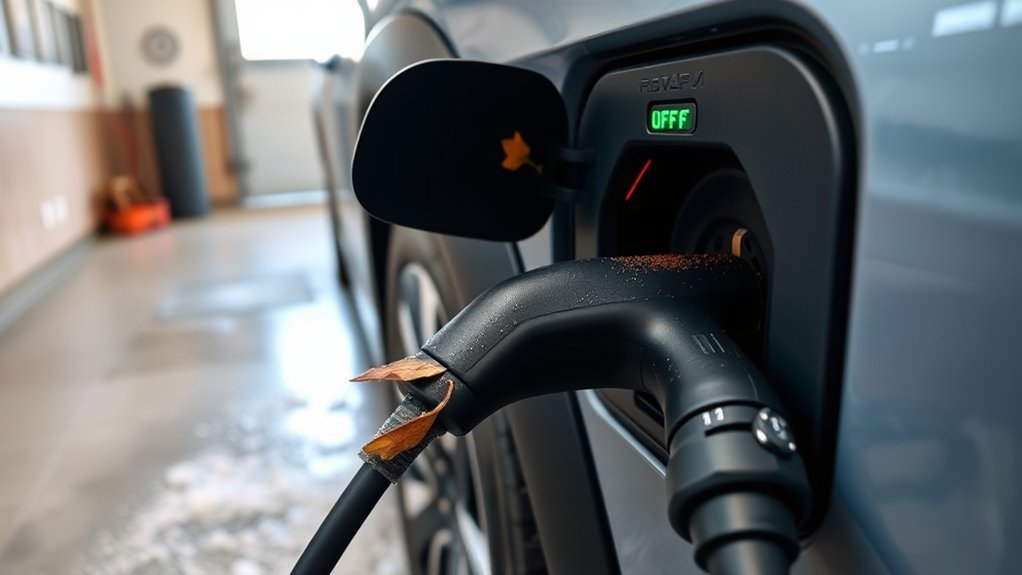
Connector issues can create intermittent charging because the car and EVSE must confirm a safe connection before power flows. A connector may look plugged in but still fail the latch or communication check if dirt, ice, moisture, or damage blocks full seating.
Use safe, simple inspection steps:
- Look first. Use a flashlight to check the vehicle inlet and charging connector for leaves, sand, mud, salt residue, insects, ice, or bent/damaged plastic.
- Clean gently. Use a dry lint-free cloth or soft non-metallic brush. Do not insert metal tools into the inlet.
- Dry carefully. If moisture is present, disconnect the charging equipment and let the inlet and connector air-dry. Do not use a heat gun, liquid cleaner, or compressed air that could push contamination deeper.
- Check the latch. The connector should seat fully and release normally with the latch button.
- Watch temperature conditions. Extreme heat or cold can slow charging, trigger battery heating/cooling behavior, or make a marginal connection worse.
- Store the cable correctly. Keep the AC charging cable off the ground when possible and away from standing water, heavy dirt, and sharp bends.
Do not apply dielectric grease to electrical contacts inside the charging inlet. If rubber seals look dry or damaged, ask a technician which product is approved for that seal material.
What Charging Lights and Error Codes Mean (What to Ask the Dealer)
Charging lights are diagnostic clues. Toyota’s owner information says that when a system malfunction occurs during charging or remote air conditioning, the charging indicator may rapidly flash for a period of time and then turn off. When a message appears on the multi-information display, follow the screen instructions and save the message.
- No power light on the CCID: The outlet, plug connection, cable, or CCID may not be receiving usable power.
- Charging starts then stops: Look for a schedule, station timeout, overheated plug, poor connector seating, or vehicle-side fault.
- Rapid flashing at the charge port followed by shutoff: Treat it as a likely system malfunction clue and document it.
- Dashboard charging message: Photograph the exact wording. Do not paraphrase it for the service advisor.
- Check-engine or hybrid-system warning: Ask the dealer to scan all hybrid/EV and charging-related modules, not just generic OBD-II codes.
When you contact the dealer, ask these direct questions:
- What DTCs are stored, pending, or historical?
- Does my VIN fall under any Toyota service bulletin, recall, warranty enhancement, or emissions warranty rule related to plug-in charging?
- Did the technician test both the portable charging cable and a shop Level 2 EVSE?
- Was the 12-volt battery tested under load?
- Does the diagnosis point to the EVSE, charge inlet, wiring harness, onboard charger, charger cooling fan, DC-DC converter, or control module?
- Will the diagnostic fee be waived if the repair is warranty-covered?
Costs, Warranty Coverage, and What to Document for the Dealer
Toyota warranty coverage depends on the failed component and the exact model year. The 2024 RAV4 Prime Warranty & Maintenance Guide lists a 36-month/36,000-mile Basic Warranty, a 60-month/60,000-mile Powertrain Warranty, an 8-year/100,000-mile Hybrid System Warranty for the components specifically named in that guide, and a 10-year/150,000-mile Hybrid Battery Warranty. The onboard charger is not automatically covered by the hybrid-battery warranty simply because it charges the traction battery. A TSB may identify Powertrain or emissions coverage for its exact condition, and state-specific emissions rules may extend coverage.
Bring a dated charging log so the dealer can reproduce the fault faster. Include:
- Date, time, mileage, and outside temperature for each failed charge.
- Charging source: 120V outlet, portable Toyota cable, home Level 2 EVSE, or public station.
- Station brand, location, stall number, and app session details if public.
- Exact dashboard message and a photo of the message.
- Charging-port light behavior and EVSE/CCID indicator behavior.
- Whether charging failed immediately, after a few minutes, or near a certain state of charge.
- Whether the same source charged another vehicle successfully, if known.
- Any recent 12-volt battery replacement, jump-start, collision repair, water exposure, electrical work, or software update.
The strongest warranty case is a repeatable fault with photos, timestamps, charging-source details, and a written dealer diagnosis tied to specific DTCs.
When to Call a Pro and What to Bring to the Repair Visit
Call a Toyota dealer or EV-qualified technician when charging fails on multiple sources, the vehicle displays a system malfunction, the port light rapidly flashes and shuts off, a breaker or GFCI repeatedly trips, the plug becomes hot, or the 12-volt battery and basic external checks do not explain the problem.
Bring the following to the appointment:
- Warranty paperwork or the vehicle’s in-service date and current mileage.
- Your charging log with photos and videos.
- The portable charging cable that came with the vehicle, if you use it.
- Public-station receipts or app screenshots showing failed sessions.
- Recent service records, 12-volt battery test results, or prior diagnostic reports.
- A clear request for written findings, DTCs, repair estimate, and warranty decision before any paid repair.
State the problem in a repeatable way: “The vehicle fails to charge on this outlet and this Level 2 station, shows this message, and the indicator behaves this way.” That is far more useful than simply saying “charging interrupted.”
Preventing Future RAV4 Prime Charging Interruptions
Once the immediate issue is fixed, prevention is mostly about clean connections, stable power, and good records.
- Use a dedicated, properly grounded charging outlet or professionally installed Level 2 EVSE.
- Keep the charging connector dry, clean, and stored off the ground.
- Do not charge from worn outlets, loose plugs, overloaded circuits, or damaged extension cords.
- Check your charging schedule after app updates, driver-profile changes, or daylight-saving-time changes.
- Have the 12-volt battery tested before winter or after repeated short trips.
- Save a photo of any unusual warning before turning the vehicle off.
- Use Toyota’s VIN lookup or ask a dealer whether your vehicle has open recalls or service campaigns; ask separately about applicable charging-related TSBs.
Frequently Asked Questions
Why does my RAV4 Prime keep saying charging interrupted?
The most common causes are an active charging schedule, no power at the outlet, a tripped breaker/GFCI, a loose connector, debris or moisture in the charge port, a faulty EVSE, a weak 12-volt battery, or a vehicle-side charging system fault. Test a known 120V source and a known Level 2 station to narrow it down.
Can a bad 12-volt battery stop a RAV4 Prime from charging?
Yes. The 12-volt battery powers the control modules that manage charging. If it is weak, the vehicle may show warnings, fail to wake modules correctly, or behave inconsistently. Test the 12-volt battery before replacing expensive charging parts.
What are four common symptoms of charging system problems?
Common symptoms include charging stopping soon after connection, warning messages on the multi-information display, fault lights on the EVSE or charging port, and the battery state of charge not increasing. You may also see a check-engine light or hybrid-system warning if a diagnostic trouble code is stored.
Should I use a public charger to test the problem?
Yes, when the station matches the vehicle’s model year and inlet. For 2021–2025 models, use a known-good AC Level 2 J1772 station. If the vehicle fails on two compatible known-good AC sources with the same message, schedule dealer diagnosis.
Is the onboard charger covered under warranty?
It depends on the failed part, model year, mileage, in-service date, the exact diagnosed condition, applicable Toyota bulletins, and state emissions rules. The onboard charger is not automatically covered by the hybrid-battery warranty. Ask for a VIN-specific written warranty decision.
Can a 2026 RAV4 Plug-in Hybrid use DC fast charging?
It depends on the trim. Toyota says 2026 XSE and Woodland models use a CCS1 charging inlet and support DC fast charging. The 2026 SE and GR SPORT use a J1772 inlet for Level 1 and Level 2 AC charging. Confirm the trim and inlet before using a public charger as a diagnostic test.
Does rapid flashing always mean the onboard charger has failed?
No. Rapid flashing followed by shutoff is a malfunction clue, not a parts diagnosis. Save the exact dashboard message and EVSE lights, then have all charging-related modules scanned. The cause may be the charging equipment, inlet, wiring, cooling fan, onboard charger, 12-volt system, or a control module.
Conclusion
For 2021–2025 models, the safest diagnostic path is to confirm the schedule, verify outlet or station power, inspect the connector and inlet from the outside, compare compatible AC charging sources, screen the 12-volt battery, and record every message and light pattern. For 2026, identify the trim and charging inlet before applying the same test. If the fault repeats on two known-good compatible sources, stop swapping parts and request a Toyota diagnosis with written DTCs and a VIN-specific warranty decision.
Sources
- Toyota Owners: Using the Charging Schedule Function — backs up Charge Now and charging schedule guidance.
- Toyota Owners: Power Sources That Can Be Used — backs up 120V GFCI/circuit-breaker power-source requirements.
- Toyota Owners: AC Charging Cable — backs up AC cable and CCID safety precautions.
- Toyota Owners: Charging Equipment — backs up charging indicator behavior during system malfunction.
- Toyota 2024 RAV4 Prime Warranty & Maintenance Guide — backs up basic, powertrain, hybrid system, and hybrid battery warranty periods.
- NHTSA/Toyota T-SB-0067-22 Rev1: MIL ON With Plug-In Charger DTCs — covers specific 2021–2023 RAV4 Prime XSE 6.6 kW charger conditions and warranty language.
- NHTSA/Toyota T-SB-0021-21 Rev1: DTC P1CE931 — covers a specific 2021 charger-cooling-fan signal condition and charger-control reprogramming procedure.
- Toyota USA Newsroom: 2025 RAV4 Plug-in Hybrid Name Change — confirms the RAV4 Prime name changed for the 2025 model year while retaining the prior-generation plug-in powertrain.
- Toyota USA Newsroom: 2026 RAV4 Charging Hardware by Trim — confirms J1772 charging on SE/GR SPORT and CCS1 with DC fast charging on XSE/Woodland.