You should clean Tacoma brake rotors promptly when you spot surface rust, rough spots, or noise to restore pad contact and stopping power. Wear goggles and gloves, remove the wheel, and scrub light rust with a stainless wire brush, brake cleaner, and a Scotch‑Brite pad; dry thoroughly. For deep pitting or heavy corrosion, consider chemical soak or replacement. Reassemble with proper torque, apply anti‑seize at the hub, bed the pads, and continue for full maintenance guidance.
Quick Answer: Do Tacoma Brake Rotors Need Rust Cleaning?
Curious whether your Tacoma’s rotors need rust cleaning? Yes — surface rust forms on Tacoma brake rotors from moisture or long storage, and you should address it as part of routine brake maintenance. You’ll want to remove light surface oxidation to restore full pad contact and braking efficiency; untreated buildup causes uneven pad wear and can compromise stopping power. Use brake cleaner spray and a wire brush to remove surface rust without damaging the rotor face, and inspect whenever you change pads or at least annually. This proactive approach preserves rotor integrity and boosts rotor longevity, letting you keep control and freedom on the road. You’re not just preserving parts; you’re preventing cascade failures that limit mobility. Keep the procedure simple: clean, inspect for pitting or deep corrosion, and replace if damage exceeds service limits. That practical discipline minimizes risk and maximizes the life of your rotors while supporting your independence.
How To Tell If Your Tacoma Rotors Need Rust Removal
How can you tell if your Tacoma’s rotors need rust removal? Inspect visually for surface rust or discoloration, especially after storage or wet exposure. Visible orange/brown patches on the braking face are a clear indicator that rotor maintenance is needed.
Run your finger (with glove) across the rotor surface: a rough texture or raised corrosion means rust has compromised the contact area and requires cleaning. Check for uneven wear patterns or grooves; these signal localized corrosion or debris embedding that undermines pad contact and may demand resurfacing or replacement. Listen when braking—new squealing, grinding, or vibration often points to rust buildup affecting rotor performance. Monitor braking efficiency: increased stopping distance or a spongy pedal response can result from contaminated rotor surfaces.
Prioritize routine rotor maintenance as part of broader rust prevention. Detecting these specific signs early lets you act decisively, preserving braking reliability and your freedom to drive without constraint.
Safety Gear And Tools You Must Have Before Starting
Before you start, don protective gear and gather the right tools: safety goggles and chemical-resistant gloves to shield your eyes and skin from brake cleaner and flying debris; a stainless-steel wire brush for scrubbing corrosion without scoring the rotor; microfiber cloths to wipe residues without leaving lint; a socket wrench set to remove wheel nuts and caliper bolts safely; and a quality automotive brake cleaner formulated to remove grease and contaminants without degrading rubber components.
You’ll work cleaner and freer when you respect hazards. Fit safety goggles that seal around your eyes and use chemical-resistant gloves; don’t rely on shop towels alone. Choose a stainless-steel wire brush sized to match rotor diameter so you remove rust without creating grooves. Keep microfiber cloths dedicated to brake work to prevent transfer contamination. Have a calibrated socket wrench set ready; working with the right torque tools prevents stripped fasteners and speeds reassembly. Use a labeled automotive brake cleaner spray, ventilate the area, and keep a disposable tray for runoff. These items protect you, preserve component function, and let you reclaim control over maintenance.
Remove The Wheel And Access The Rotor Safely
Park the Tacoma on a level surface, set the parking brake, and use a jack to lift the vehicle at the factory jacking point. Place jack stands under the frame before you work and break the lug nuts with a socket wrench, then remove them and stow them safely. With the wheel off, you’ll have clear access to inspect the rotor for wear, grooves, or rust before cleaning.
Jack And Secure Vehicle
1. Park your Tacoma on a flat, stable surface and engage the parking brake; this small act secures your work area and affirms jack safety. Position wheel chocks behind opposite wheels to prevent roll.
Use a hydraulic jack at the manufacturer’s lift point to raise the vehicle; lift only high enough to clear the wheel. Immediately set jack stands under strong frame or pinch-weld locations and lower the vehicle onto them to guarantee vehicle stability. Never rely on the jack alone.
Organize tools and don’t rush: have a socket wrench, replacement parts, and safety gear within reach. Once the truck is stable on stands, remove the wheel to access the rotor. Confirm stability by gently pushing the vehicle before working beneath or beside it.
Remove Lug Nuts
With the truck secured on jack stands and the wheel cleared, you can remove the lug nuts to take the wheel off and expose the rotor. Park on flat ground, set the parking brake, and confirm stability. Use a socket wrench and loosen lug nuts in a crisscross pattern to prevent wheel warping. Once loosened, fully remove them and lift the wheel away. Inspect the hub and brakes for wear or damage before proceeding.
- Feel the control as you remove each nut—know the lug nut types you’re handling.
- Notice the freedom when the wheel comes off and the rotor’s accessible.
- Reinstall with correct torque specifications to secure your liberation and safety.
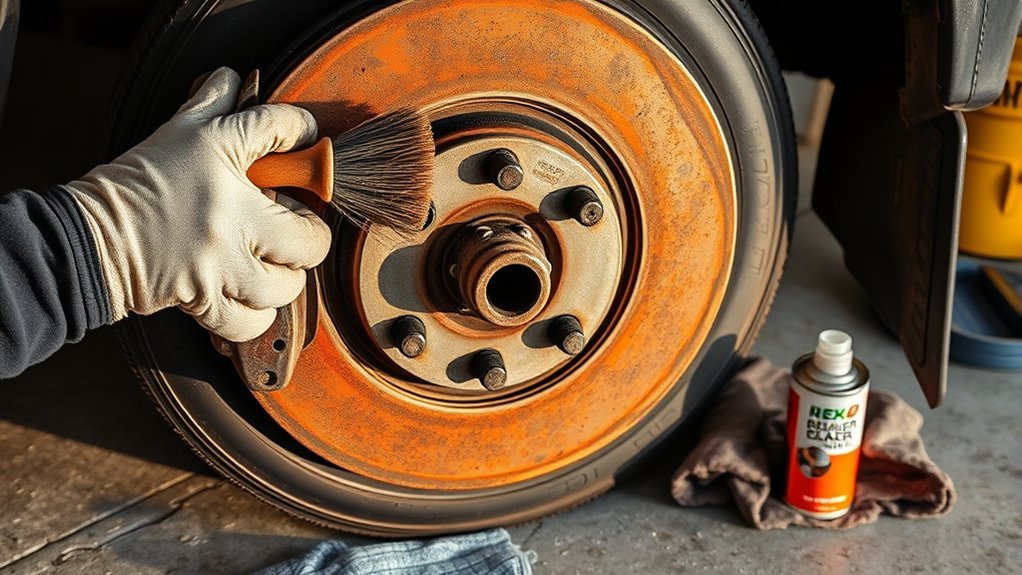
Clean Surface Rust: Wire Brush, Brake Cleaner, Scotch‑Brite
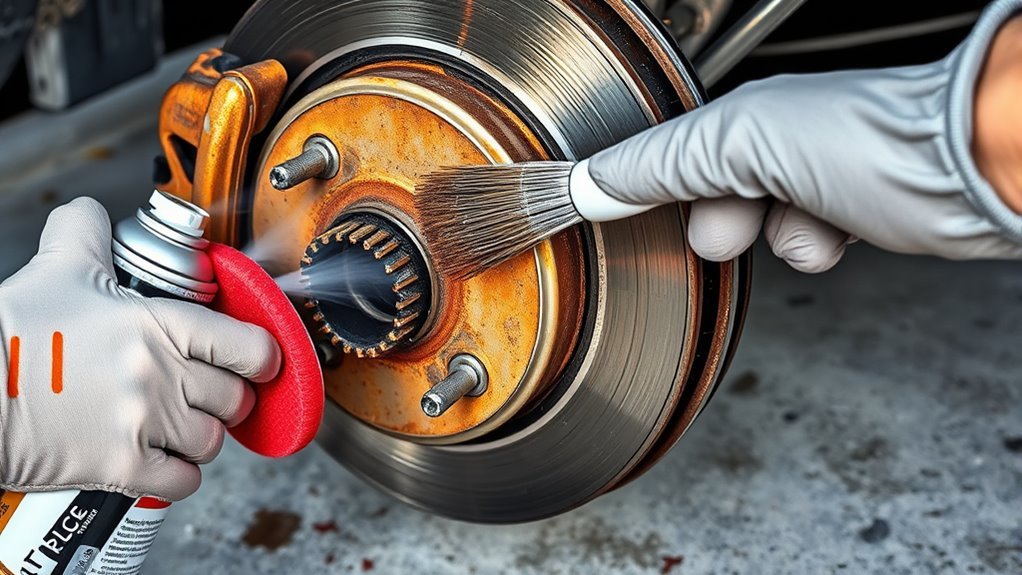
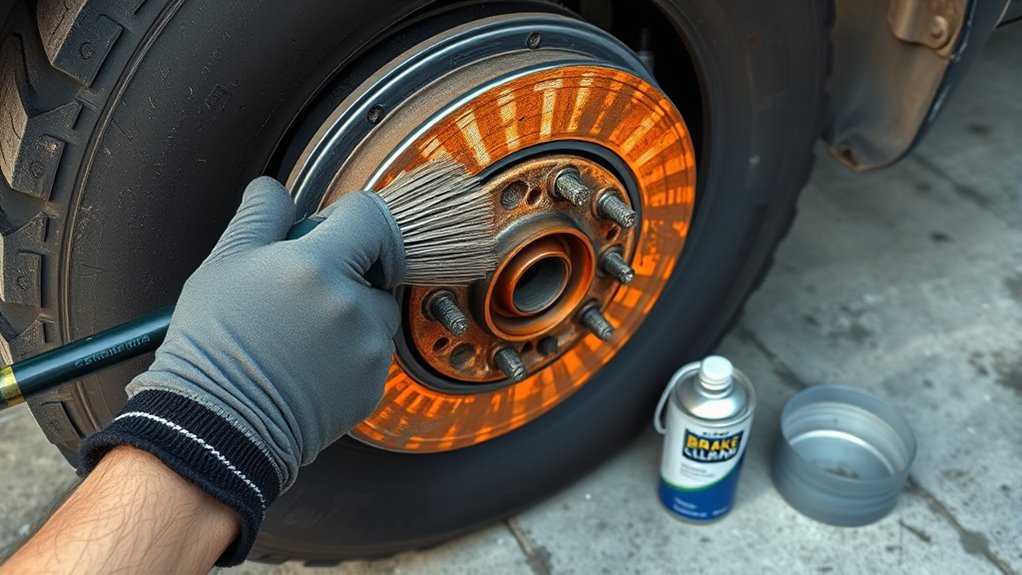
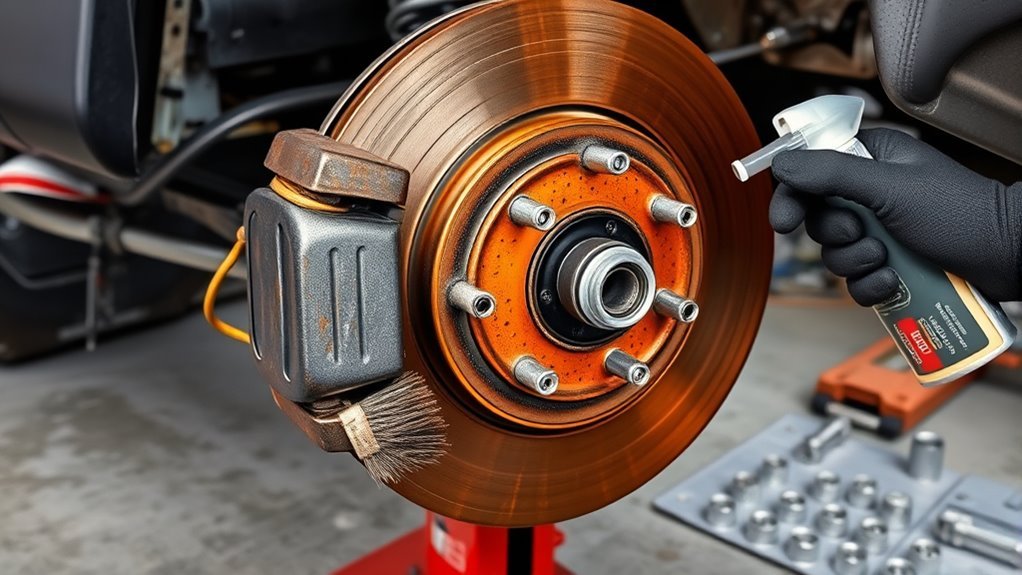
Scrub surface rust from your Tacoma’s rotors using a stainless-steel wire brush to restore full contact between pads and rotor, then spray automotive brake cleaner to dissolve grease and contaminants and finish with a Scotch-Brite pad for light smoothing; always dry the rotors completely afterward to prevent moisture-driven corrosion.
You’ll work methodically: clamp the wheel hub, hold the brush at a shallow angle, and remove flaky oxidation until you see uniform metal. Immediately spray brake cleaner in short bursts to wash away loose particles and oil; let solvent flash off. Follow with a medium Scotch-Brite pad, applying even pressure to knock down micro-high spots without scoring. Wipe with a lint-free cloth and force-dry with low-pressure compressed air or a heat gun at safe distance. Inspect the surface for consistent finish. Adopt a realistic cleaning frequency based on mileage and exposure—after wet seasons or salty roads—so rust prevention becomes routine, not optional. This keeps braking crisp and frees you from avoidable rotor degradation.
Deep Rust Fixes: When To Soak, Use Metal‑Rescue, Or Replace
When surface cleaning won’t restore a smooth braking face, you’ll need to decide whether to soak the rotor, attempt chemical rescue with a product like Metal Rescue, or replace it outright. You’ll first assess rust depth: shallow scale can yield to soaking with a commercial rust removal methods solution; heavy pitting or grooves trigger rotor replacement criteria. Soak in Metal Rescue per directions for several hours, then rinse and dry thoroughly to prevent re‑corrosion. Use PPE and a dedicated container; don’t mix chemicals.
You deserve brakes that free you from worry. Choose based on measurable damage, not hope. If metal loss compromises contact or thickness, replace with OEM or quality aftermarket rotors. After replacement or rescue, maintain routine cleaning and dry storage to limit recurrence.
- Soak: effective for surface-to-moderate corrosion.
- Chemical rescue: precise, requires full rinse/dry.
- Replace: mandatory when pits/grooves or thickness loss appear.
Inspect Rotors After Cleaning: Wear Limits & Replacement Signs
After soaking or chemical treatment, you need to closely inspect each rotor face and edge for wear that cleaning can’t fix. Perform a systematic rust inspection: look for pitting, scaling, and grooves deeper than 1/32 inch. Surface rust is tolerable, but pitting compromises braking and signals replacement indicators.
Measure rotor thickness with calipers at multiple points and compare to the minimum spec in your service manual; if any reading is below the limit, replace the rotor. Check for lateral runout and uneven wear patterns that can cause vibration or noise during braking—these are functional replacement indicators even when thickness is marginal.
Document findings and liberate yourself from guesswork: mark rotors that fail any criterion and remove them. If rotors pass visual, thickness, and vibration checks, they can return to service. When in doubt, prioritize safety and follow model-specific limits rather than risking compromised braking performance.
Reassemble, Dry, Apply Anti‑Seize, And Perform Initial Bedding Procedure
Dry all rotor surfaces thoroughly with clean, lint‑free rags and compressed air, then reassemble the brake components ensuring proper alignment and torque for each fastener. Use reassembly tips: align caliper, pads, and hardware squarely; torque lug nuts and caliper bolts to spec; verify rotor runs true. Apply a thin, even anti seize application to the axle hub contact area only — don’t contaminate braking surfaces.
Perform the initial bedding procedure immediately: accelerate to moderate speed, apply progressive braking to transfer pad material evenly, and repeat in controlled cycles. After bedding, test for abnormal noises, vibration, or reduced stopping power that indicate misassembly or contamination.
Perform immediate bedding: accelerate to moderate speed, apply progressive braking cycles, then check for noises, vibration, or reduced stopping power.
You’ll feel liberated when the system performs reliably. Stay precise, deliberate, and safety‑minded. If any anomaly appears, stop, recheck alignment, fastener torque, and cleanliness; repeat bedding only when confident components are correctly installed. Routine inspection after initial miles confirms success.
- Restore control.
- Eliminate doubt.
- Maintain freedom.
Prevent Future Rust: Storage, Environment, And Routine Checks
Now that you’ve finished reassembly and bedding, keep rust from undoing your work by controlling storage and inspection routines. Store your Toyota Tacoma in a dry, ventilated area; good storage solutions reduce moisture contact that accelerates rotor corrosion. Consider driven storage cycles or covered, airflow‑friendly shelters to keep humidity low and salt spray away.
Regularly inspect rotors for surface rust—especially after inactivity or wet exposure—and use brake cleaner to remove contaminants and assembly grease before reinstalling wheels. If you’ll park long term, apply a thin protective coating or rust inhibitor to the rotor faces and edges but avoid friction surfaces that contact pads.
Factor environmental considerations into your plan: coastal, winter, and high‑humidity climates demand stricter protocols and more frequent checks. Maintain a routine check‑up schedule at least annually, more often if conditions are severe. These disciplined steps liberate you from preventable brake degradation and keep braking performance reliable and safe.
Frequently Asked Questions
Will WD-40 Remove Rust From Brake Rotors?
It can loosen light surface rust, but WD 40 effectiveness is limited; you shouldn’t rely on it for rotor maintenance. Use wire brushes and brake cleaner or professional service to guarantee safe, liberated braking performance.
Why Do Toyota Rotors Rust?
Your rotors rust because moisture and inactivity attack their metal like rain on an idle sword; you’ll use rotor maintenance and corrosion prevention tactics—regular driving, cleaning, and storage control—to reclaim and keep braking freedom.
Conclusion
You don’t need to obsess over every speck of surface rust on your Tacoma rotors — light rust is normal and won’t ruin braking if you clean it properly. Use the right PPE, remove the wheel, and scrub surface corrosion with a wire brush, brake cleaner, or Scotch‑Brite; soak or replace heavily pitted rotors. Inspect wear limits, apply anti‑seize where needed, and bed in new surfaces. With routine checks and dry storage, you’ll barely ever see rust again—like it never happened.